
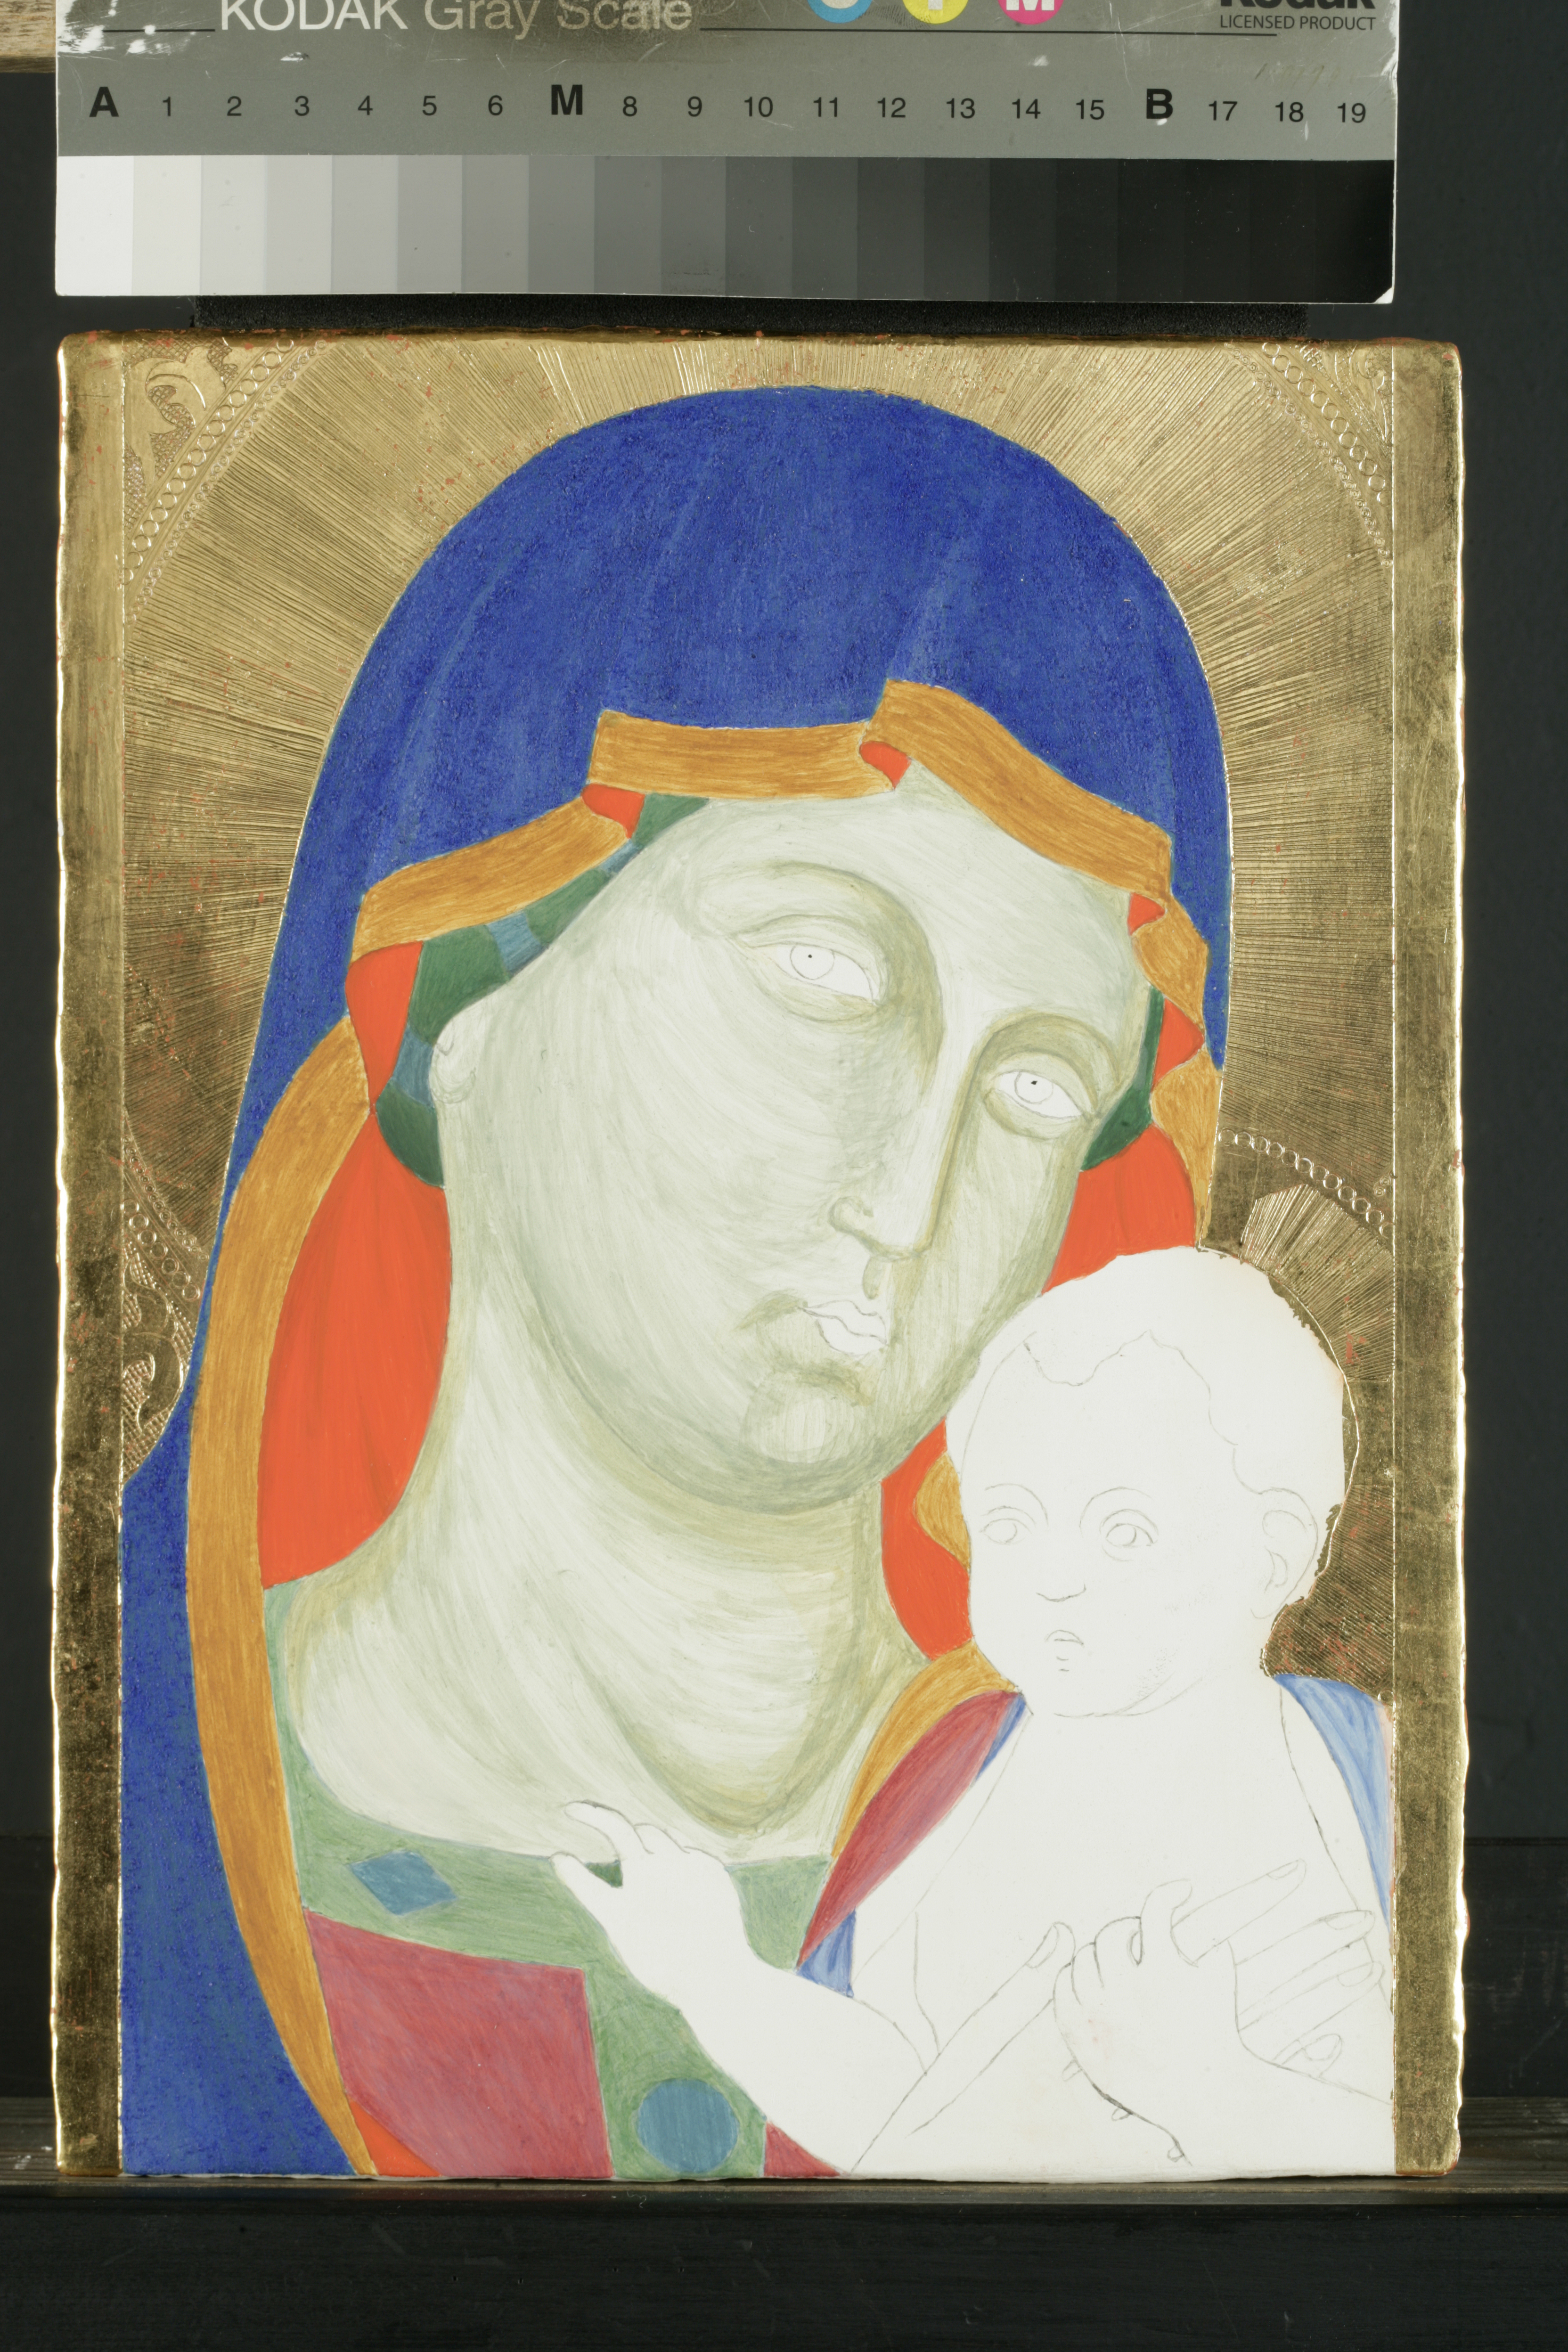
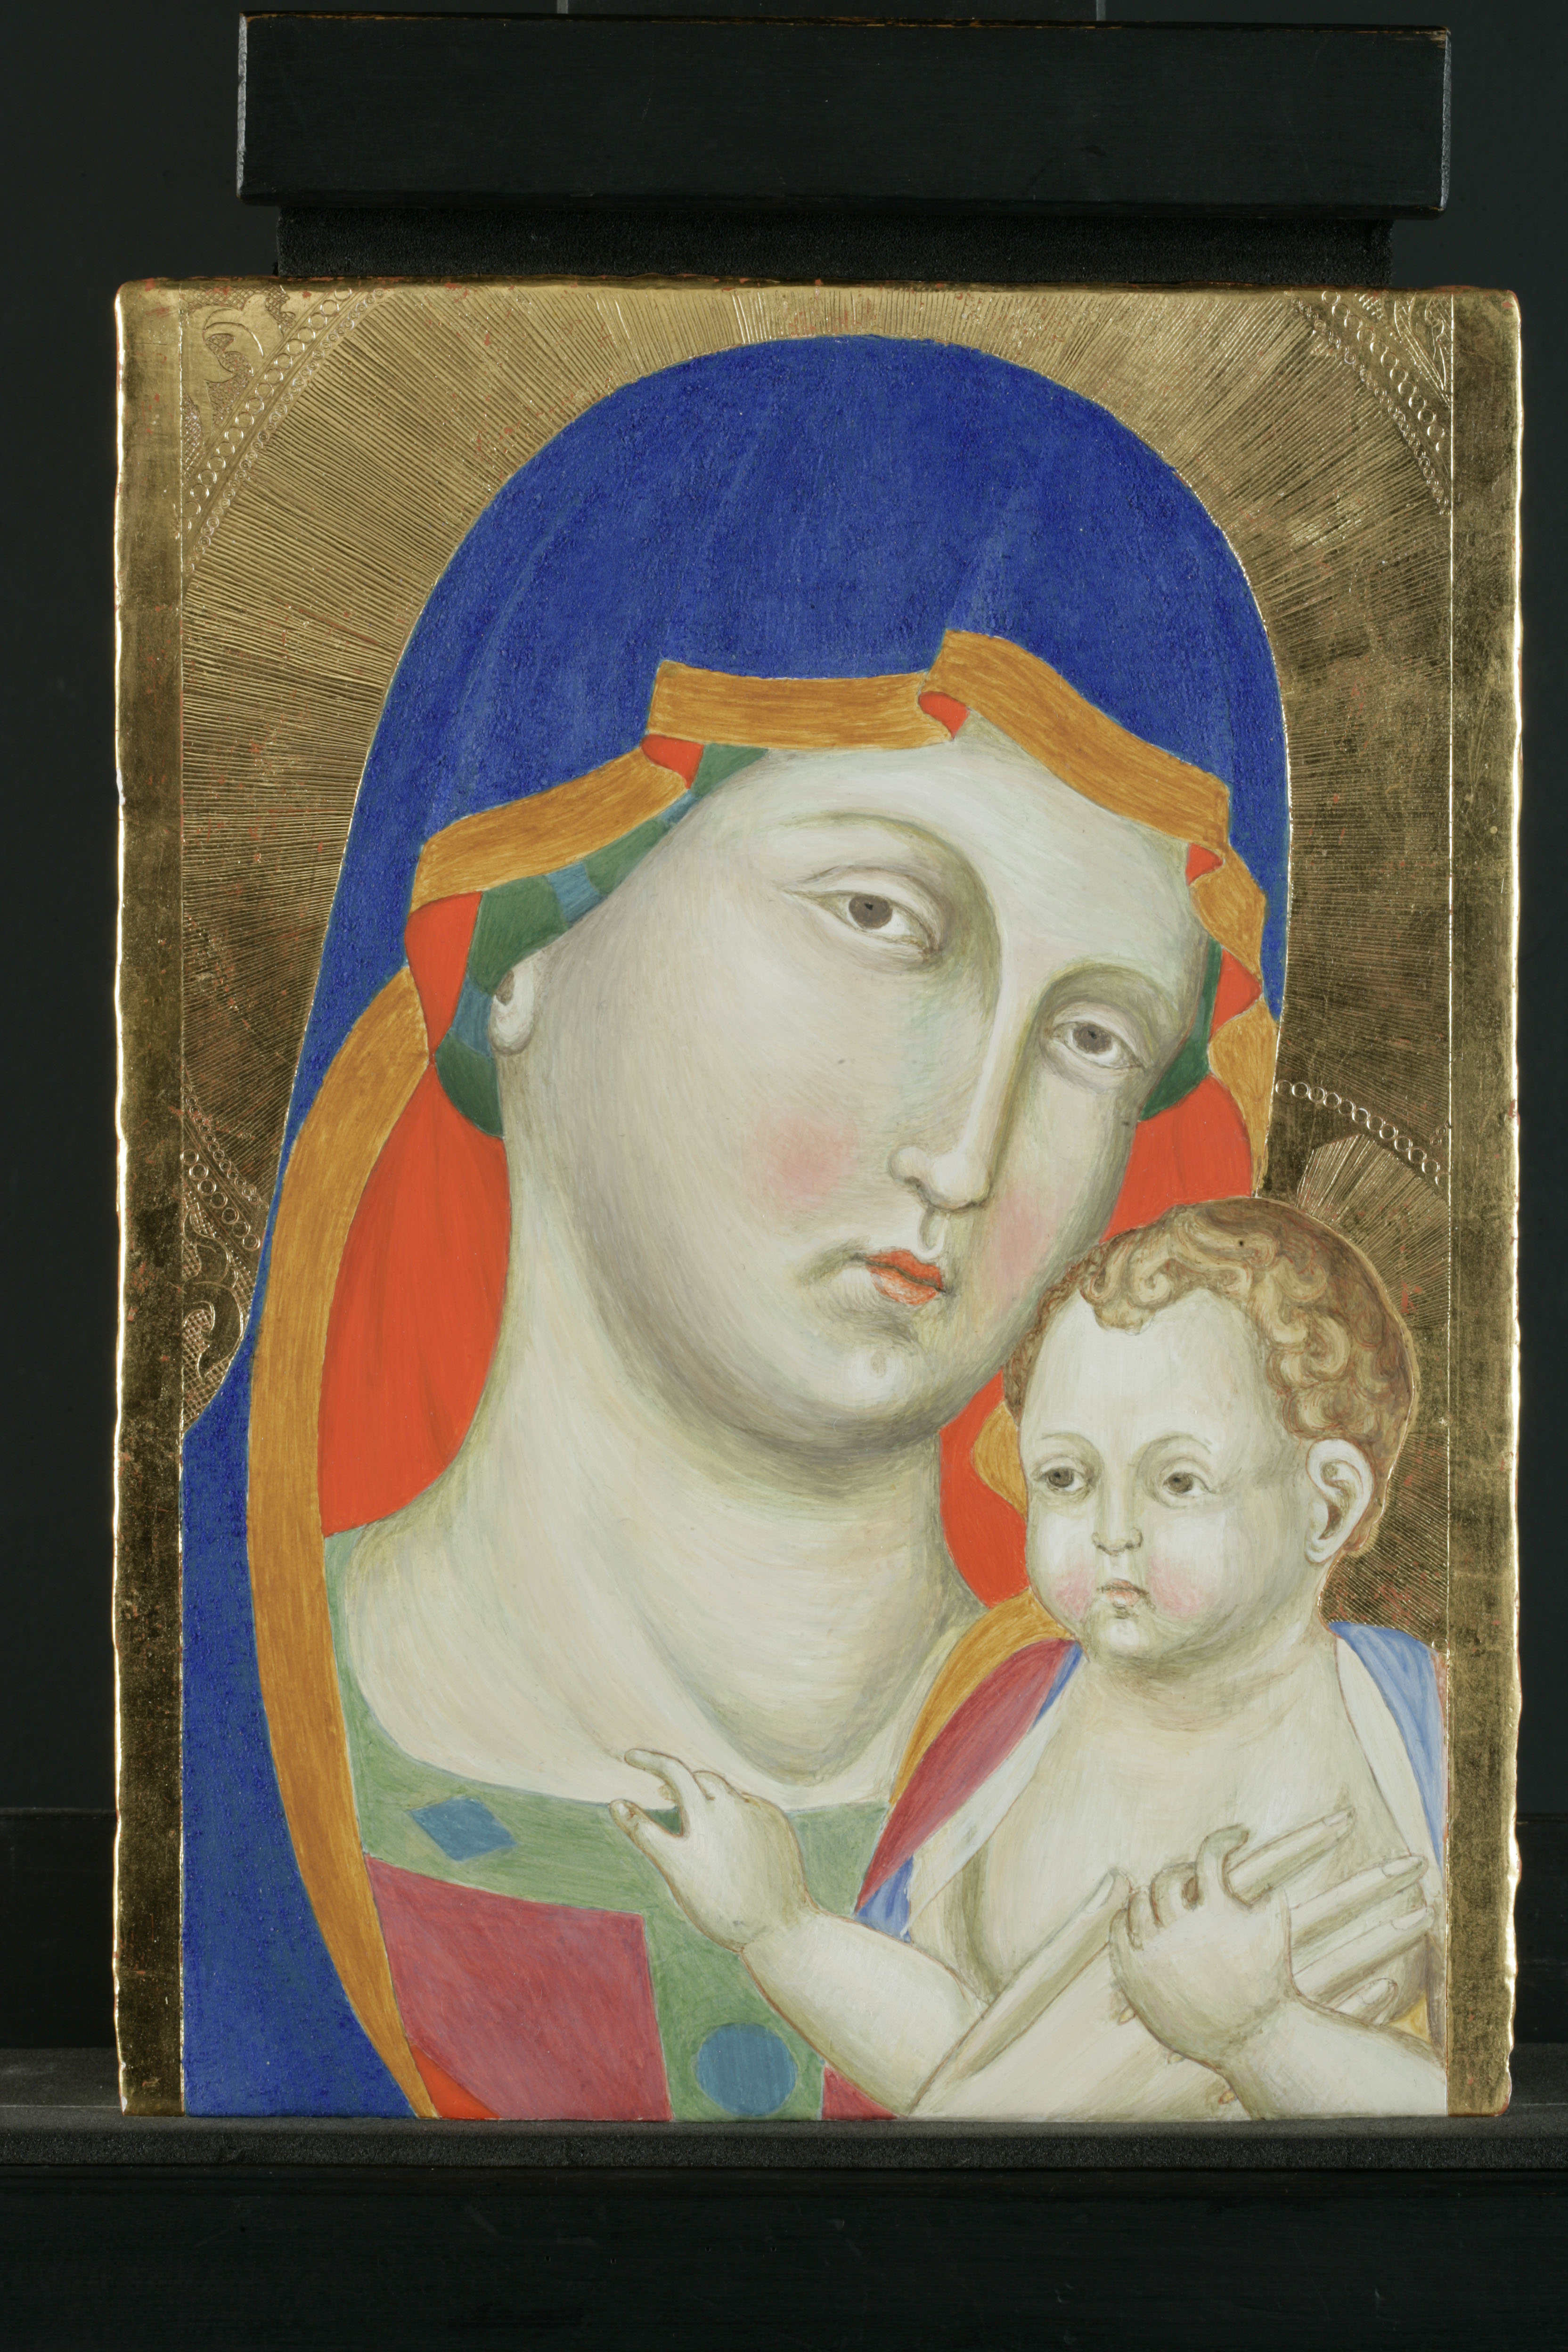
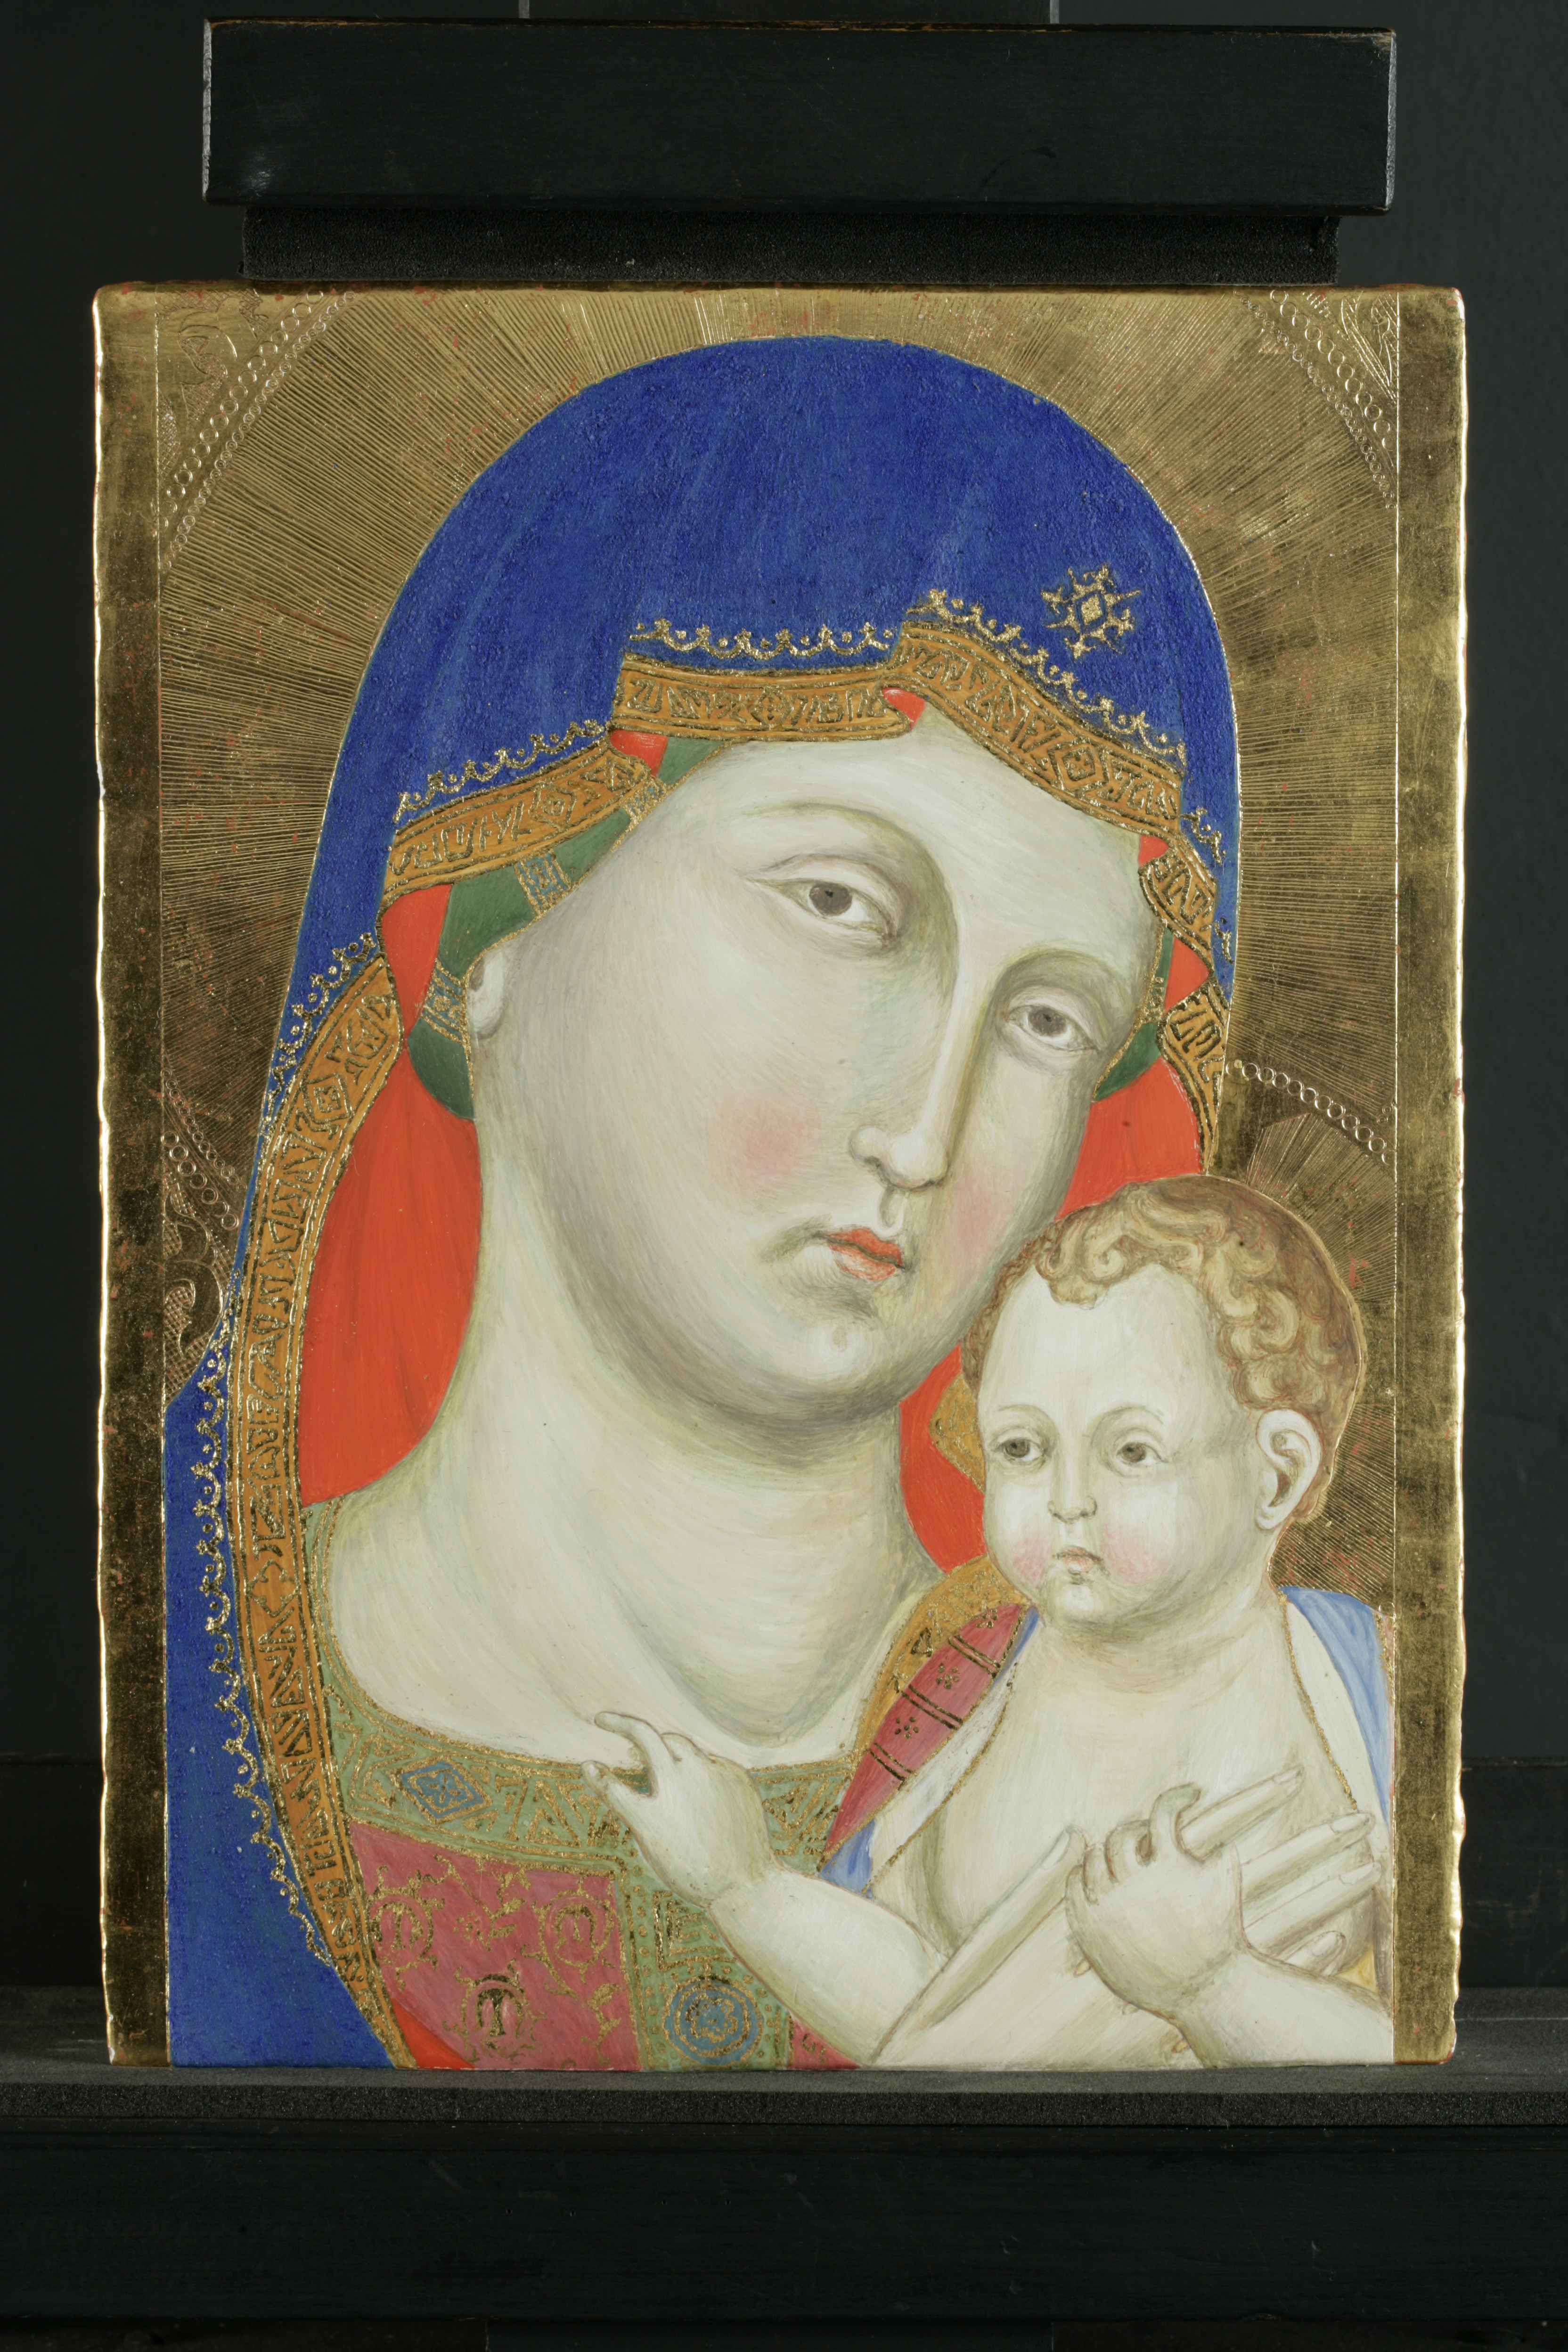
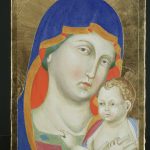
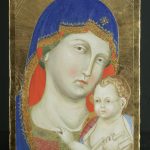
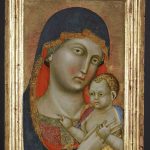
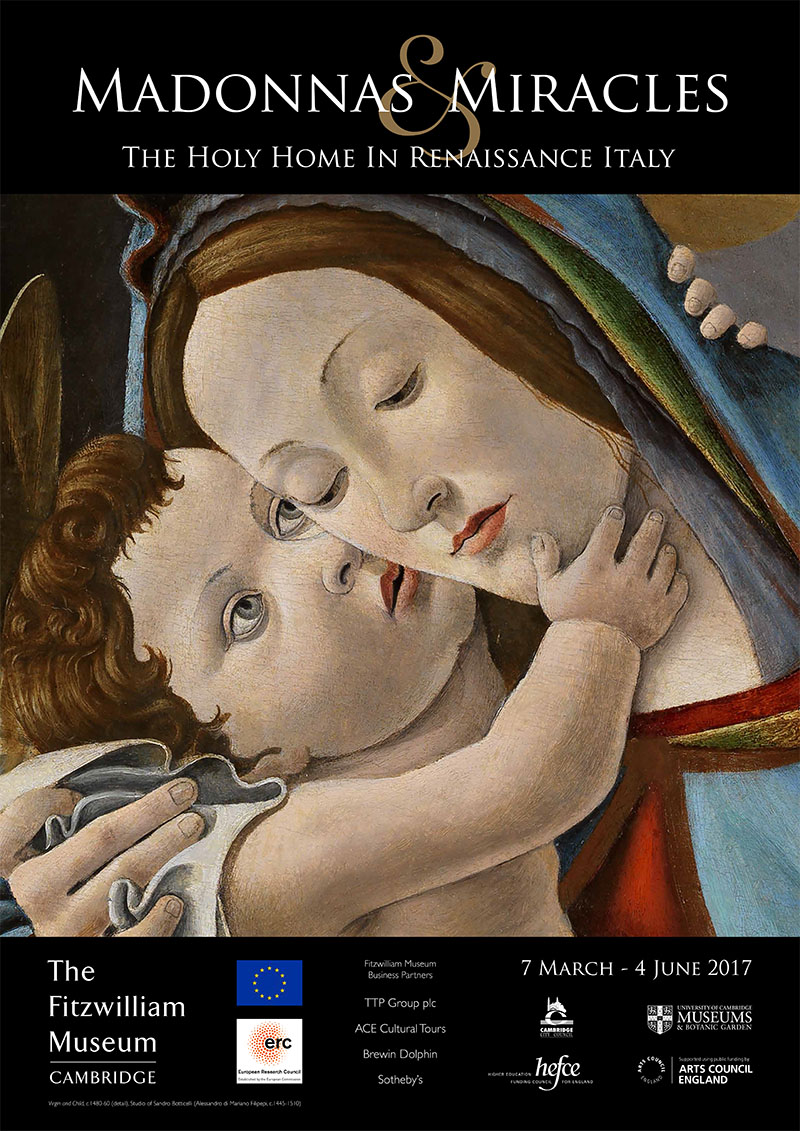
As part of our first year on the Post-Graduate Diploma at the Hamilton Kerr Institute, Elisabeth and I were given the task of reconstructing an early Italian egg tempera painting. This year, there happened to be multiple, wonderful examples of these paintings in the store of the institute, which had just been treated ready for the Madonna and Miracles exhibition at the Fitzwilliam Museum; therefore we were extremely lucky to be given a choice of what we would like to reconstruct. I chose an early fourteenth century painting of the Madonna and Child with an unknown attribution from the Fitzwilliam Museum, while Elisabeth went for a much later piece by Pinturicchio (1454-1513), dated 1495, also from the Fitzwilliam Museum. By choosing these two diverse examples, we were able to compare stylistic differences, as well as changes in materials and technique over the course of the period within which these works were painted.
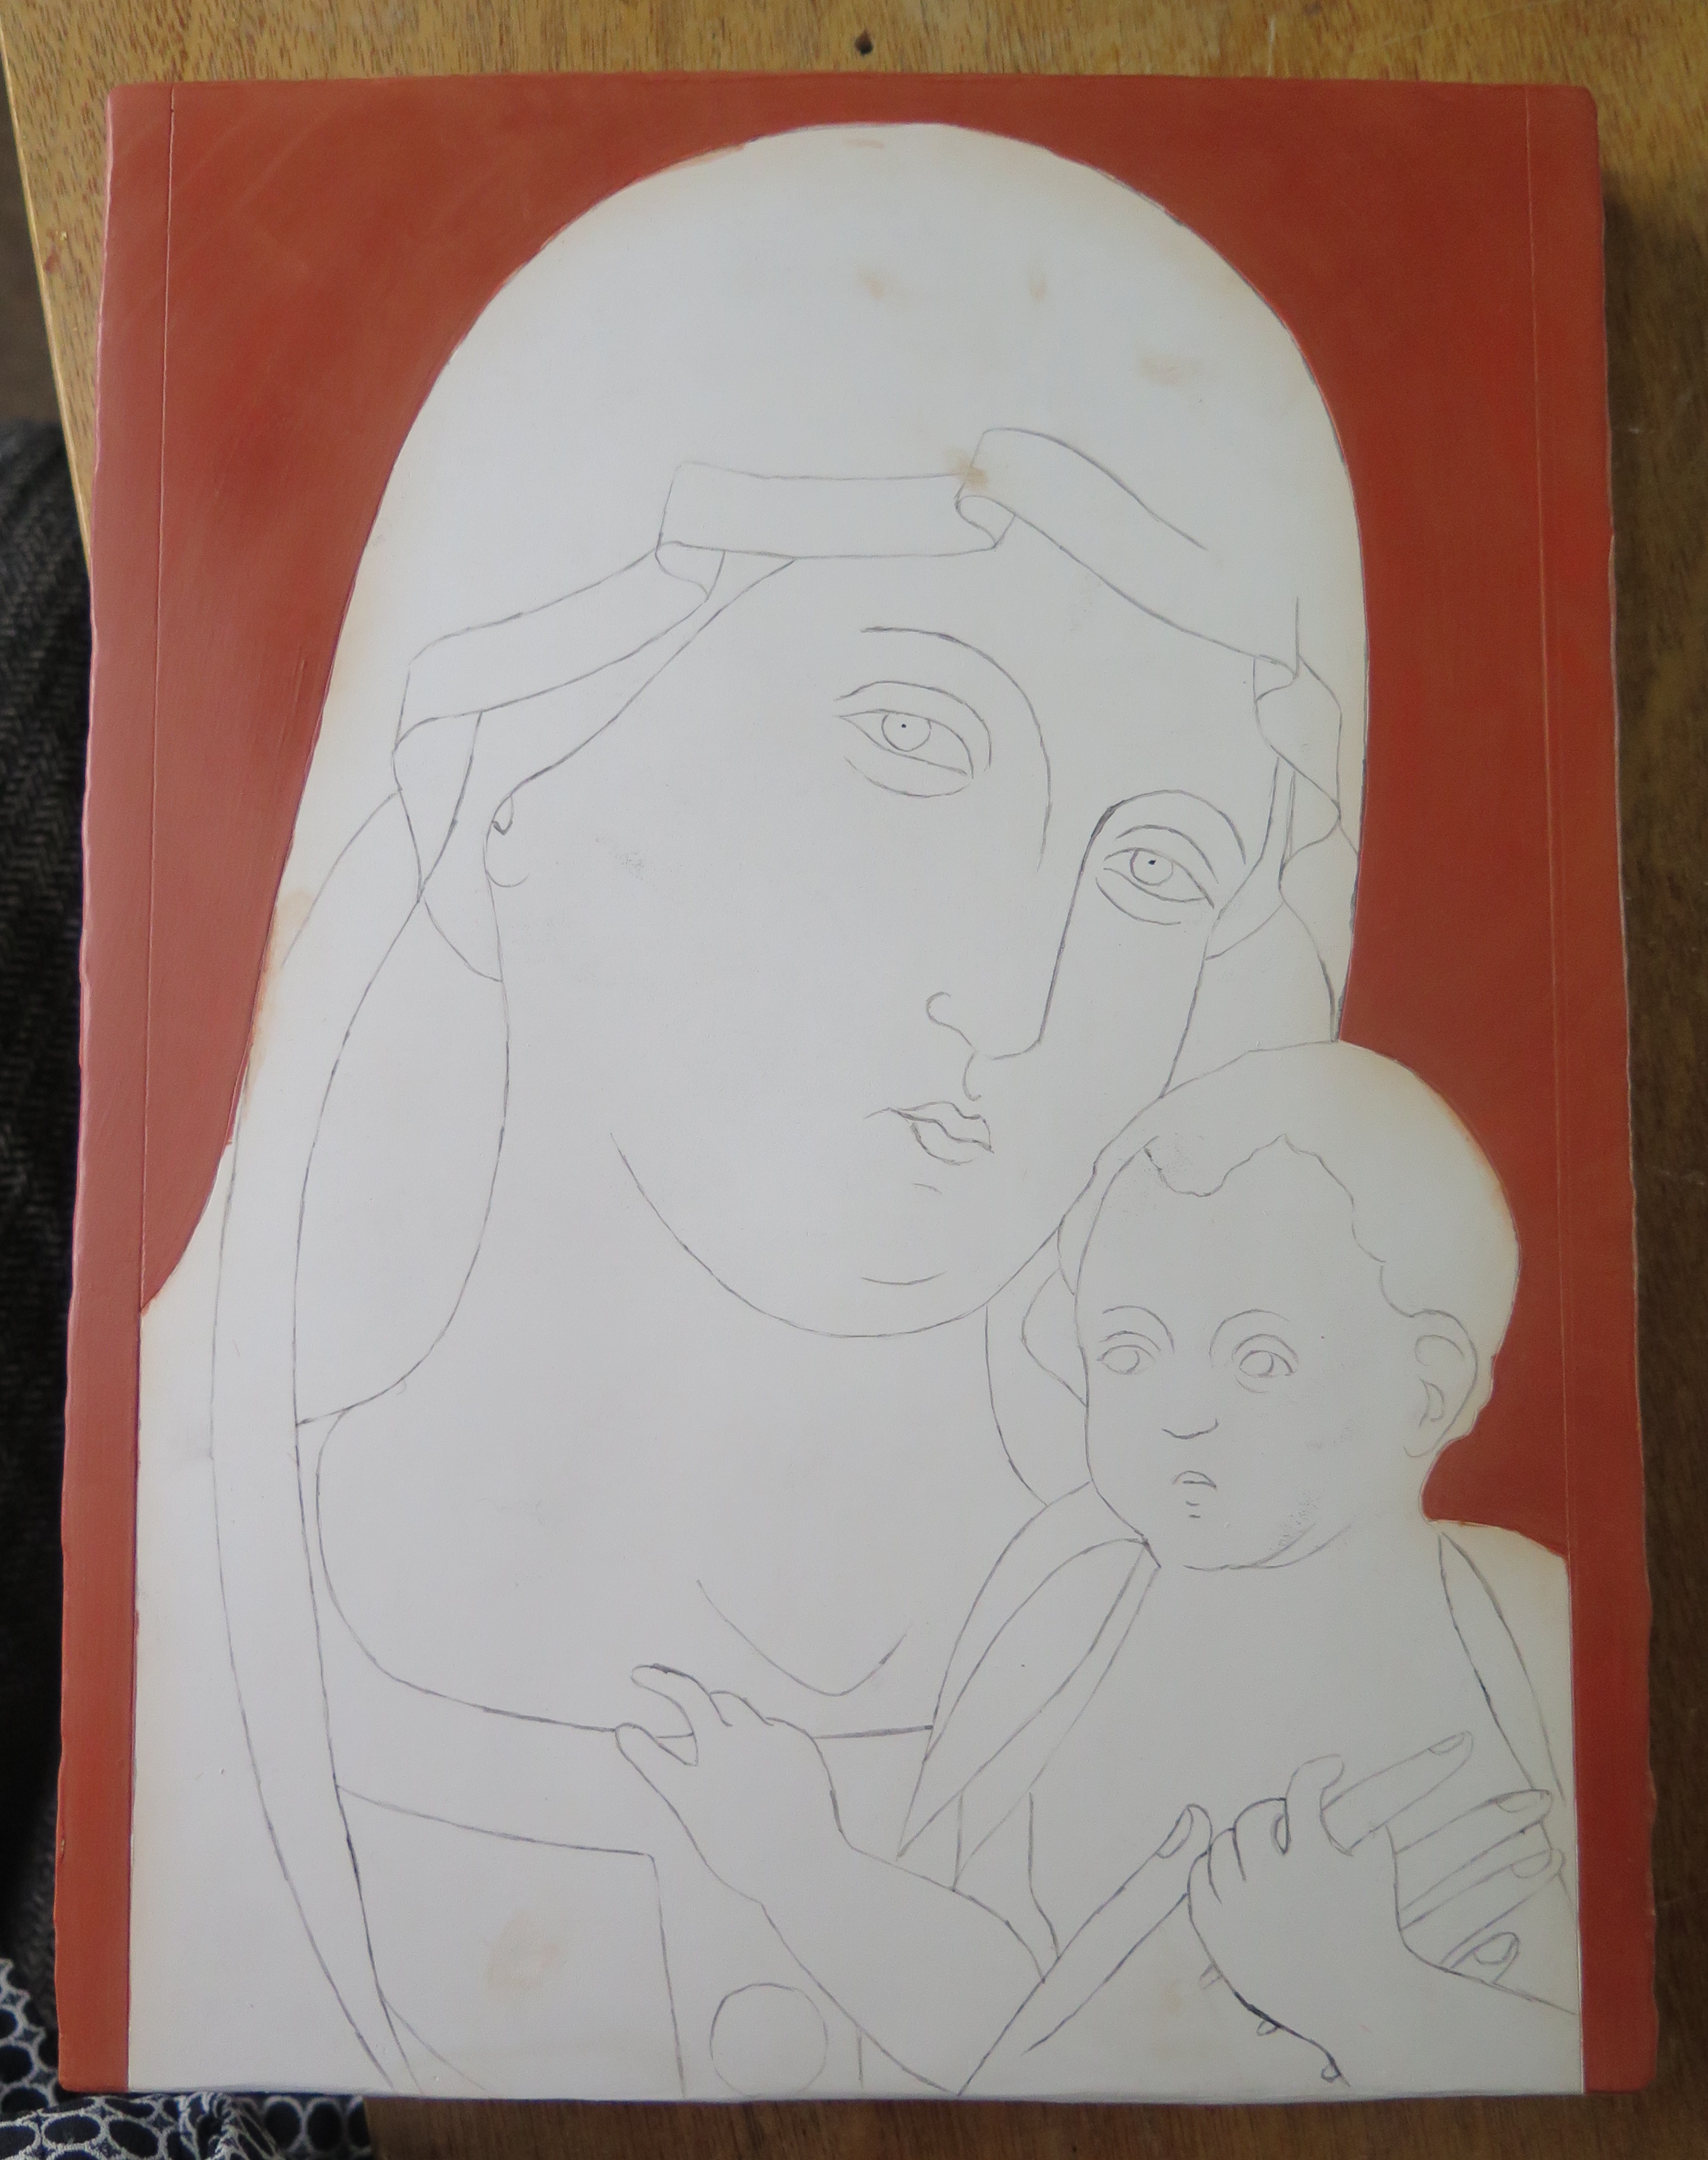
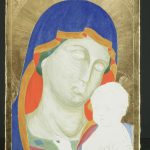
The Madonna and Child exhibits a range of beautiful techniques that I was keen to attempt, particularly the use of both water and mordant gilding and the fine hatching and punch work on the former. It is also a clear example of the brushwork used in egg tempera painting, with the short, hatched lines creating the impression of blended paint.

Gesso Ground
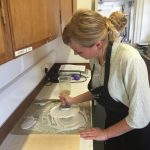
The first stage in this project was preparing the support. It started with the making and application of the gesso ground layer, which appeared straightforward in theory but produced many challenges along the way. In preparation for the ground, the panel is first sized with rabbit skin glue to seal the wood and prevent it from absorbing the ground layer. The early Italian method of applying gesso ground is carried out using two different mixtures, applied in different ways.
The first of these is a coarser, thicker gesso (gesso grosso), made by mulling calcium sulphate (CaSO4) on a slab with warm rabbit skin glue. This is applied in a very thick, single layer. As the rabbit skin glue begins to cool, the gesso grosso becomes sticky and difficult to work with, so we discovered through practice that it should not be manipulated for too long. Once this layer was scraped back and smoothed, the second mixture was applied.
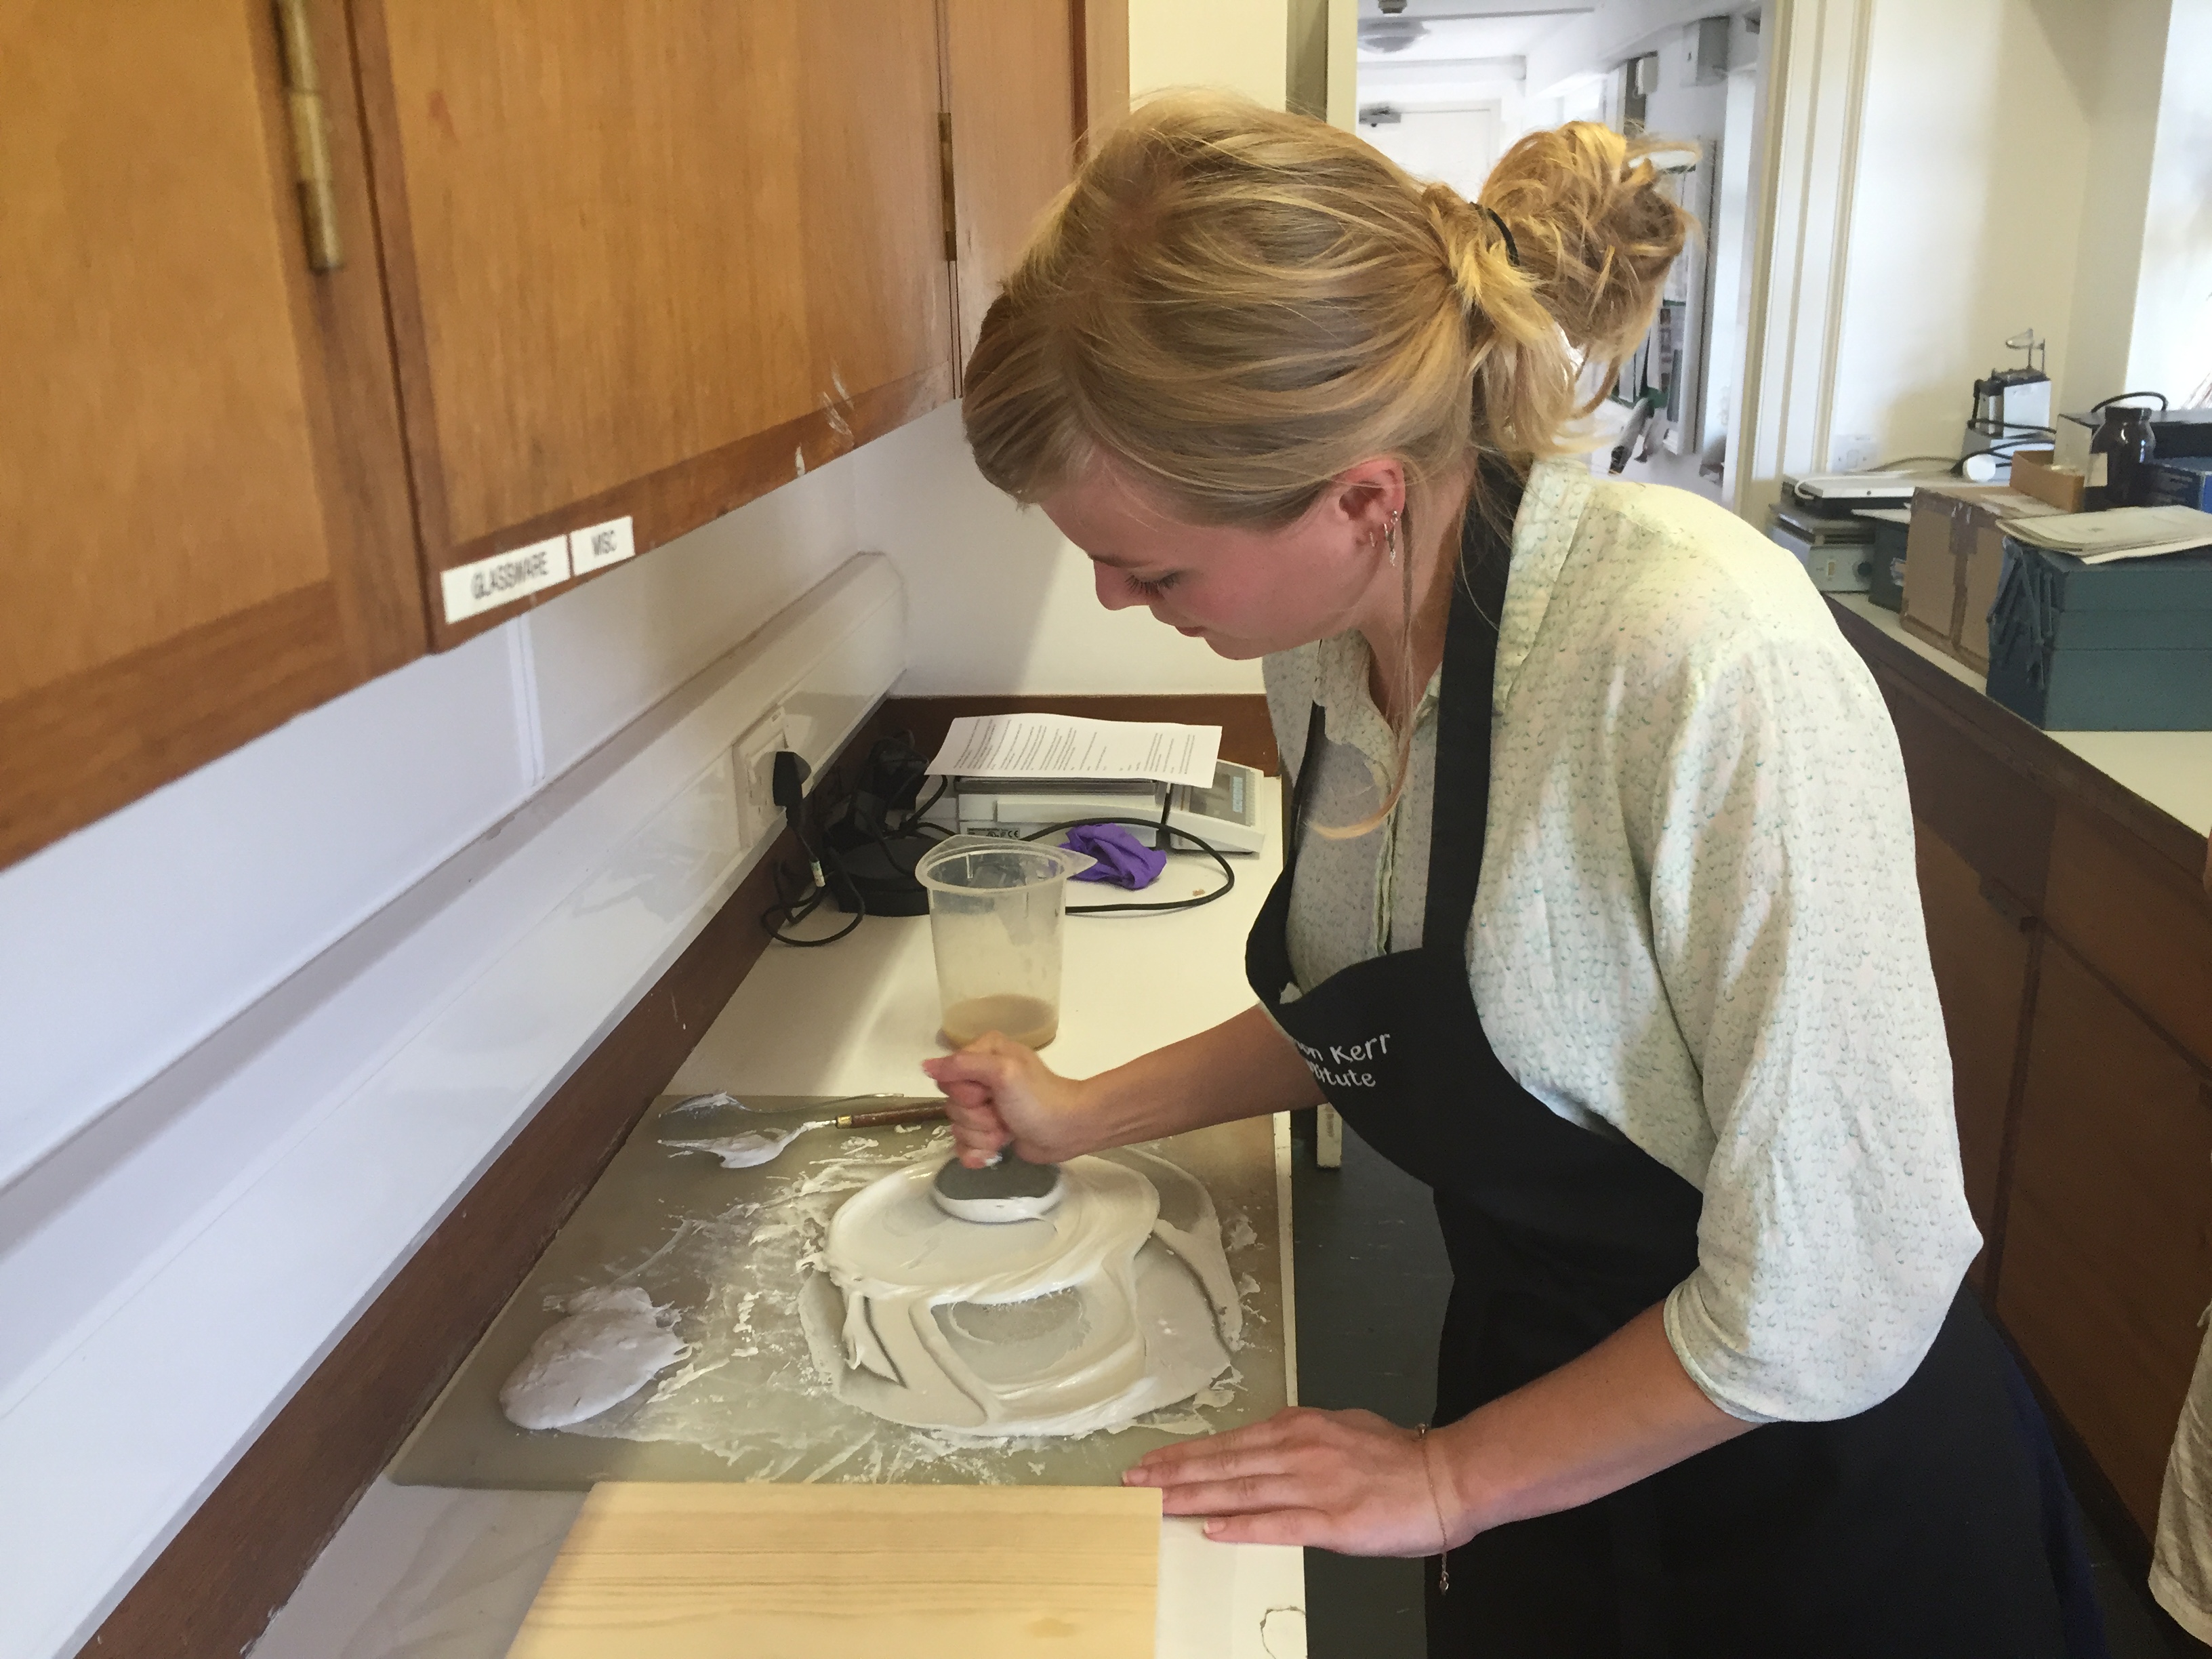
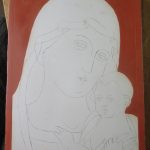
This second mixture results in a much finer gesso (gesso sottile), and requires the calcium sulphate, soaked in water, to be stirred over the course of a month, followed by straining and setting into cakes. These can then be rehydrated and heated with rabbit skin glue to apply in multiple thin layers on the panel, which are then subsequently sanded to a smooth finish. The traced image was then transferred onto the ground using charcoal, and the lines strengthened using carbon black in gum arabic. To distinguish between the areas to be painted and areas to be gilded, lines were incised into the ground.
Water Gilding
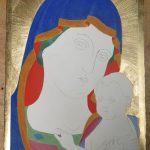
In order to prepare for the water gilt background, bole clay mixed with rabbit skin glue was applied. It was difficult to apply in that some areas were continuously solubilised and picked up on the application of each thin layer.
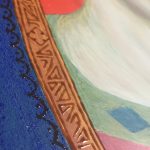
The bole was wetted and the gold leaf laid on top using a gilder’s tip. Due to the incredible delicacy of the gold, it often tore or crumpled in the process, so it required multiple goes to get the background covered. The gold was then burnished with an agate burnisher to achieve the rich sheen of the water gilding on the Madonna and Child. After gilding, the hatched lines and rays of the Virgin and Christ’s haloes were incised with a pointed bamboo stick, as metal points broke through the gold. The punchwork was carried out by tapping the points of different shaped tools into the surface of the gold to create an imprint.
In retrospect, it was considered that the hatched lines could have been applied prior to gilding, however the application of layers on top of this hatching may have reduced the definition. Also, that two layers of gilding (time permitting) would have been beneficial given that medieval gold leaf was somewhat thicker than the gold leaf of today.
Painting
It became clear that the most important part of this process was to closely and carefully examine Madonna and Child, in an attempt to understand how the artist achieved certain effects, which pigments and tools he may have used, and in what order he carried it out. Reading appropriate treatises, particularly Cennino Cennini’s Il Libro dell’Arte, gave us a framework to work within, however there was much more to be gleaned from the surface of the painting.
To mix the paint, pigment particles were ground in water and then left to dry. This pigment could then be ground with an equal amount of egg yolk to bind it. However, this paint has an incredibly fast drying time, so it was made up as and when we needed it. I began with the drapery, building each section up in layers. During this process, a problem that I encountered was the inability to achieve colours with the same degree of vibrancy as on the original. This may have been due to some of the modern, safer equivalents of pigments I was using for this section. For the drapery I was using titanium white as a replacement for lead white, which had a dulling effect.
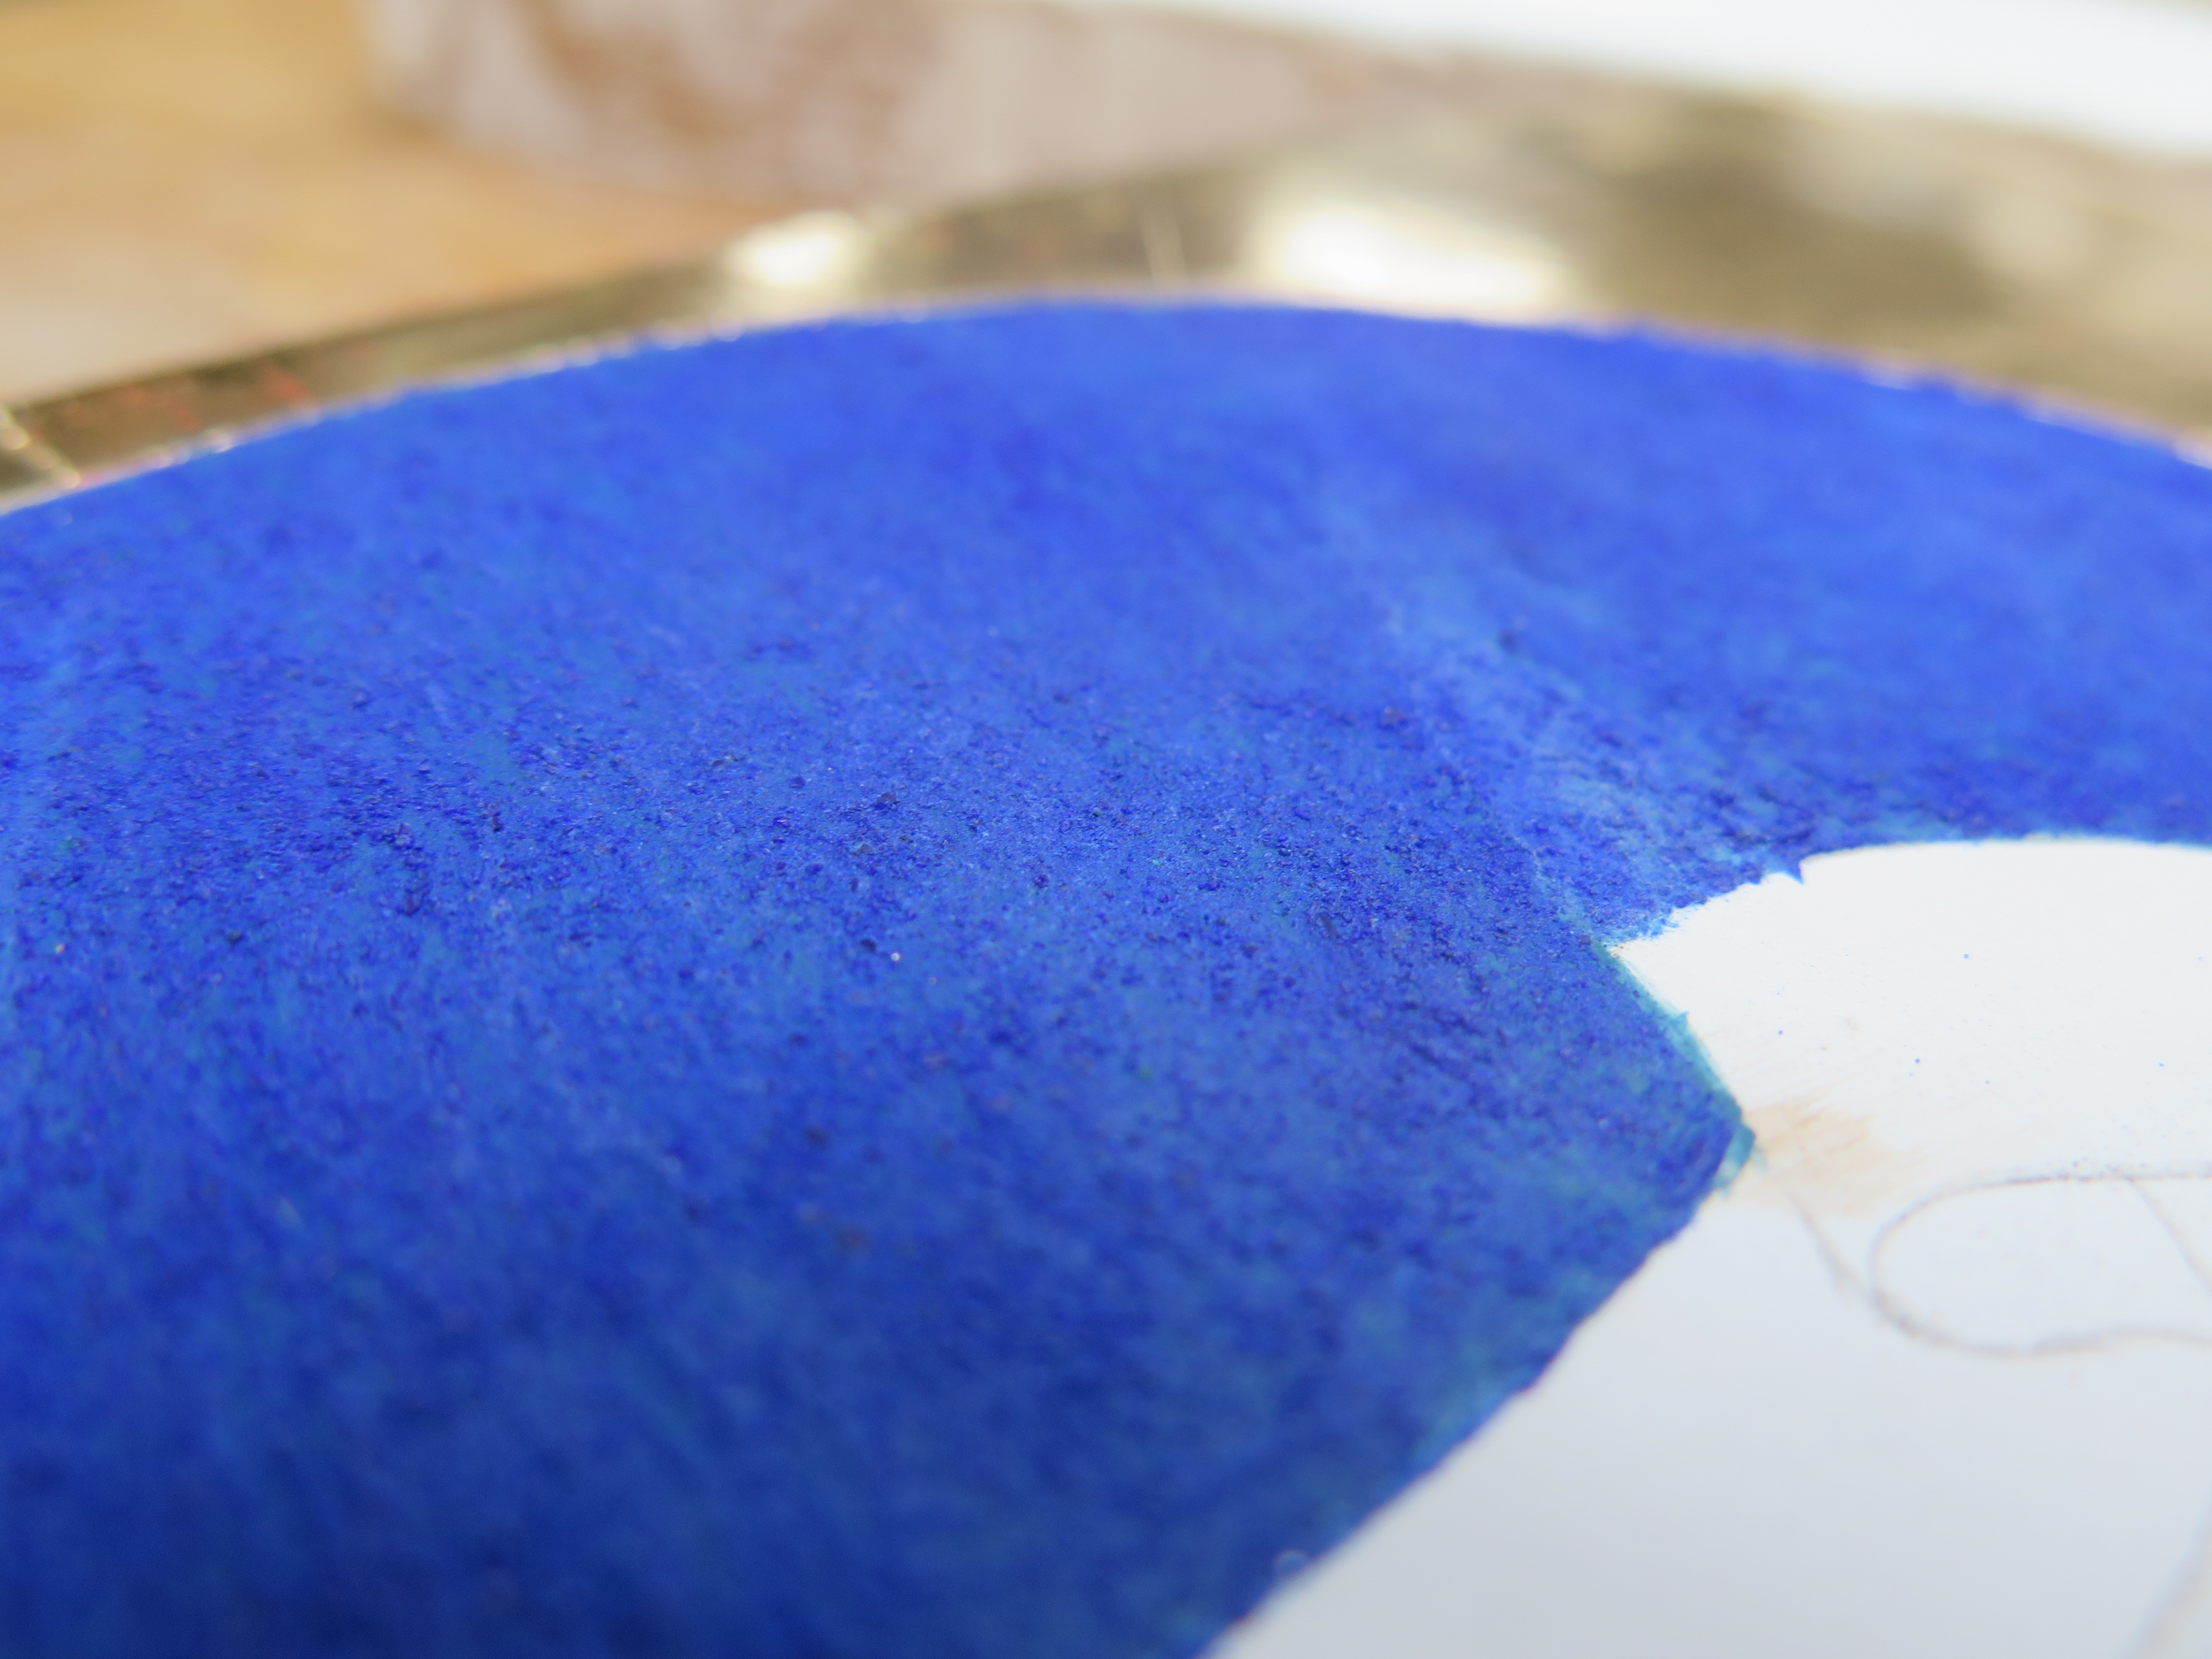
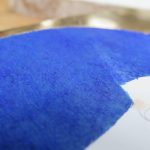
On the other hand, one particular pigment, azurite, was very satisfying to work with. The process of preparing azurite pigment results in different grades, where the coarser particles are more vibrant and blue, and the finer particles are duller and have a greener hue. For the Virgin’s mantle, an underlayer of fine azurite particles was applied. On top of this, the mantle was modelled using the very coarse azurite to give it the distinct blue colour. What I wasn’t expecting was how coarse these particles appeared on the surface. Due to the fragility of these particles they are often easily abraded and so this effect isn’t so extreme in many original examples, however seeing it freshly applied made it clear how this pigment can shimmer in the light.
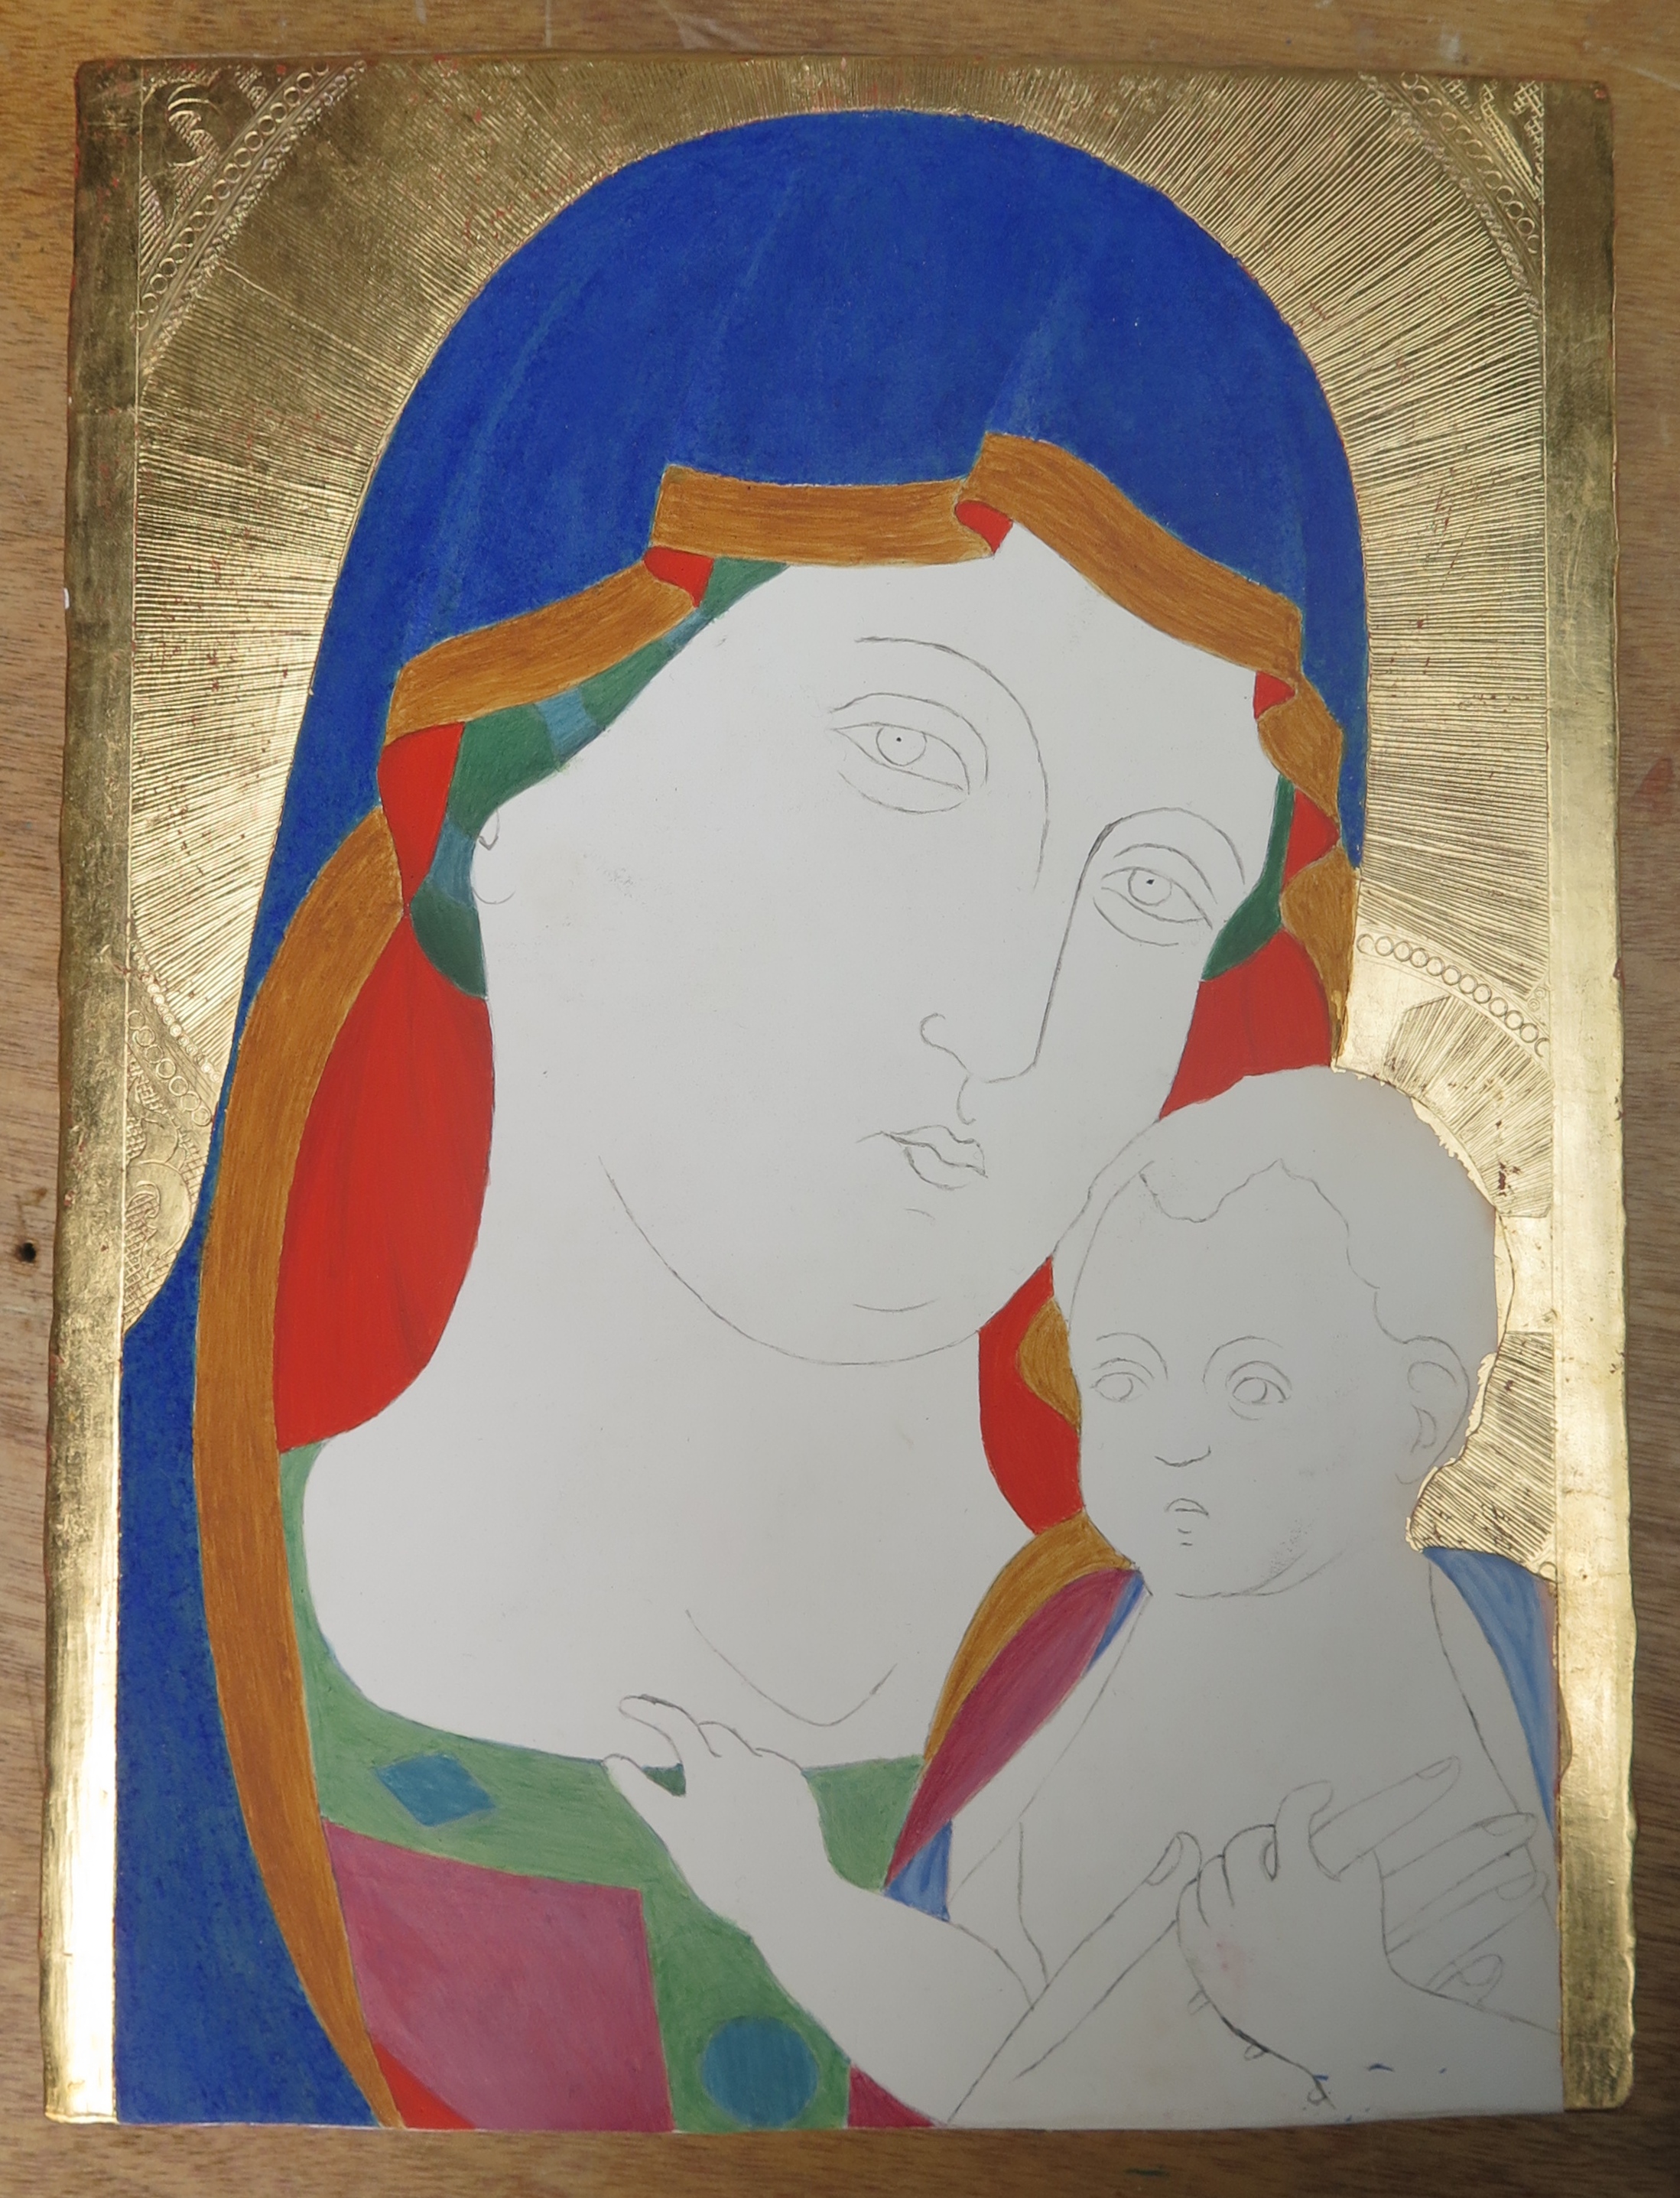
The next stage involved working on the flesh tones. A distinct characteristic of early Italian painting is the washy green earth undertone employed for the flesh, along with verdaccio (a specific blend of black, white and earth pigments) for the shadows. On top of this, the flesh is modelled, using short, singular lines to apply the gradations of the flesh tones. It was at this stage that I began to incorporate lead white as my white pigment, rather than titanium white, as I found the latter gave the flesh a blue-ish, dull look that the lead white did not.
Mordant gilding
The final stage was the application of the mordant gilding over the painted areas, which turned out to be perhaps the most unpredictable and challenging phase in the process of producing the reconstruction. Mordant gilding uses the adhesive properties of an oil-based mixture to fix the gold leaf onto the surface. For this, my test panel was invaluable, as I needed to attempt many different ratios of lead oil, drying pigments and an oil-resin mixture (composed of linseed oil, mastic resin and colophony rosin), before reaching a combination with good working properties and drying times.
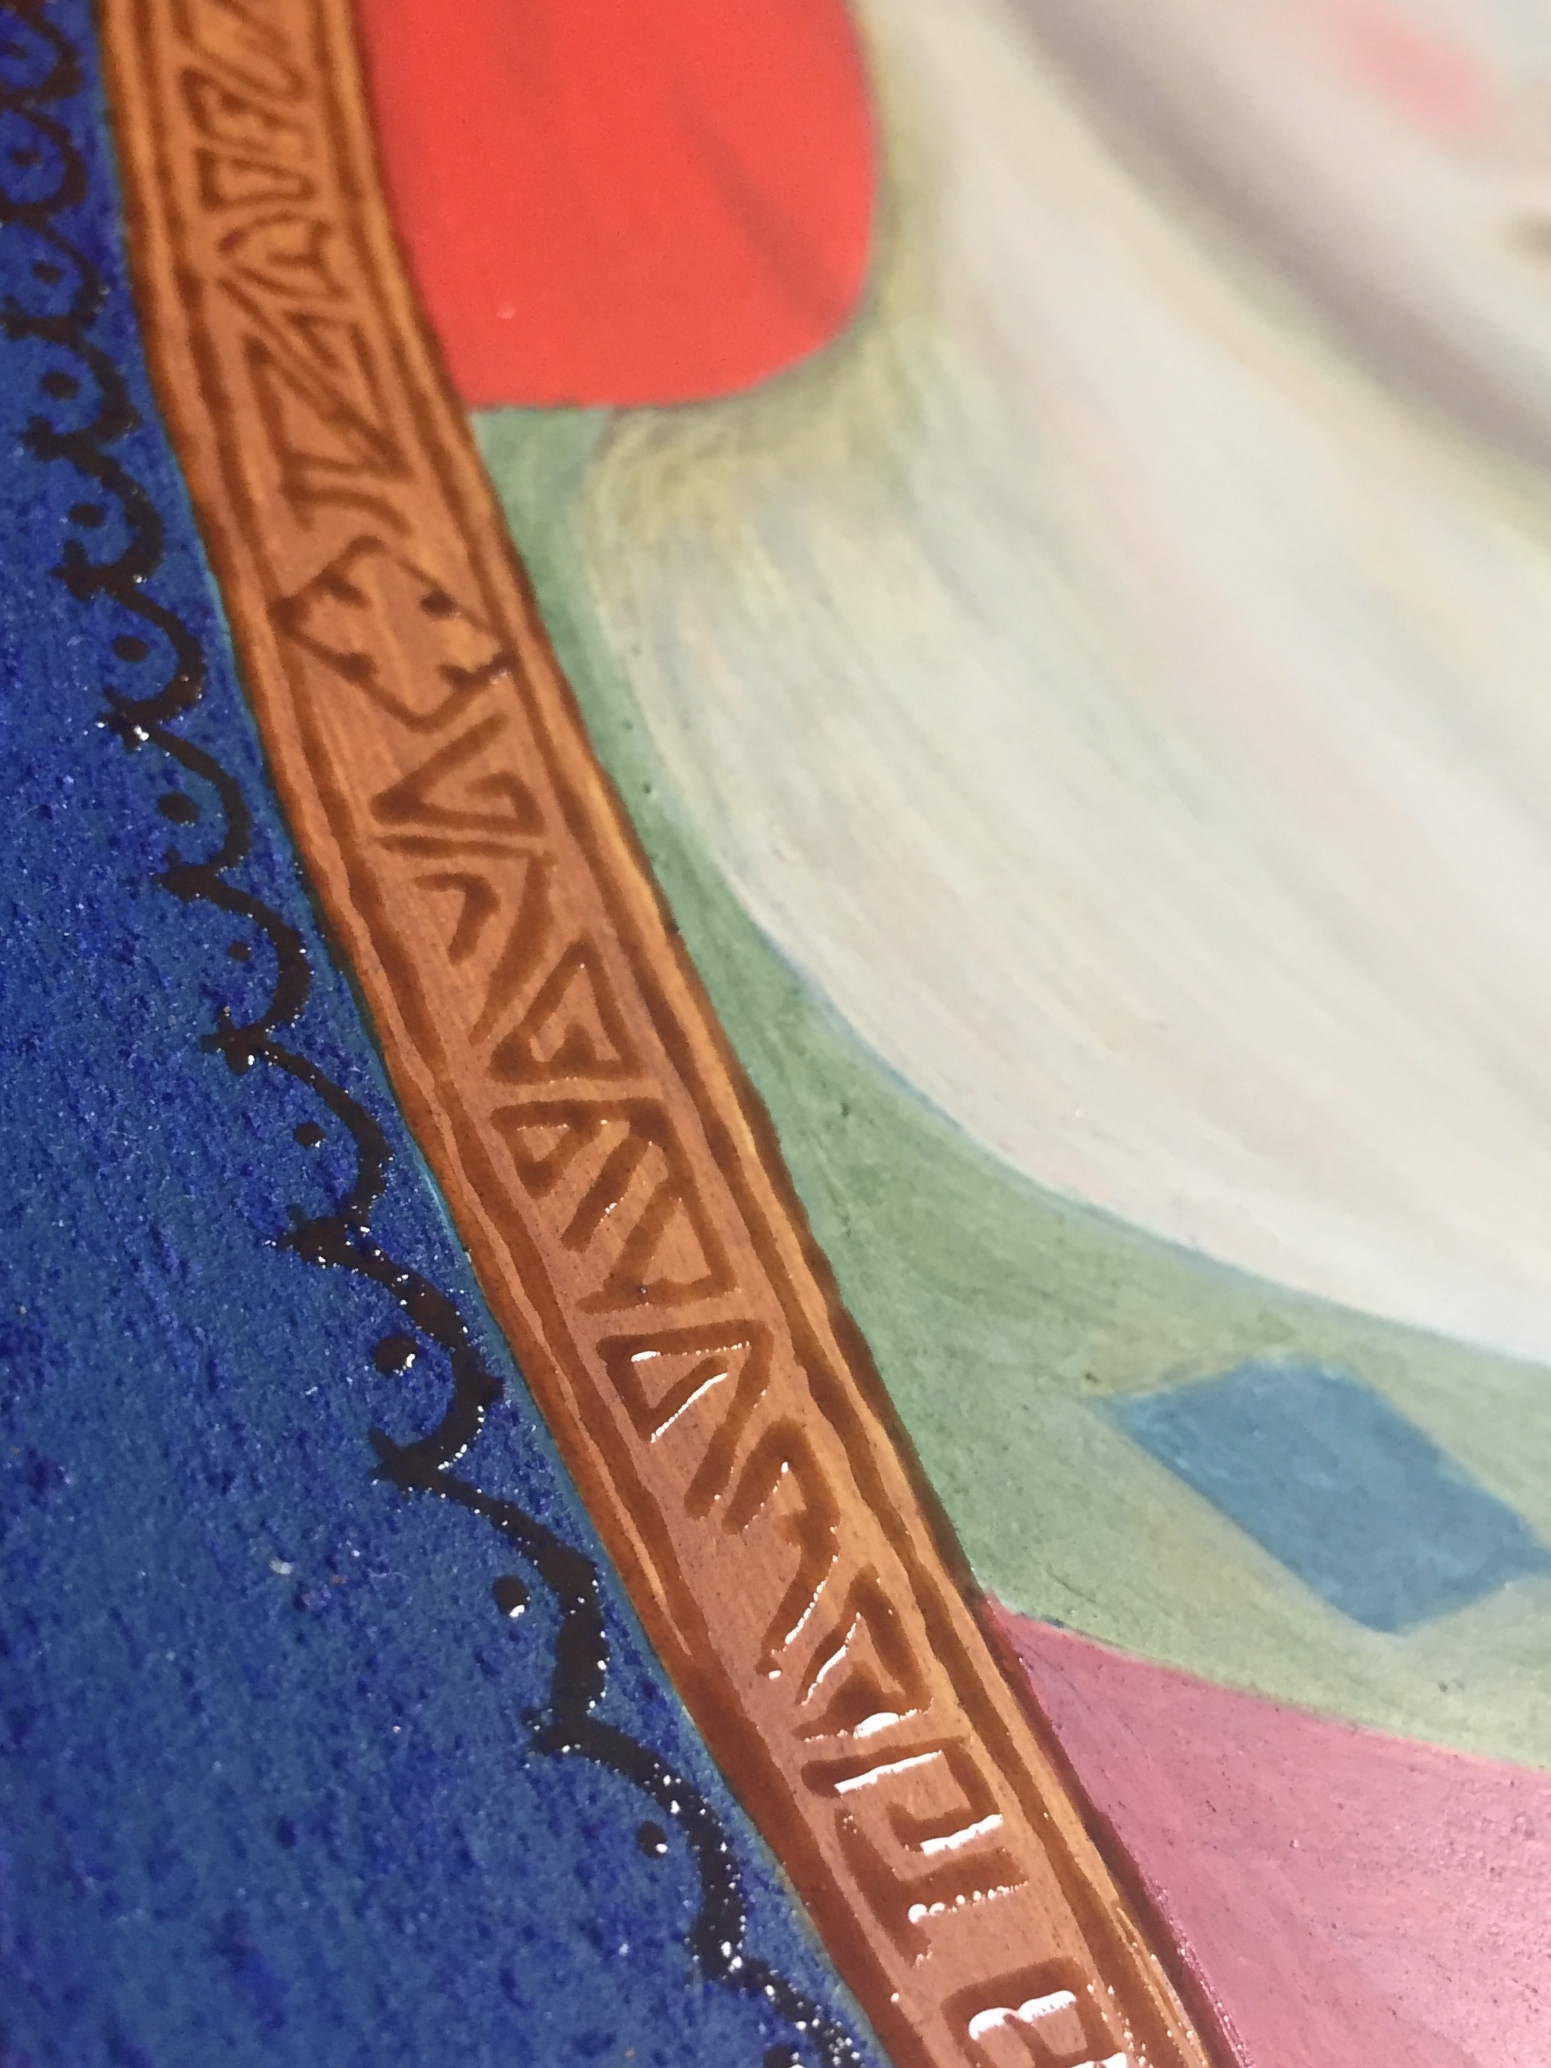
After painting out the mordant, it needs to be left for some time to reach the right level of tack (somewhere between one and three days depending on the materials in the mordant and the thickness of the application). I experienced the issues of both gilding on mordant that was far too wet, when the mordant itself smudges and the gold sticks to the surrounding areas as well; and far too dry, when the gold sticks to nothing at all. After multiple failed attempts, I began to form a better understanding of the drying time of the mordant. Laying the gold at the right stage was a distinctly gratifying experience, and resulted in a much better appearance.
Anna Don, 1st Year Student
Madonnas and Miracles Exhibition (video)
Anna Don is one of two first years at the Hamilton Kerr Institute, studying for a Postgraduate Diploma in the Conservation of Easel Paintings. She previously attended City & Guilds of London Art School, graduating with a First Class BA (Hons) in Conservation Studies. She has undertaken an internship in painting conservation at Restauratie Atelier Marjan de Visser in the Netherlands, and has been involved in projects conserving frames, objects and historic interiors. Most recently, Anna took part in a four-month internship researching George Stubbs’s wax painting techniques at the National Maritime Museum, London, the results of which were presented at the George Stubbs and Wax Painting symposium in 2016 in London.
To contact Anna: ad838@cam.ac.uk