
In the previous post, I shared my experiences of making a reconstruction from a detail of Virgin Adoring the Child by Jacopo del Sellaio (dated c. 1473). While creating the copy, I learned about the materials and methods utilized for painting with egg tempera. The use of egg tempera is characteristic of early Italian paintings. Similarly, decorative gilding goes hand-in-hand with early Italian artworks. Halos of saints, fabrics, and even entire backgrounds can all be depicted in gold. A range of gilding techniques could be employed, depending on the visual effect the artist wanted to achieve.
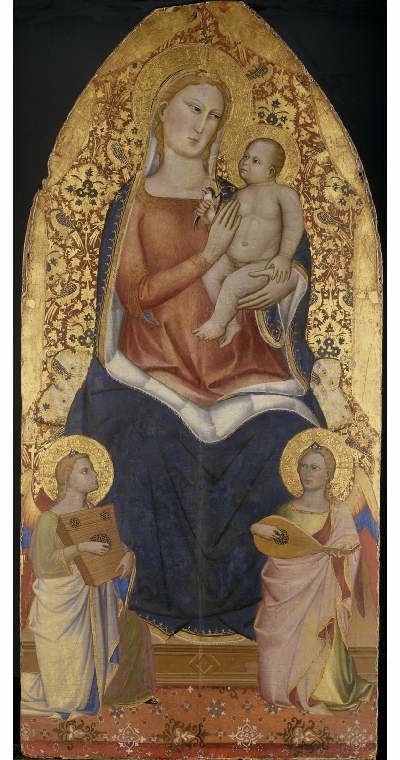
The second reconstruction I made last term is the gilded decorative pattern found in the background of Virgin and Child by Niccola di Pietro Gerini (1368–1415), also from the Fitzwilliam Museum. The same decoration appears in many paintings by other artists – such as Saint Matthew and Scenes from his Life by Andrea Orcagna. This suggests the same pattern might have been widely available and was used by different workshops. This reconstruction was the most technically challenging, but also the most rewarding. Once I got the hang of it, gilding was incredibly fun!

The panel was prepared in a similar manner as the first reconstruction. The relief work – called pastiglia – was done by thinly brushing on gesso layer after layer, slowly building up the volume. A red clay – called bole – was mixed with glue and painted on in six thin layers. It was then burnished with a linen cloth. The bole layer allows the gold to adhere and to be burnished. Plus, it gives the gold a warm glow.
A gold leaf is around one thousandth the thickness of hair! Therefore, it is extremely tricky to work with. If I breathe at the wrong time or someone walks past me, the delicate leaf can just fly away as I helplessly watch on. The surface to be gilded is first wetted with water containing a couple of drops of ethanol (added to improve the flow). This step accounts for the name of the technique: water gilding. The wetted bole is enough to adhere the gold. An experienced gilder can achieve the same with merely breathing on the bole! Leaves were cut using a special gilding knife and transferred using a gilder’s tip. The fine squirrel hairs attract the gold using static electricity.


After a period, the gold is burnished with an agate stone to make it as reflective as possible. If burnished too soon, the gold is rubbed away. Too late, the bole underneath flakes off. Therefore, the key is to get the timing right with practice and experience.
The bird and leaf pattern was created using a technique called sgraffito. I covered the entire gilded surface with red and blue paint. The decorations emerged by carefully scraping away paint with a bamboo stick, revealing the gold underneath.
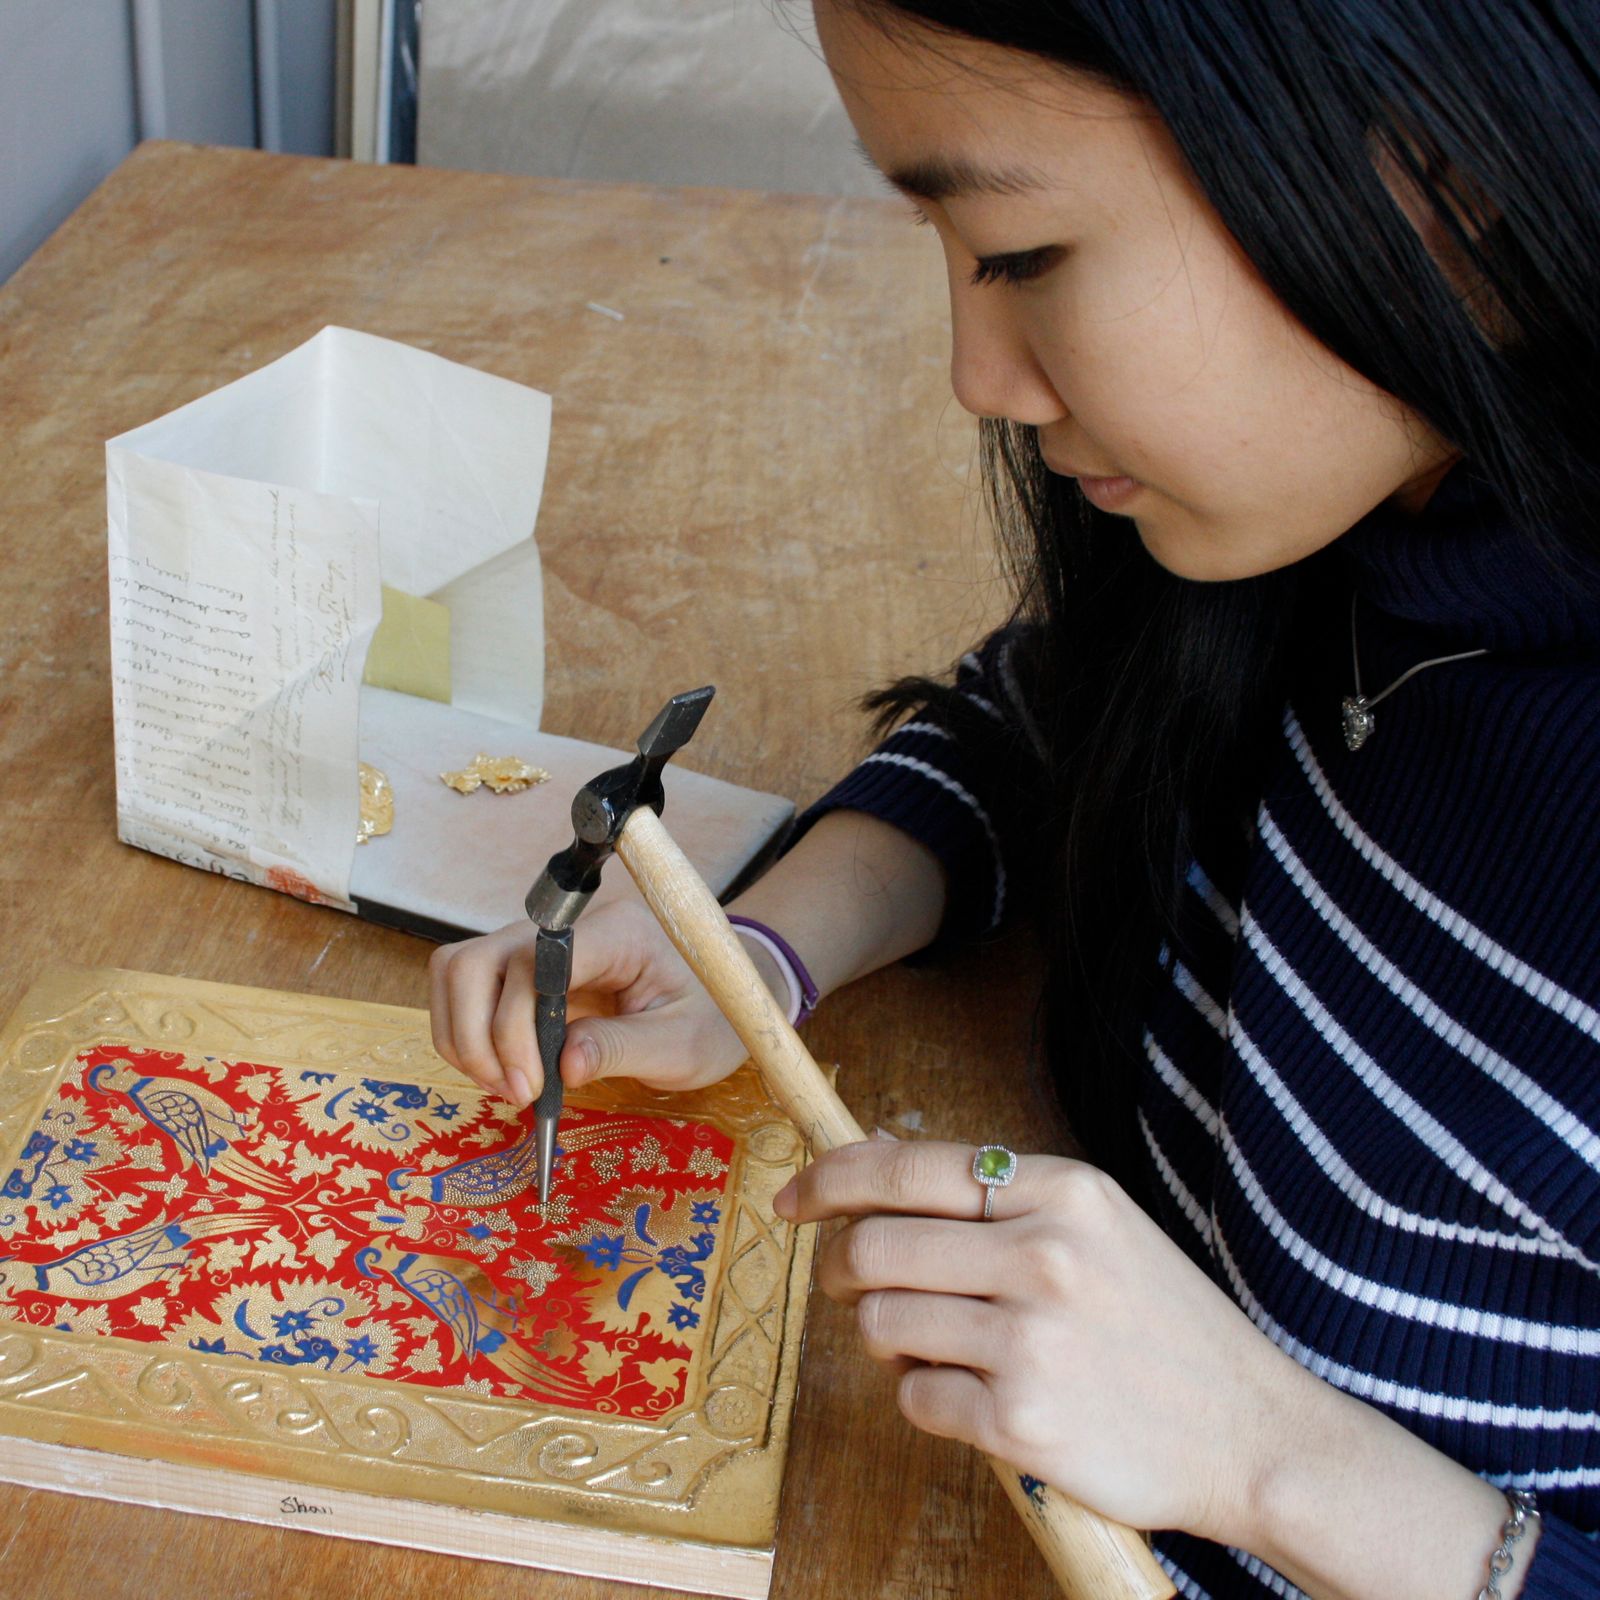
For the final touch, the gold is then punched to create decorative details. The dots were created by giving a nail a gentle tap with a small hammer. Not only does the punched surface have a decorative flair, it also scatters light, making the gold appear brighter from most directions.

This reconstruction project gave me a true appreciation for early Italian artists’ craftmanship. For a more detailed, step-by-step instruction of the painting and gilding techniques employed by early Italian artists, I highly recommend this wonderful online interactive on the Fitzwilliam’s website. For the next post, Pia will step away from Italian paintings and will write about the two remaining reconstructions: a deposition scene by a 15th-century Northern European artist and a flower painting by a 17th-century Dutch painter.
– Shan
Yes thanks for information, but I need to know what kind of paint use for graffitt0?
The paint I used was egg tempera, which was made by grinding egg and pigments together. If the proportion of egg is too high, the paint would peel off. If the pigment content is too high, the paint would crumble. When the paint had the right ratio, the sgraffito was quite easy to do!
Thank You!