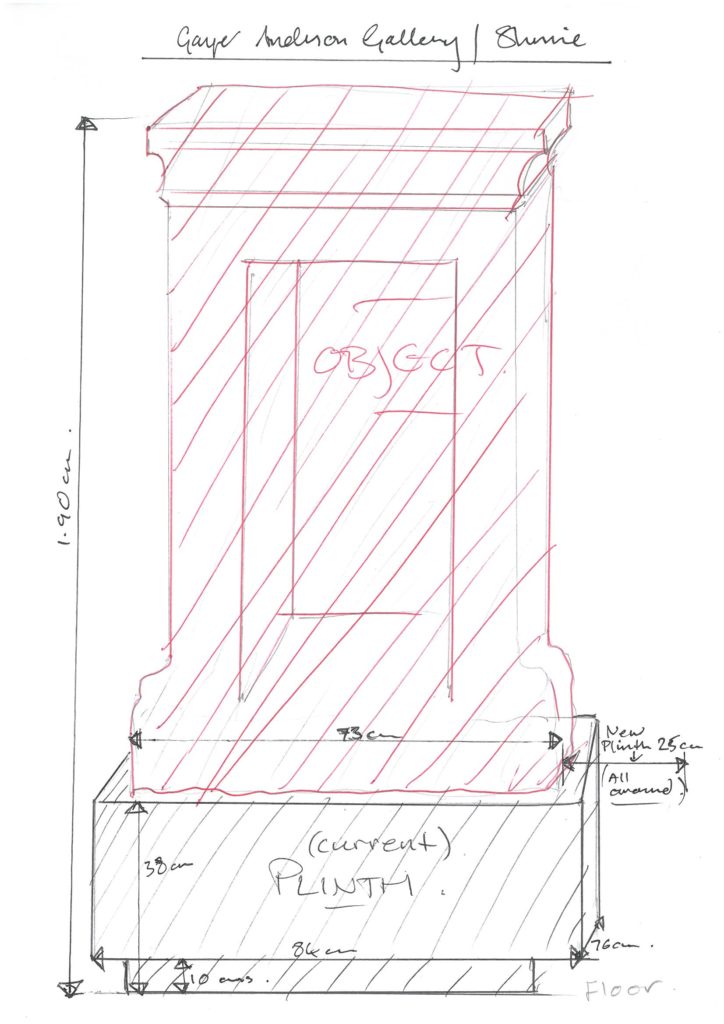
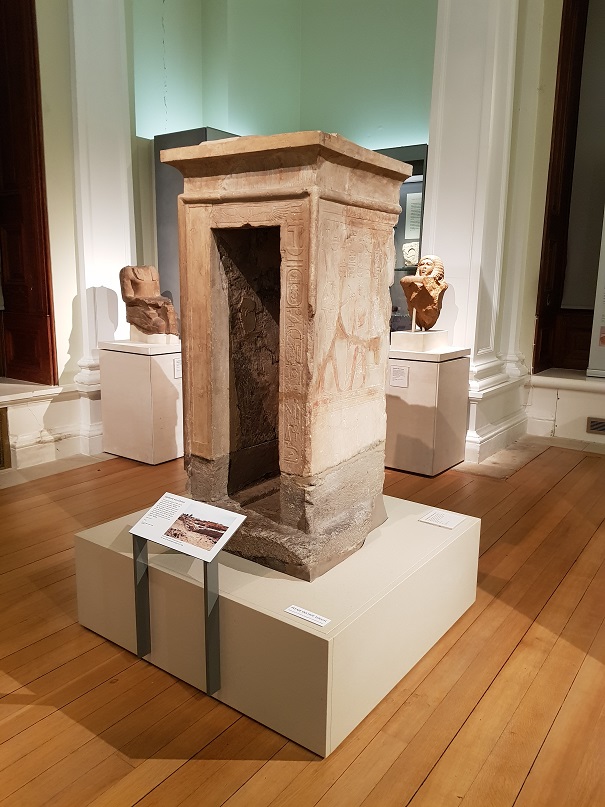
Discussion about replacing the old, worn plinth beneath the Egyptian Shrine (E.40.1902) in the Gayer Anderson Gallery began in 2017 (Fig. 1). We wanted to bring it into line with the other two plinths supporting the largest pieces of sculpture in this gallery. Plinths provide an important protective function. In addition, they help to create a clearly defined, dedicated space which can offer visual emphasis to objects, like frames around paintings.
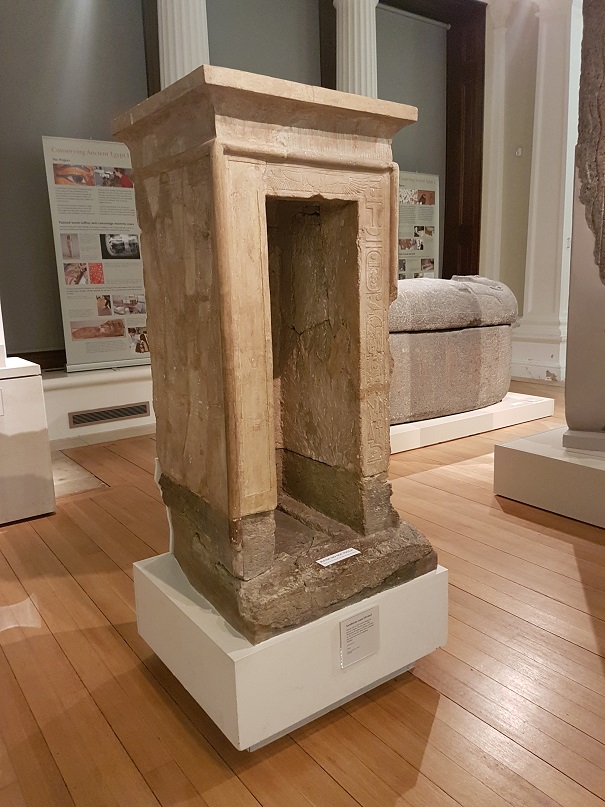
People had been observed passing this sculpture too closely, accidentally brushing against it. On one occasion, a boy had climbed up onto the front of the shrine and reversed himself neatly into the niche. Although this was an isolated incident, it increased the urgency to make the necessary improvements. Preservation of this ancient sculpture is vital: in widening the footprint of the plinth, a safer distance could be created between the sculpture and visitors.
I contacted the company who had built the two previous plinths, forwarding them a rough sketch to save time (Fig. 2). In follow-up communications, I included static label holders, required for each of the three main sculptures. To achieve design consistency, they were to match the material and design of those in our Greek gallery. For the plinth itself, we chose Corian, a hardwearing and versatile stone-like material, which was also used for the other main plinths.
The contractors visited to make a plywood template in four sections which needed to follow the meandering edges of the base very closely. The aim was to provide a snug fit but avoid contact with the surface of the object. They were confident that they had all the information they needed to proceed, but to ensure accuracy, I asked for a detailed, scale drawing – to quote an inherited mantra, ‘Measure twice, cut once!’. After some tweaking, relating specifically to the angle and height of the label holders and how they connected to the plinth, we were able to agree on the plan and set a date for installation.
Work and time spent on the practical, planning stage of a project is mostly unseen and therefore largely unappreciated. Success, however, is apparent in a job well done. Mistakes can prove costly and exceed time limits, so clear, detailed communication with contractors is key. This technical drawing (Fig. 3), showing various angles, views, and elevations, illustrates the result of this process, which took several weeks.
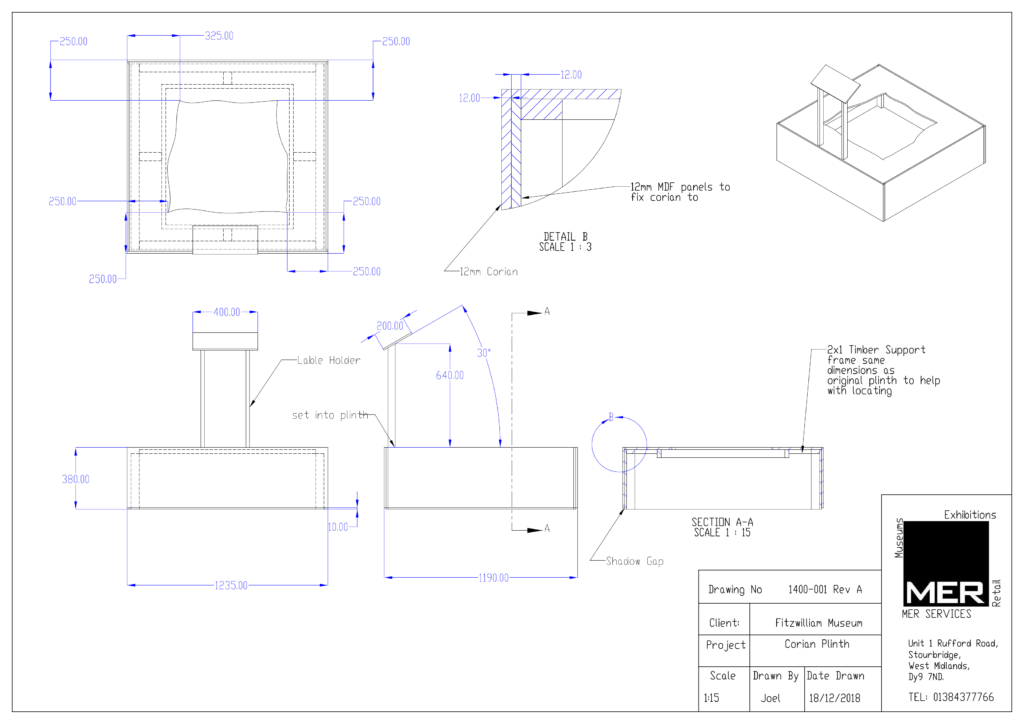
Fig. 3 Detailed drawings of the final design
A structural restoration had been made on the reverse of the shrine using bricks and poorly applied cement mortar (Fig. 4). This was to enable safe, upright display and it continues to serve this purpose. The shrine was previously displayed up against a wall, so no consideration had been given to the appearance of this practical fix.
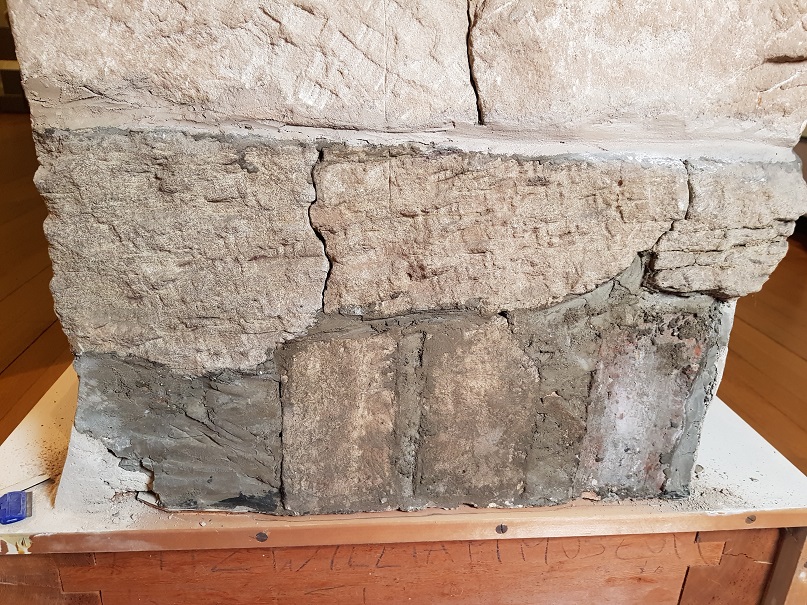
When the Egyptian galleries were refurbished and reopened in 2006, the shrine was moved into the Gayer Anderson gallery and placed in a central space where it could be viewed from all sides. During this busy project, the decision was made to hide the unsightly restoration from view temporarily behind a white shadow board, set vertically into the base.
As technicians, our priorities regularly shift around to provide vital support to our rolling exhibitions and departmental needs. Projects can overlap or happen simultaneously so temporary measures are adopted when time is short. This can sometimes move into semi-permanent status, which is perfectly acceptable if the safety and condition of an object is uncompromised.
However, ten years on, with the imminent installation of a new plinth, it was time to remove the painted board from the shrine, and improve upon the ugly restoration beneath. Minimal intervention is always preferable and, as removing the cement would almost certainly have incurred risk to the shrine itself, the plan was to work with what was already there, making the best possible improvements. I estimated the project would take a couple of months to complete as this was gallery-based work and I was restricted to Mondays, when the Museum is closed to the public.
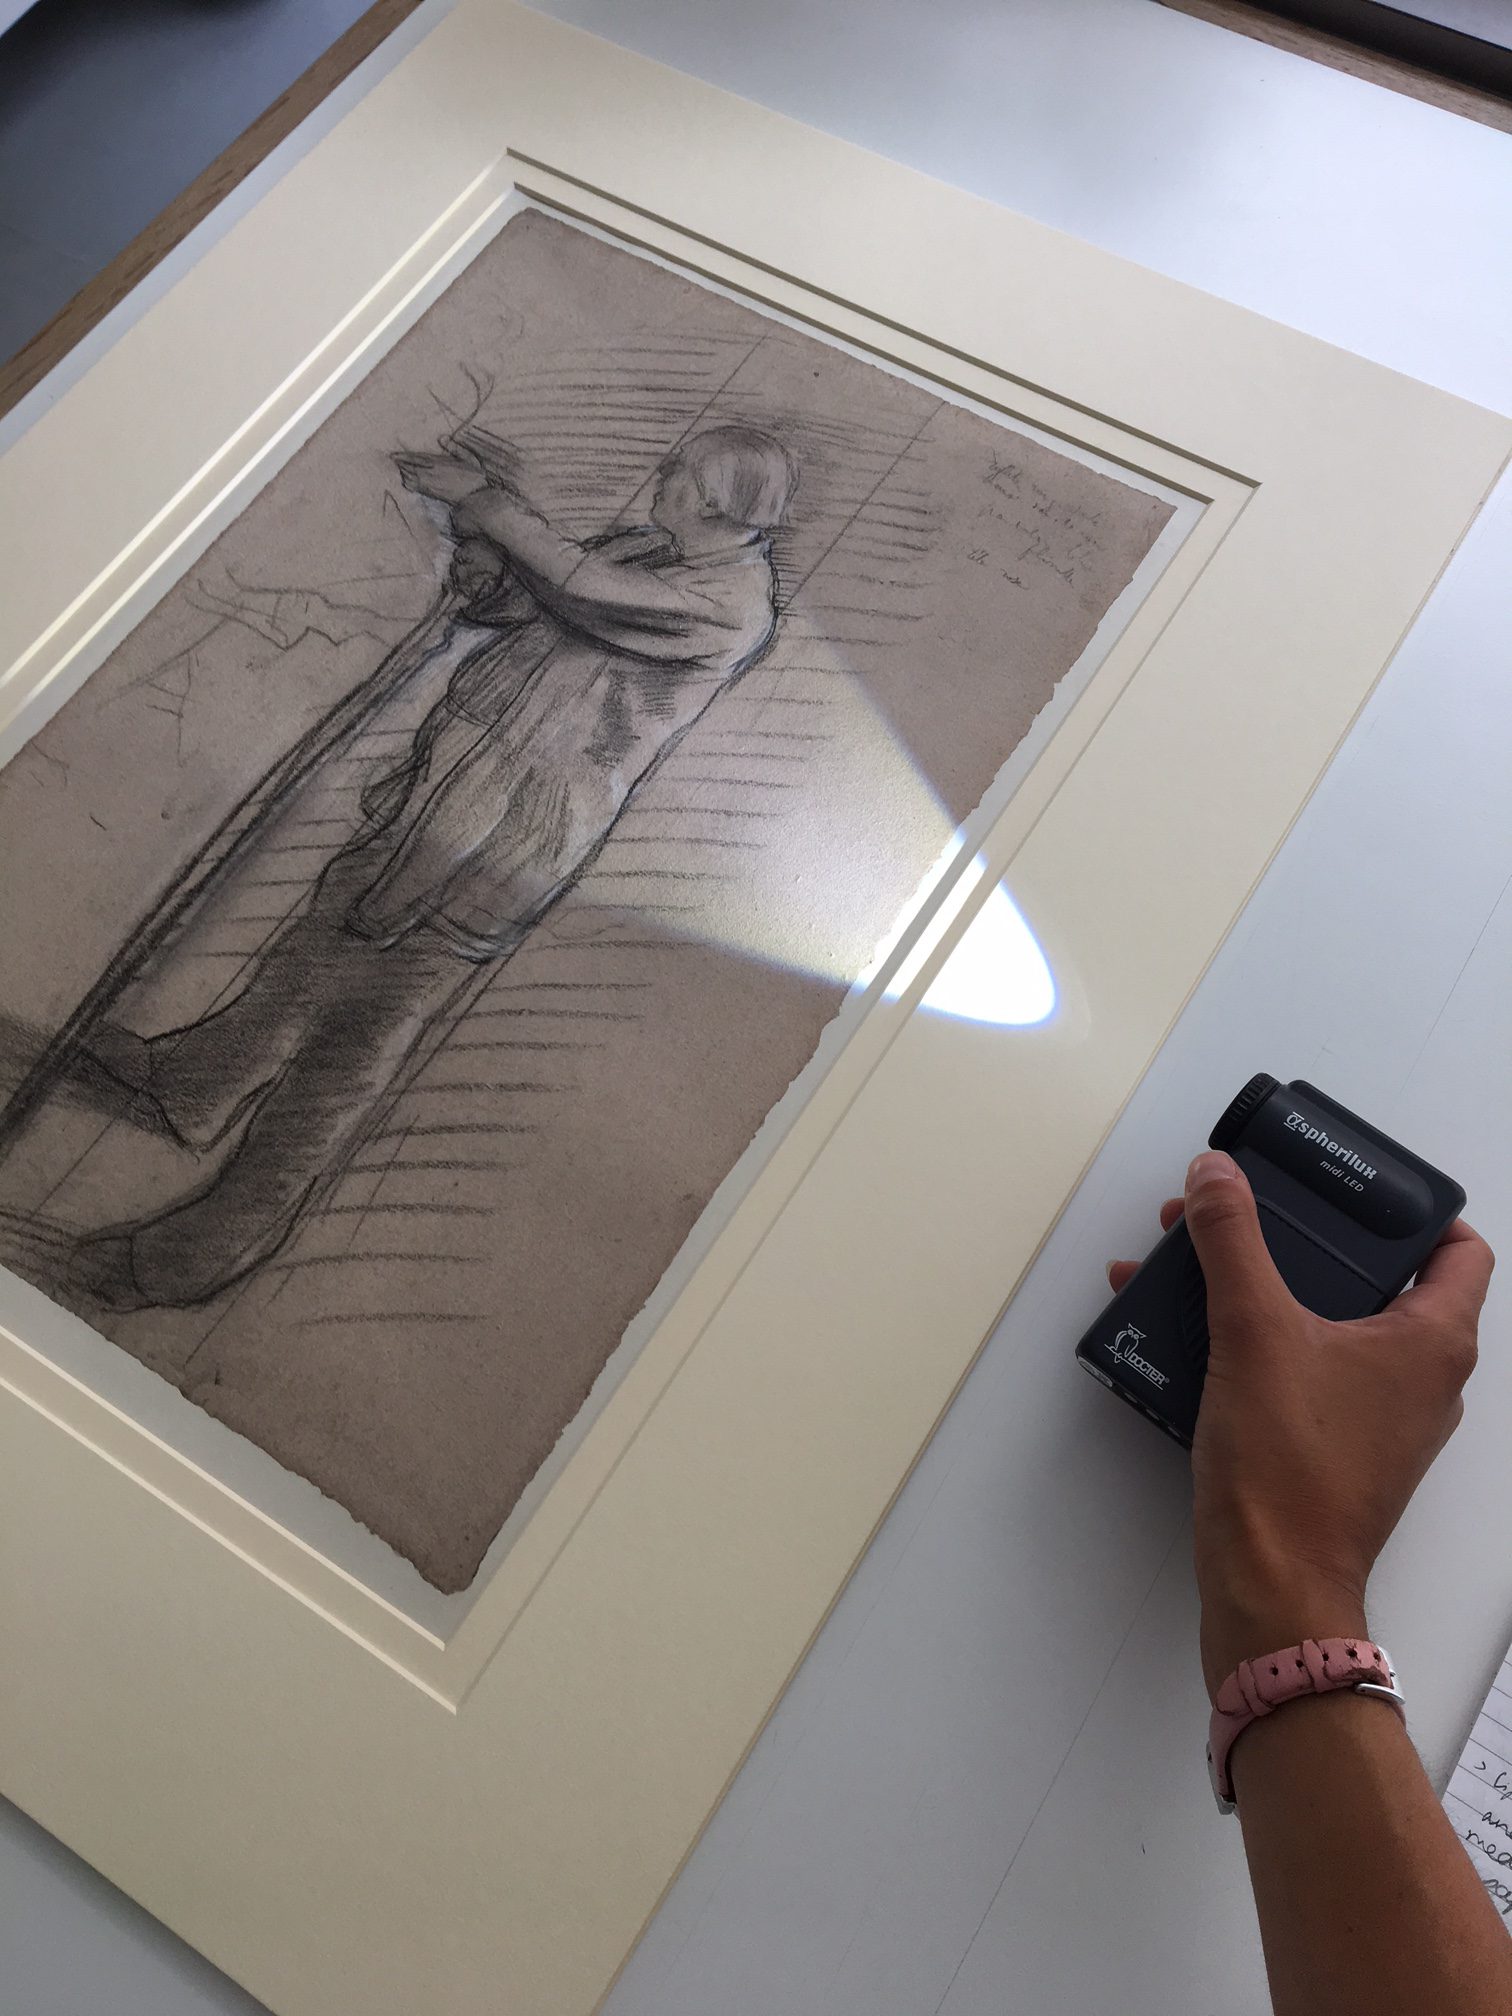
I enjoyed the opportunity and challenge presented and began to plan how I could achieve the best result. I reviewed all existing documentation on the shrine to see if I could find information that might reveal less obvious areas of fragility or cracks. I also needed to establish exactly where the actual object ended and where the restoration began. This would enable me to take the new infill just up to the edge of the object without creating too obvious a divide, but make the dividing line apparent on closer inspection. This was to keep in line with a general museum conservation rule-of-thumb that infills and repairs should be imperceptible from a distance of six feet, but clearly distinguishable from a distance of six inches.
After thorough examination and consideration, I collected the equipment and materials I would need. These included:
- A good task light and extension lead – essential for fine work in our darkened galleries
- Dust masks and gloves, and something comfortable to sit on
- Lots of sandpaper, an old chisel, blunt scraping tools, and various brushes (ranging from wide DIY types to thin fine bristle)
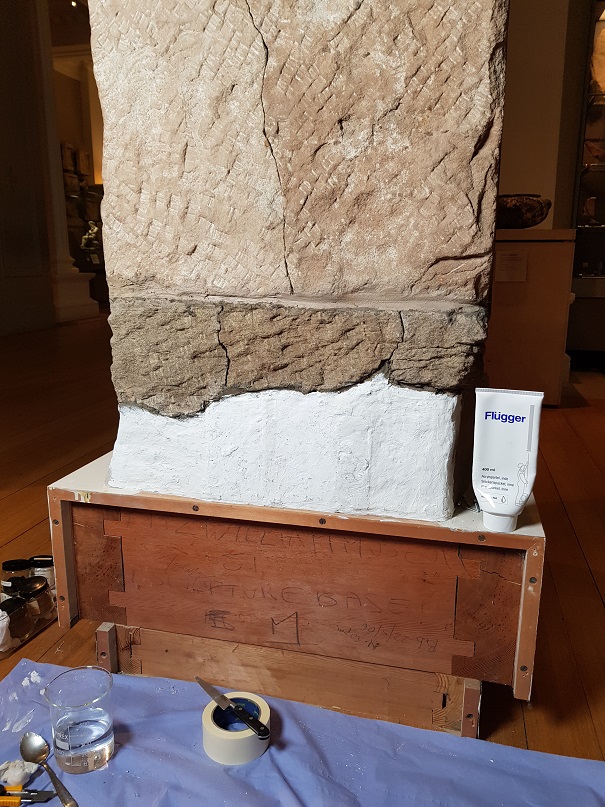
- An inert, conservation-grade filler, called ‘Flugger’ (https://www.flugger.com/en)
- Paint, both acrylic and pigment, and a vessel for water
- a Henry vacuum-cleaner
- …and my personal playlist!
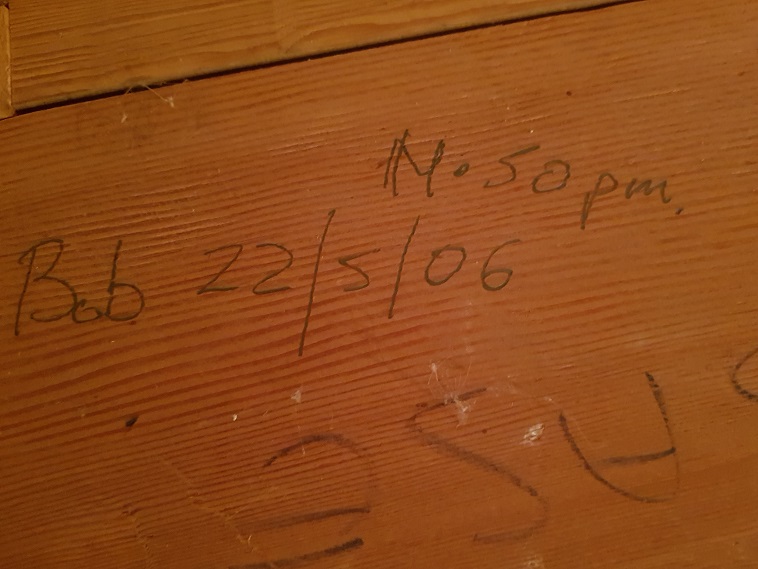
On removal of the painted backboard, it was a nice surprise to discover a more modern piece of history – a handwritten note by my retired colleague, Bob, on the underside (Fig. 5). I posted a photo of it to him, but we are still wondering what he had meant by ‘No 50 pm’!
My first job was to cut away a random, brittle piece of Formica, protruding from the base of the object (Fig. 6). Use of a Stanley knife proved futile, but a quick trip to our friendly Maintenance team produced an essential, sharp, electrical cutting tool. The Formica had been filing a small void at the base of the object, so I made a new fill from pieces of card (Fig. 7).
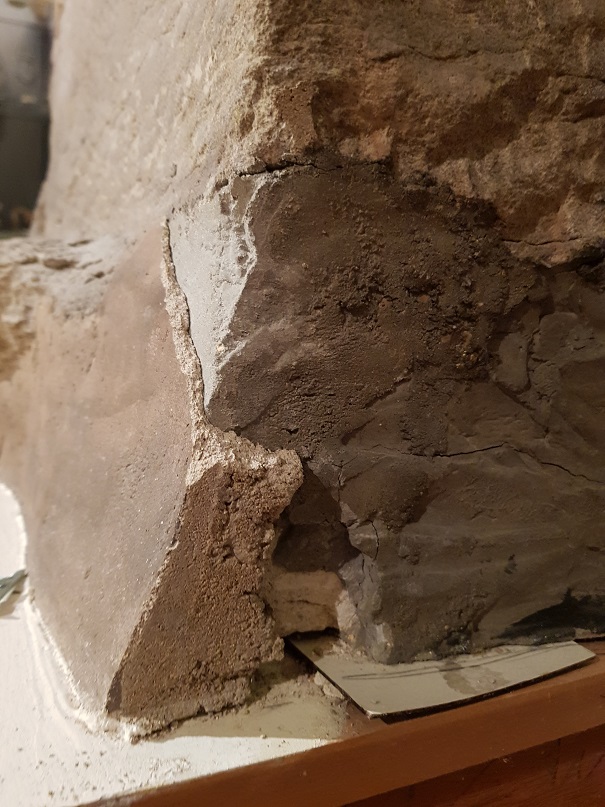
Next came the use of the filler. The crude surface of the old bricks and cement needed to be covered evenly to reintegrate the area with the sculpture visually, so it was important to make the texture match well with the original surface.
Flugger can shrink a little on drying so needed to be applied quite thinly in stages. It was important to allow it to dry fully before applying the next layer. This fitted well with the rhythm of access that framed the job. At the end of the day, I would re-attach the white board back over my work and have little choice but to allow it the entire week to set before adding another layer.
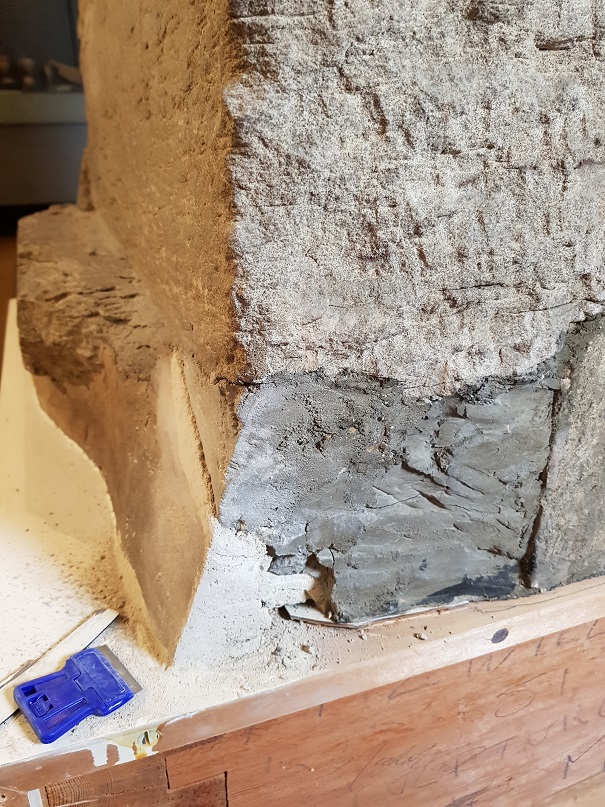
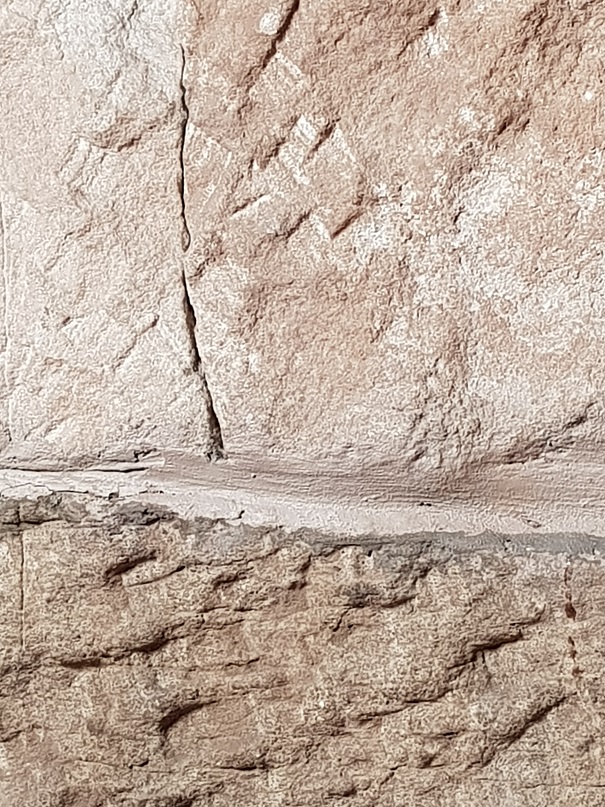
Regular sanding back of rough, crusty edges (Figs. 8 and 9) and the repeated application of Flugger continued for some time. This resulted in a lot of fine white dust and the regular need to vacuum. Although smoother than the surface of the object, the end goal was not to disguise or confuse but to create a subtle distinction between the object and the new fill.
Once I had completed this stage, I needed to decide on a suitable colour match. I took time to examine the landscape of textures and differing earth tones on the shrine (Figs. 10 and 11). This was a tricky decision, particularly because, when viewed from the side, several different colours and tones were apparent. I made colour tests with a mixture of acrylics and earth pigments, adding a matting solution to prevent surface shine. On comparison of the results, I decided on a muddy combination of them all.
I applied a base coat to the entire area and then began building up layers, stippling with a wide brush to create depth and texture. Challenges arose with the difference in colour of wet, freshly applied paint in comparison to its appearance when dry. This is a common issue, especially with pigments. In order to check on progress with the colour I had to switch off my task light regularly and stand back to judge the effect of how my work would normally be seen by visitors, under the controlled light of the gallery during open hours.
Mixing up a big enough batch of paint and covering it with clingfilm to use at the next weekly application became a helpful time-saver. Although enjoyable, colour matching can sometimes seem never-ending, with a constant potential for improvement; but the fast-approaching date for the plinth installation provided me with a deadline.
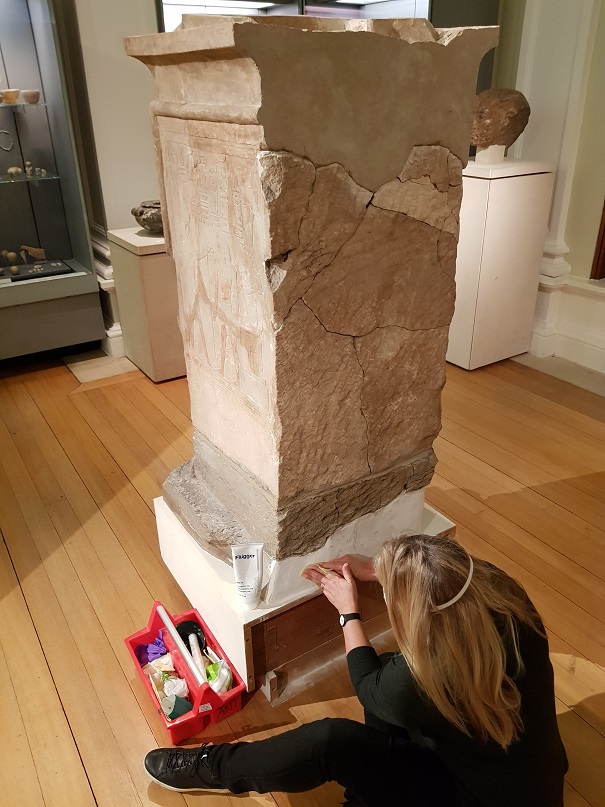
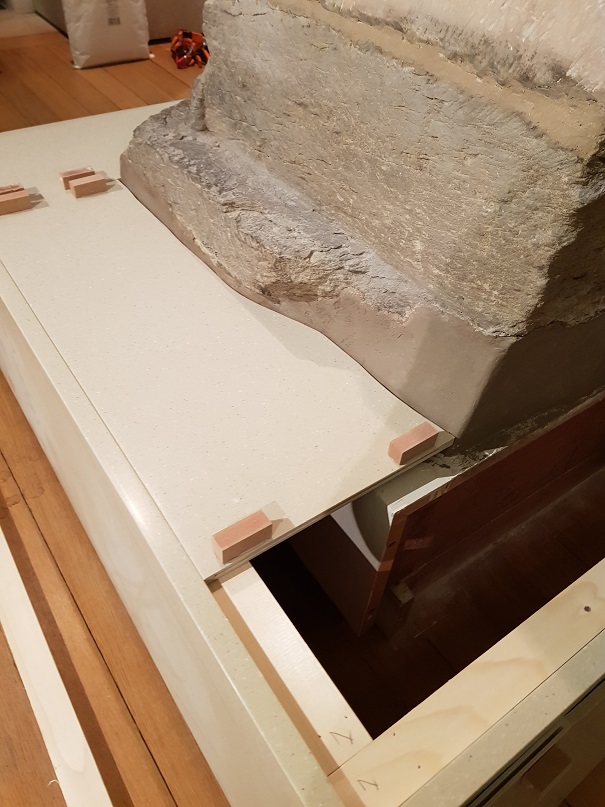
Having completed my part of the project, it was great to see the four sections of Corian arrive and fit neatly, jigsaw-style, around the object (Figs. 12 and 13). The contractor made small adjustments where needed and filled the joins, sanding back the filler to an impressive invisible finish.
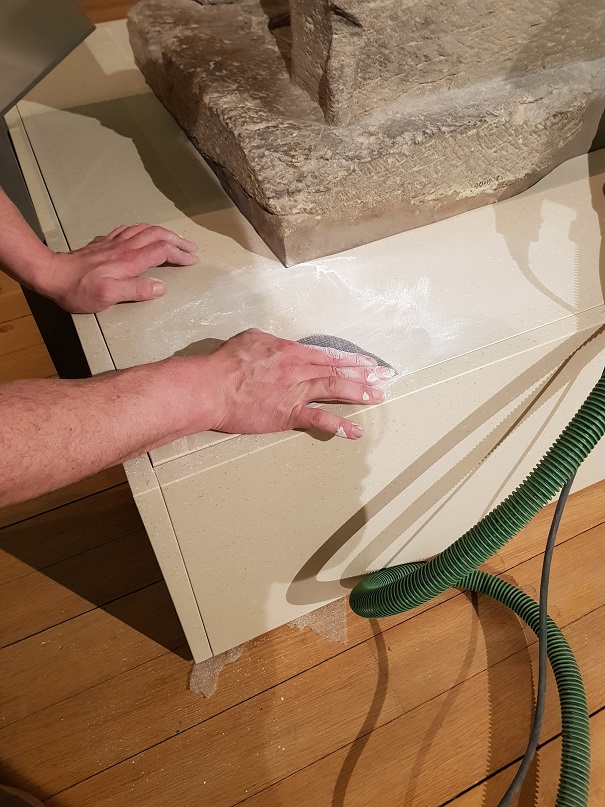
Now standing on its smart new plinth, complete with a built-in label holder, the shrine has an improved, balanced aesthetic and is better protected from general contact (Fig. 14).
Louise Jenkins, Senior Chief Technician, Antiquities Department