Dead hand talking

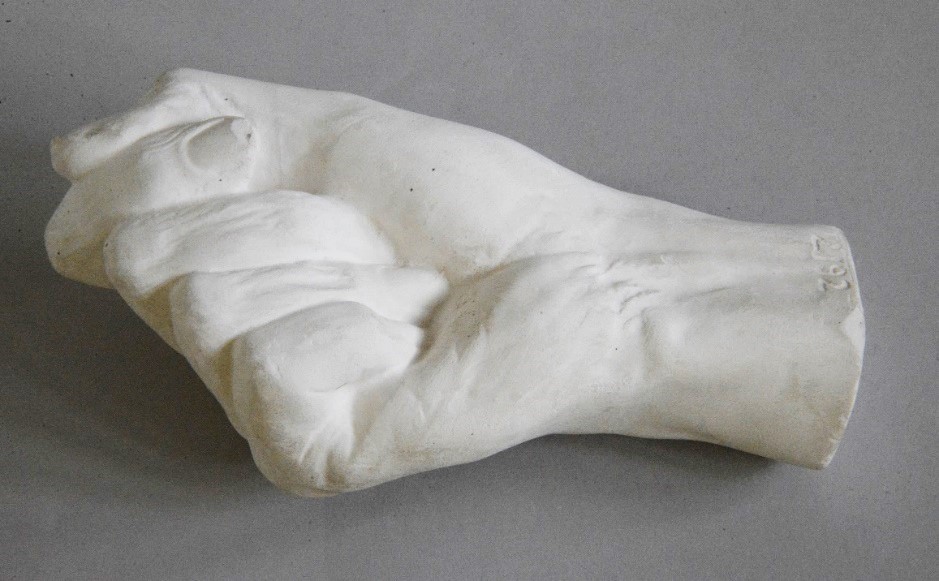
William Thackeray’s hand in The Human Touch exhibition contains tantalising clues to the trade secrets of master Victorian plaster-cast maker Domenico Brucciani.

I will admit it up front: I have been making casts of hands and faces from myself and family members on and off since I was a young teenager; so I was particularly intrigued by the cast of William Makepeace Thackeray’s hand (Museum number M.5-1944) which I recently conserved for the exhibition ‘The Human Touch: making art, leaving traces’  (open from 18th May to 1st August 2021). 

The mould for Thackeray’s hand was made on Christmas Day 1863.  Thackeray had died suddenly the day before, aged just 52.  His doctor and friend Sir Henry Thompson was called to confirm the death, and it was he who also sent for the famous and highly respected cast-maker, Domenico Brucciani, to make casts of Thackeray’s face and right hand.  The National Portrait Gallery has copies of both.
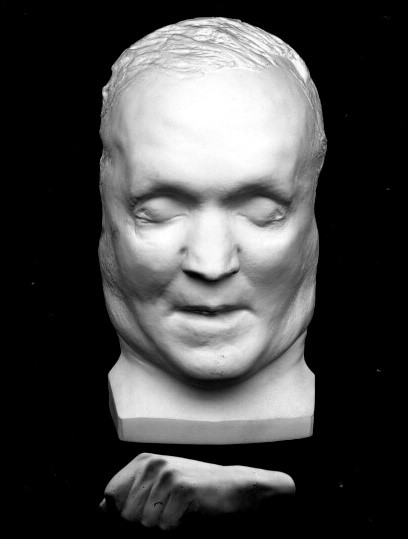
William Makepeace Thackeray by Domenico Brucciani Plaster casts
William Makepeace Thackeray by Domenico Brucciani Plaster casts of death-mask and right hand NPG 1501 © National Portrait Gallery, London

The only other known copy of the hand is the one in the Fitzwilliam Museum, which was given to us in 1944 by Henry Thompson’s son, Herbert.  It came with a note written by Henry, which says ‘It is characteristic, recalling for me the original with its long and delicate fingers, the form of the nails &c, very forcibly’. 

The cast hand has its own special red leather case, similar to a jewellery case but somewhat resembling a very small coffin.
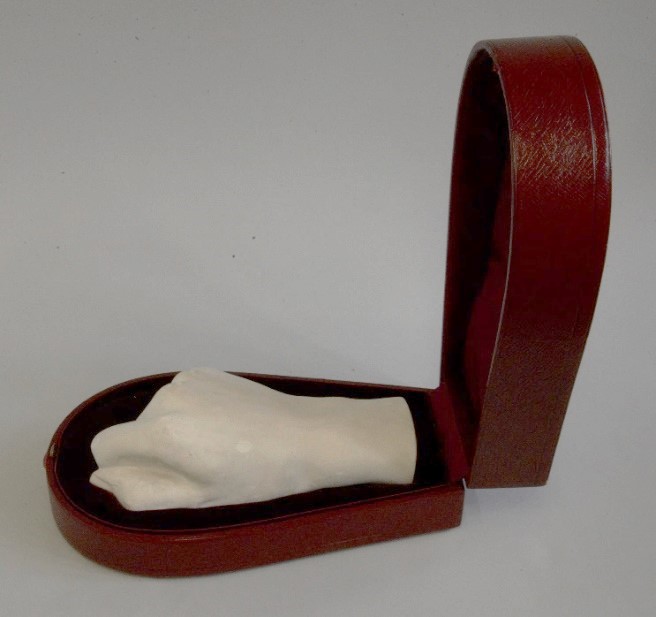
The cast of Thackeray’s hand in its original red leather case

So why did Thompson commission casts of Thackeray’s head and hand?  Although death-masks have been made for many centuries in different cultures, they were particularly popular in Victorian times.  Before photography was widely available, they served as an affordable memento of a loved one who had died.  They were also made fashionable by the pseudo-science of phrenology, which suggested that a person’s character was evident from the shape of their skull.  This stimulated demand for copies of the cast heads of famous individuals, whether they were the great and good or heinous criminals.  Thackeray was ranked second only to Dickens in his own time, and there would surely have been public interest in his death-mask.  But his family very much opposed making the mask and hand widely available and insisted that Brucciani should not make any further copies of them, so in this case they were made purely as personal mementoes.

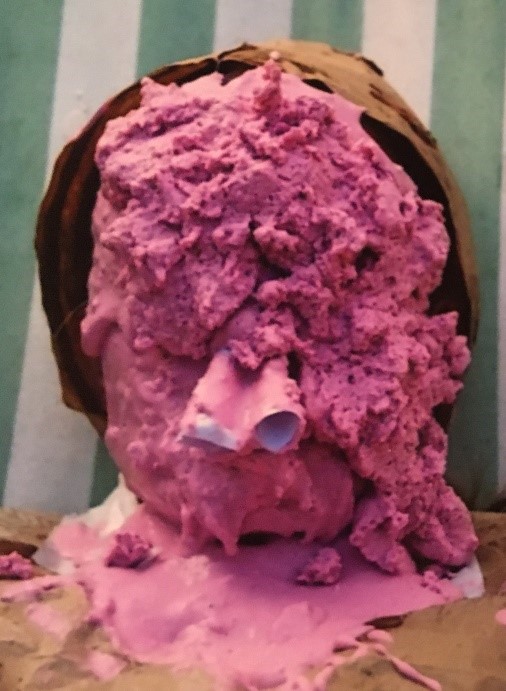
Taking a cast from a person’s head is quite an undertaking.  A few years ago, my daughter very sportingly allowed her parents to cast her face.  After generously applying Vaseline so that her eyelashes, eyebrows and downy hair would not be pulled out in the process, we made a mould using alginate powder, which is a rubbery casting compound:
Making a mould of a face
Making an alginate mould of my daughter’s face.

The pink blobs are the alginate mixture and the two cones are paper tubes which my daughter inserted up her nostrils so she could breathe during the few minutes it took for the alginate to harden enough to be removed.  This is the aspect of the process which sometimes makes people panic and pull off the mould before it solidifies: it can be pretty stressful to have to stay absolutely still and breathe only through straws up your nose while someone piles the moulding material onto your face! 

Casting the head of a real person is clearly quite invasive, whether the subject is dead or alive, and not everyone was willing to submit their very recently deceased loved one to the process.  Luigi Finili, who was at one time Brucciani’s chief moulder, said in an interview with the Pall Mall Gazette in 1892: ‘Many people prefer to have a model of their dead friend’s hand instead of the face.  They do not care to let anyone touch the face, but they do not seem to mind so much about the hand.’ Even when a death mask was made, it was often disappointing.  Jack C. Rich in his classic work, The Materials and Methods of Sculpture (1947) explained that ‘There is a tendency of the facial tissues to sag with gravitational pull when the subject is in a horizontal position.  This phenomenon is particularly marked with older and more obese persons.’

Even when a cast is made from an upright model this can still be a problem – the mask we made from my young daughter was also quite distorted by the pressure of the moulding material on her face.  A cast from life may also fail to resemble the subject because it lacks colour and expression, while features like hair and spectacles which contribute strongly to many people’s appearance are hard to reproduce in a plaster cast.  Comparing the death- mask of Thackeray with even a very static-looking photograph of him from 1855 gives an idea of the problem. 
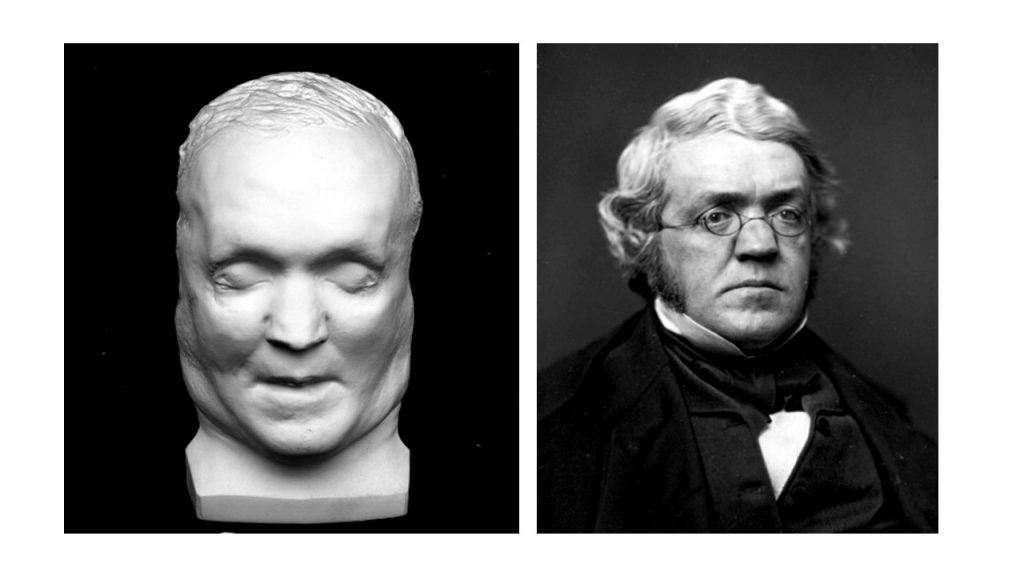
Daguerreotype photograph of William Makepeace
Daguerreotype photograph of William Makepeace Thackeray by Jesse Harrison Whitehurst (1819-1875), digitised by Boston Public Library 2007. Licensed under the Creative Commons Attribution 2.0 Generic license

‘By some mischance the [face] was not agreeable, [with] none of the charm of expression so attractive in life & it was rejected.  But the hand is a portrait and recalls to me very strongly the character of the original.’

When looking in detail at the cast of the hand, it is clear that it was made by a very skilled craftsman.  The plaster is fine and there are no air bubbles visible at all.  This can be very hard for an amateur like me to achieve.  The detail on the surface is very clear, with the grain of the skin visible in places when the hand is viewed under the microscope.  Small losses from the surface reveal more about the technique Brucciani used to achieve this fine detail.  He seems to have poured a very fine plaster mix into the mould first to get a thin ‘skin’ layer, allowing this to set partially and then filling the rest of the mould with a coarser plaster mix.

Brucciani’s skill at finishing the cast also makes it hard to tell if the mould was made in sections or cast in a soft mould.  A clenched human hand has a number of ‘undercuts’ which would make it impossible to remove from a hard plaster mould made in a single piece – it would need to be made in sections.  The traditional method of doing this involves using a fine wire or waxed thread to split the mould around the hand.  This technique is tricky to master because it relies on expert timing.  Threads are laid on the surface of the hand in the places where splits in the mould are needed.  They are then pulled out at exactly the right moment while the plaster is setting, to split the mould so it can be removed in sections.  If the thread is pulled too soon the soft plaster flows around the place where it was and re-joins the sections of the mould; if it is left too late, the thread may break when it is pulled or even be unable to split the hardened plaster.

The alternative to this hard plaster mould method is to use a soft moulding technique, similar to the alginate we used for my daughter’s face mould.  Alginate was not available in 1863, but soft moulds made from gelatine had recently been invented.  It is sometimes said that this technique was invented around 1865, when it was used by another well-known cast-maker, Giovanni Franchi, to cast Pisano’s 14th-century marble pulpit in Pisa Cathedral for the famous V&A cast collection.  But Brucciani was already using the technique in 1861, when he got into trouble with the British Museum for allegedly staining a Classical mausoleum while casting it using gelatine.  He was actually banned from using the process at the British Museum again without express permission from the Museum’s Trustees – but of course he was still free to use it in projects for other clients.

Gelatine moulds were suitable for making both small and large casts and had the advantage that the final result would not have the seam lines that you get when casting from hard moulds made in sections.  Brucciani’s skill was such that it is not easy to tell whether there were seams on Thackeray’s hand that have been removed; but the stumps of two iron pins in the wrist may provide a clue.
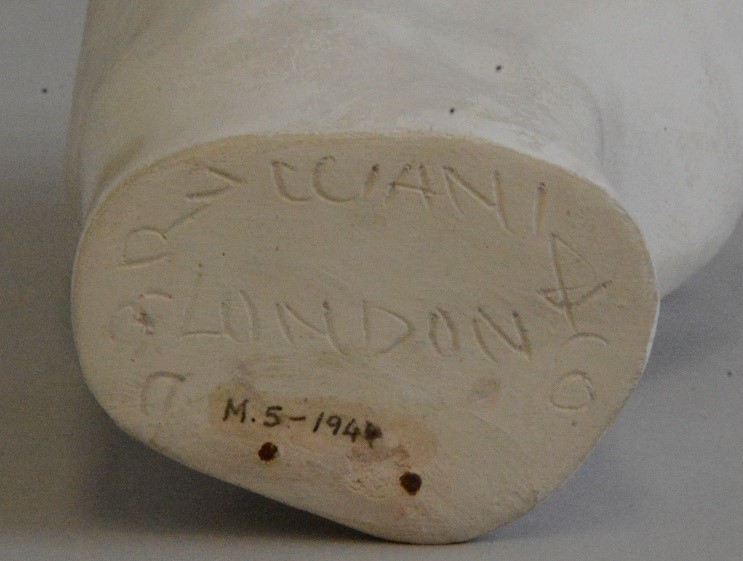
Brucciani’s signature
The pins are visible as two brown dots at the end of the wrist, under Brucciani’s signature.

Plaster heats up quite a lot as it sets.  When using a gelatine mould it is important to remove the cast as soon as the plaster is firm enough so that this heat doesn’t melt the gelatine, or the mould cannot be reused.  The iron pins may be the remains of a hook used to help pull the cast out of the soft mould quickly.  Once the cast was removed, the hook could be snipped off as it would no longer be needed. 

Spending time with the cast of Thackeray’s hand has made me wonder about the maker, Domenico Brucciani.  He came to England from Italy around 1829, when he was just 15, and joined his uncle’s plaster-cast business in Covent Garden.  He stayed in England until his death in 1880.  Unlike most Italian itinerant ‘image-sellers’ at the time, he built a very successful business known for quality, riding a wave of democratization of art, both for people’s homes but also for the great museums and art schools of his day.  He headed a large firm which was responsible for many casts in the V&A, British Museum and Royal Academy, and exhibited his work at the Great Exhibition of 1851 and the International Exhibition of 1862. 

A fascinating recent book by Rebecca Wade, Domenico Brucciani and the formatori of 19th Century Britain (2018) discusses his career and the plaster-casting industry in depth, and yet, despite his renown, Brucciani remains a rather shadowy figure.  A short obituary published in The Builder in April 1880 said ‘although chiefly a plasterman in calling, he was an artist at heart’.  The beautifully made death-hand of Thackeray bears witness not only to the famous writer, but also to the craftsman who made it.

‘The Human Touch: making art, leaving traces’  is open from 18th May to 1st August 2021, and tickets are available to book online

Flipping Admiral Russell’s Frame: how and why Fitz conservators turned a baroque masterpiece upside-down

This magnificent carved and gilded frame was the Fitzwilliam Museum’s birthday present to itself in 2016, when the Museum celebrated its 200th anniversary.  It was acquired with generous support from the Friends of the Fitzwilliam, as well as the V&A Purchase Grant Fund, Henry Moore Foundation, Finnis Scott Foundation, Old Possum’s Practical Trust and private individuals.  It is a fantastic example of a baroque trophy frame, made for Admiral Edward Russell in the 1690s.  The image shows what the public sees in the gallery, but conservators need to examine every nook and cranny during conservation treatment.  It can be quite a challenge to access all areas with an object as fragile and heavy as this frame, so we had to be creative to solve the problem.

Admiral Russell’s Frame
M.2-2017 Admiral Russell’s Frame

The frame is made from carved and gilded lime wood, and is highly elaborate and dramatic, with figures of Hercules on the left and Mercury on the right.  The bottom of the frame shows the winged figure of Fame with two trumpets, one for good publicity and one for bad.  The top is decorated with Tritons (demi-gods of the sea), and realistic seashells rising out of the waves, as well as two cherubs, all surrounding Russell’s coat of arms.  Other details such as shields, helmets and the prow of a ship all show that this was a military trophy frame made to celebrate Admiral Russell’s naval victories against the French in 1692.   There is much more information about the frame and its makers in this short film, and an excellent account of how trophy frames arose out of the ancient practice of taking military trophies from the field of battle in this 2019 blog by Lynn Roberts, a picture frame historian.

The frame was put on display as soon as it came to the Museum, because the public and benefactors who helped acquire it were keen to see it without delay.  There was no time to conserve it in 2016, but recently we had a chance to examine and treat it, ready for a move to Gallery III.

From the start, we knew that conserving this object would be a challenge.  The splendid carving is actually very fragile and worm-eaten, but the whole frame including the mirror is also extremely heavy, weighing around 70kg.  Just moving it safely is tricky, let alone getting access to all sides for conservation treatment.  How could we turn it over to look at the back without the frame collapsing or crushing itself under its own weight?

We started by working on the front to make it completely secure before turning the frame over.  Lily Griffin, who is on a work placement with us for 10 months as part of her conservation MSc course at University College London, worked on the frame with me, and together we cleaned the gilded surface.

Conservator cleaning frame
Lily Griffin cleaning Admiral Russell’s Frame

The gilding is only microns thick and the adhesive attaching it is very sensitive to water, so after vacuuming the surface we swabbed the gilded areas with white spirit.  There was a lot of tarry dirt in the crevices of the carving, which probably comes from fireplaces, candles and tobacco being smoked near the frame where it hung, first in Admiral Russell’s home at Chippenham Park, and then with subsequent owners.  We were careful not to over-clean, but even so, we collected copious numbers of filthy swabs.

Dirty swabs they produced when cleaning an object
Conservators enjoy looking at all the dirty swabs they produced when cleaning an object, and this was a particularly satisfying quantity!

Unfortunately Mercury’s legs have lost most of their gilding and also the gesso layer underneath, leaving bare lime wood exposed.  This might be due to someone attempting to clean the frame with water and having the surface dissolve in front of them.  This would have been very stressful to watch if it wasn’t intentional, and the thought of it reminds me of Mr Bean destroying the portrait of Whistler’s mother – my favourite ‘conservation disaster’ video of all time.  It is possible that someone intended to strip the whole frame and re-gild it, but if so they clearly thought better of it.

As you might expect from an object over 300 years old, there was quite a lot of old damage, ranging from small knocks and chips to a whole section of the lower left corner which seems to have been dropped at some stage and has extensive repairs.  Lily and I spent time securing worm-eaten wood and loose gilding, making small repairs and retouching the most obtrusive old losses so that they would not distract the eye. Once all this was done, it was time to turn the frame over and work on the reverse.

Flipping fragile objects over to work on the back is something of a ‘signature technique’ for me, having done it for an Egyptian cartonnage coffin and a cartonnage mask, both on display at the Museum.  But this frame was much, much heavier than those objects and I was pretty nervous about it.  Luckily, we have a superb team of conservation technicians at the Fitz, all of whom have experience with large, heavy and delicate objects, and all of whom were very helpful in lending both their brains and their muscles to make sure this job went without a hitch.

Firstly, we ordered a transport crate for the frame, of the kind typically used to pack  paintings travelling on loan.  This can be used in future as a storage crate if needed.  Our carpenter then expertly modified the crate with some extra panels to make it work for the unusual proportions of the object.

We placed the frame in the bottom of the crate and then packed it out with blue vacuum bags.

Frame in the crate
The frame in the base of the crate, just before packing the blue vacuum bags around it

These soft bags are filled with tiny beads and have a valve that lets you extract the air in a controlled way until the bag becomes rigid.  Using four large bags, we covered all of the carved areas and manipulated the soft padding so it filled the gaps and conformed closely to the shape of the frame.  When the air was extracted using hand pumps the blue bags solidified to make a completely tailored rigid support for the carving.

frame completely covered and supported by the blue vacuum bags
The sides and front of the frame completely covered and supported by the blue vacuum bags

Next, we packed out the rest of the crate with foam and bubble-wrap to fill the space inside completely, and lastly put a sheet of chipboard over the top.  The whole lot was secured with gaffer tape: it couldn’t be screwed closed because that would stop us lifting the crate off after turning it over.  By now the whole assemblage weighed about 100kg.

The crate packed, closed and ready for turning

Then for the moment of truth: eight of us lifted the crate and turned it over, replacing it on the table.

Staff flipping the crate
The first 90 degrees of the flip….
Staff flipping the crate
…And over it goes!

The gaffer tape was removed and the transport crate lifted away to reveal the back of the frame.

Lifting off the crate from the frame
Lifting off the crate for the moment of truth
Staff seeing the back of the frame for the first time
Seeing the back of the frame for the first time, and sighs of relief all round that everything went well

From the back you can clearly see that the frame is made from just a few large timbers, which would originally have been a similar size to railway sleepers.  The skill needed to create this object is impressive.  It may have been made by the carvers who were permanently employed at the Royal Dockyards in the 1690s, or perhaps by a freelance craftsman working near Chippenham Park, Admiral Russell’s home in Cambridgeshire.  If you want to know more about the possible makers, there is a blog by former Fitzwilliam Museum Director Tim Knox which discusses this in more detail.

Happily we found that the back of the frame was in surprisingly good condition and did not need any treatment apart from cleaning.  We took the opportunity to make sure the mirror was secure in its housing and also replaced the heavy modern oak backing board with something lighter to make the frame easier to handle.  Trying to reuse the old screw holes as much as possible to avoid new damage to the original wood, we used three smaller pine boards to brace the back.  They were covered in aluminium-backed tape to stop acidic gases in the pine from coming out and affecting the frame or other objects in the stores and galleries.  The mounting bars for hanging the frame were also attached to the new bracing boards.

Once conservation was complete, the frame was secured in the transport crate and wheeled to Gallery III. 

Staff moving the crate through the galleries
Admiral Russell’s Frame travelling smoothly in its crate through the galleries, on the way to its new home

The conservation technicians masterminded the delicate process of hanging the frame on the wall, using a stacker to lift it into place.

Placing the frame on the stacker
Placing the frame on the stacker which lifted it into position
Staff positioning the frame precisely on the wall
Positioning the frame precisely on the wall. The blue tape marks show exactly where it need to hang
Technician fixing final screw in frame
Tightening the final screw

The frame looks great against the deep aubergine-coloured walls and can definitely hold its own against its new, equally flamboyant neighbour, the portrait of the Countess of Southampton as ‘Fortune’ by Anthony Van Dyck!

Like all the best projects, this has been a team effort involving not just conservation technicians and conservators, but staff in Facilities, Finance, the registrars and of course curators.  A particularly big thank you goes to the Antiquities Department who let us borrow their Seminar Room so we could do the conservation work in a COVID-safe fashion.  Everyone has been very generous with their time, often dropping everything to lend a hand and always being unfailingly good-natured.  It has been a huge pleasure to work on this together.

Being a museum courier, COVID style

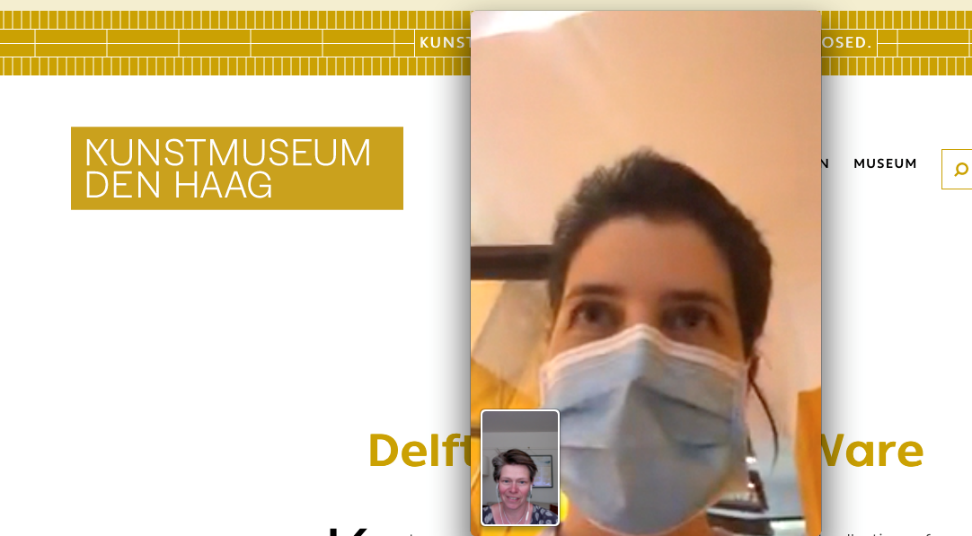
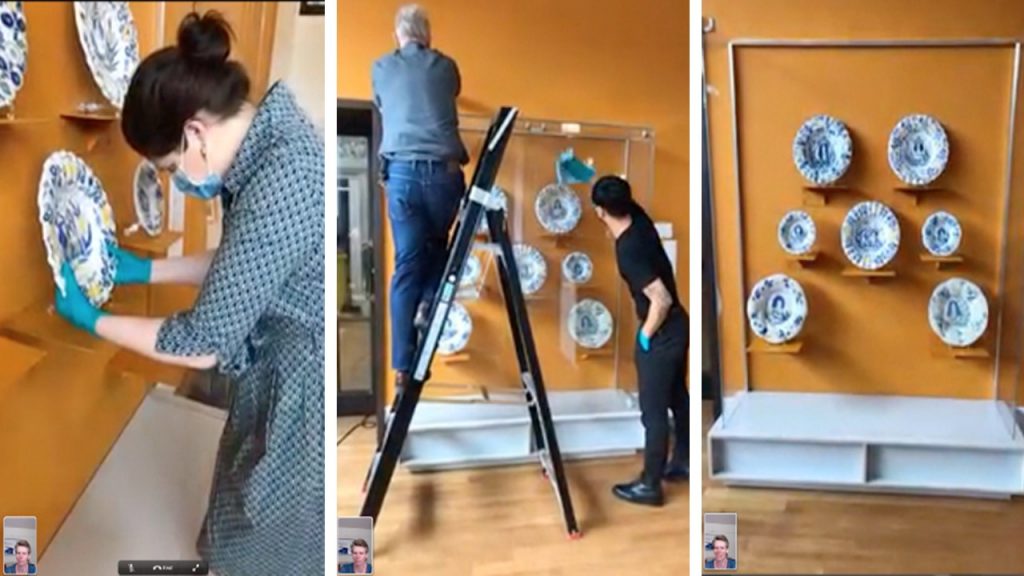
Fig. 1 – Screenshot of curator Susanne Lambooy and the author talking during a virtual courier trip to the Kunstmuseum in The Hague

International courier trips are often seen as one of the benefits of a museum career. When objects are lent to museums overseas, they are usually accompanied by a member of the collections team to oversee their safe transport, handling, and installation at the venue. It’s an amazing chance to go behind the scenes at some fantastic museums in lovely locations, and you might just squeeze in a few hours’ sightseeing somewhere exotic… Of course, it’s not all glamour! You can just as easily be spending long hours in a cargo shed at an airport, driving long distances in a lorry, or get stuck in customs, without many opportunities for a break or a meal, while making sure your precious artefacts are supervised at all times. But COVID has changed all that; and that is why in June I completed my first ever ‘virtual courier trip’, to the Kunstmuseum in The Hague.
The Fitzwilliam has loaned 15 pieces of English Delftware pottery to the Kunstmuseum for a show called ‘Royal Blue: William and Mary’s Finest Delftware’. The objects were sent out to The Hague in early March, accompanied by Tim Matthews from the Applied Arts department at the Fitz. They had just arrived at the museum when the whole of the Netherlands went into lockdown and Tim had to rush back to the UK to avoid becoming stranded. All plans to install the exhibition were abandoned and the ceramics were placed in store in their travelling crates without being unpacked.
Ten weeks later, the Kunstmuseum was planning to reopen and install the exhibition. But many institutions have lent objects for the display, sometimes from countries which, like the UK, were still in lockdown, and sometimes from museums with staff on furlough. For the exhibition to be possible, we all had to adapt our usual procedures. In this case, we decided to do the courier trip via a video call.
We used FaceTime, which meant I could follow what was happening in The Hague and also look at the loan documents I needed on the computer. (Other platforms could have worked in the same way for a PC.) At the other end, curator Suzanne Lambooy, conservator-restorer Maud Schermer, and the conservation assistant team used phones to video every moment of the process in a live session.
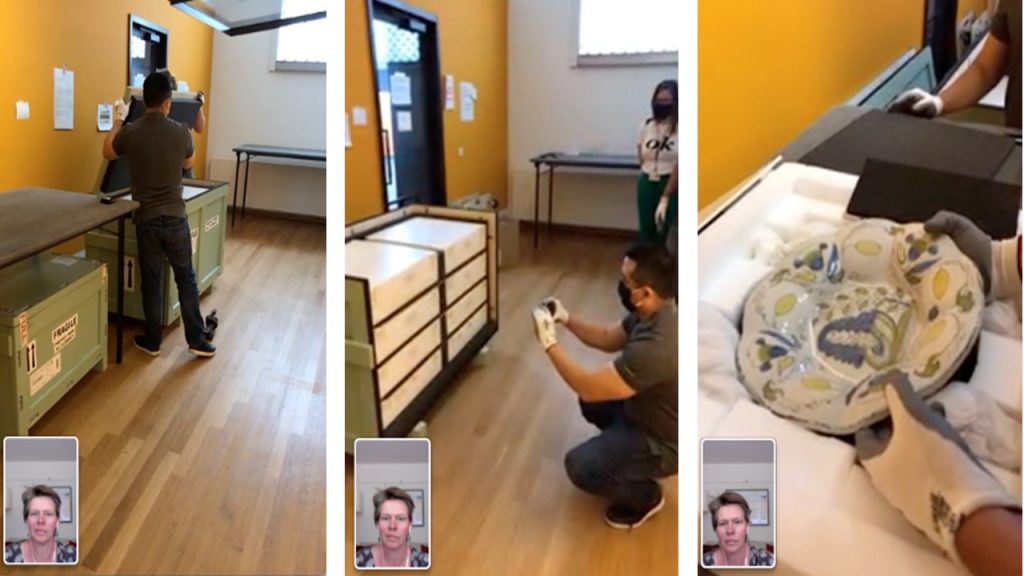
After introducing ourselves, we got on with unpacking the objects. The conservation assistants opened the crates and started to unpack, photographing every stage to make repacking easier at the end of the exhibition, and to have a record of anything untoward that might have happened during the journey. Luckily everything was in perfect order.

Fig.2 – Opening the crates and unpacking the ceramics

All the ceramics were laid out on padded tables next to the display cases and Maud started to check them over. The condition of objects when they leave the Fitzwilliam is documented thoroughly in condition reports and photographs, so Maud and I checked each piece carefully against the records to make sure that there was no new damage. Delftware is very fragile and even well-preserved examples almost always have lots of cracks and chips. Delftware needs to be handled very carefully because it is so easy to damage. Happily, all the staff at the Kunstmuseum are very familiar with this material, and everything they did was exemplary! Maud is a specialist ceramics conservator so was also the ideal person to be doing the real-life condition checking.
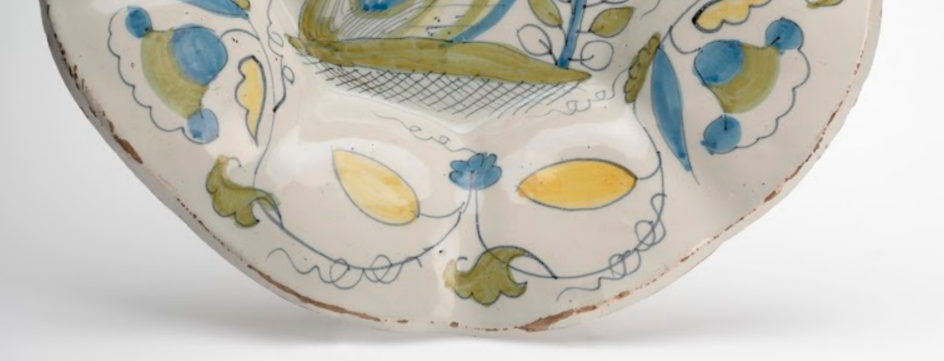
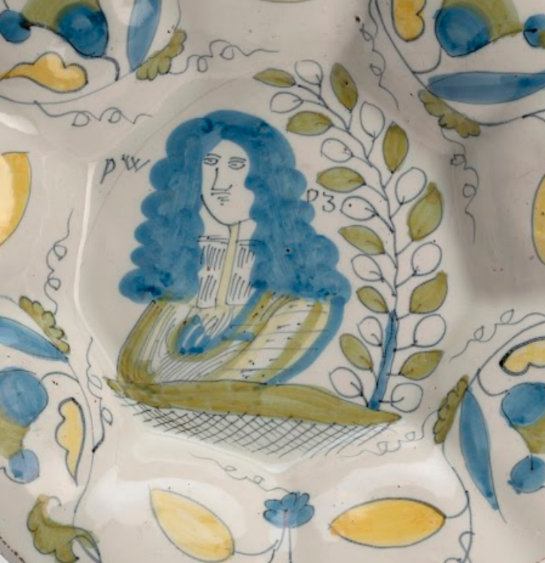
Looking at the objects in detail was one of the highlights of the experience for me. All of them are decorated with images of William and Mary, who ruled both England and Holland from 1689 to 1702. The pieces are hand-painted and have quite stylised motifs – for example, the things which to me look a bit like lemons are actually intended to be tulips:

Fig. 3 – Detail of C.2633-1928, a delftware dish, late 17th century, showing stylised yellow tulips

Similarly, the heavy blue clusters of circles topped with birds on this plate are actually a very stylised version of the rock-and-bird motifs found on some Chinese ceramics which were popular in the same period.

Fig. 4 – Detail of C.2483-1928, a delftware dish, late 17th century, showing the stylised imitation of the Chinese rock-and-bird motif on the rim

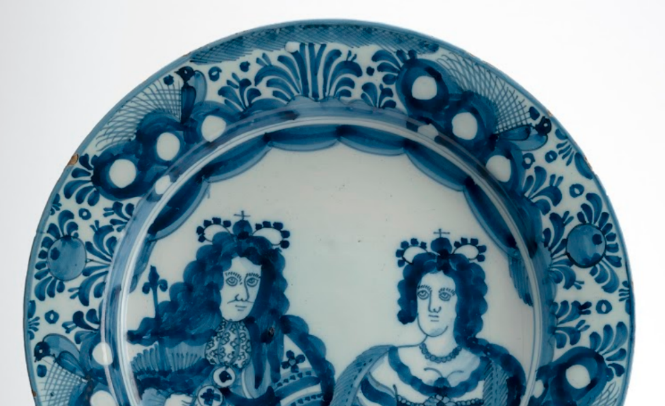
It was also fun to compare the images of the king and queen, which varied from the frankly jaded…

Fig. 5 – C.2482-1928, a delftware dish, late 17th century, detail

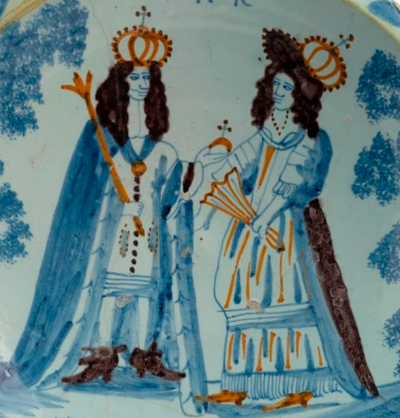
to the quite frisky…

Fig. 6 – C.1633-1928, a delftware dish, late 17th century, detail

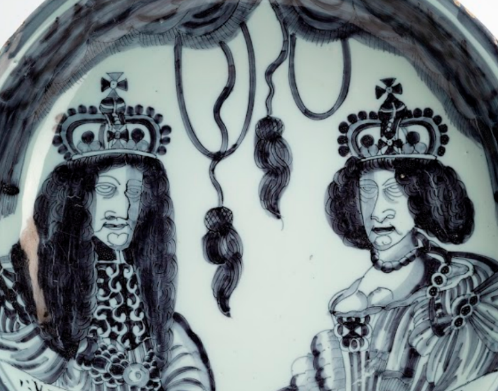
and, in this case, reminded us rather unfortunately of Jabba the Hutt!

Fig. 7 – C.2633-1928, a delftware dish, late 17th century, detail

All the designs are unique and quirky, and I could have spent a lot longer enjoying their different characters; but we had to get on with installing the objects in the displays. Curator Suzanne and conservation assistant Bao worked on arranging the dishes and jugs in the display cases, which were painted in William and Mary’s signature orange colour. The blue-and-white ceramics, with their dashes of yellow, really sing out against this background.

Fig. 8 – The Kunstmuseum team installing the ceramics in a display case. Here the plates are arranged in an ‘M’-shape for Mary, and the case next door is arranged in a ‘W’-shape for William.

Soon the displays were finished and the cases could be closed down and locked: they won’t be reopened now until the exhibition closes and it is time to pack everything for transport home.
This adventure in ‘video-couriering’ went amazingly well, not least because the members of the Kunstmuseum team were very experienced and professional, and also lovely people to work with. We had a few challenges with the signal dropping out and batteries going flat – video calls use masses of power so the phone used for the session needed to be on charge for quite a lot of the time. (A portable battery charger would be a big help here!) The video quality is never brilliant so it is also crucial to have good photos of the objects when doing the condition assessments: the main benefit of the video at the condition-checking stage is to help make sure we are all talking about the same thing.
Typically, exhibition installations can get pretty hectic, with precision timing needed to install pieces from multiple lenders in a short space of time. The scene at the Kunstmuseum was almost eerily quiet by comparison. This was partly because only about 15% of their staff were on site, to maintain social distancing as the museum gradually returned to work. Naturally everyone was also wearing a mask and gloves at all times. I asked how they were finding using video to work with ‘couriers’. On the plus side, the exhibition space itself does not get too crowded, and if more than one lender needs to supervise a particular display case being closed for the exhibition, they can attend virtually at a time to suit all. This makes some of the logistics easier to arrange, and reduces time pressure. The logistics of organising even virtual installations were tricky at the time because so many museums were closed and had their staff on furlough, but this has now eased.
This experience has challenged my assumptions about couriering objects on loan in a very positive way. It is encouraging to realise that by being flexible we can develop safer (at the moment) and also more environmentally and financially sustainable procedures, without compromising the safety of objects travelling on loan. And collaborating with the lovely Kunstmuseum team online was almost as refreshing as actually going to The Hague after so many weeks of working from home!

Sophie Rowe, ACR
Conservator of Applied Arts
Fitzwilliam Museum

Unfolding the Lennox-Boyd Fan Collection – Part 2

The Conservation Project

Fans are complex, three-dimensional objects made of several types of material. Conservation of fans from the recently acquired Lennox-Boyd collection has been a rewarding collaboration between conservators in the Applied Arts department and the Paintings, Drawings and Prints (PDP) department. Phase 1 of the project involved a condition survey, photography and treatment of a small sample of fans. Phase 2 involved a re-housing project, scientific analyses and conservation treatment in preparation for the current display at the Fitzwilliam Museum. A selection of 51 fans was made for the display, reflecting the variety in age, manufacture and condition of the Lennox-Boyd collection. This post discusses the project from a Paper Conservator’s perspective.

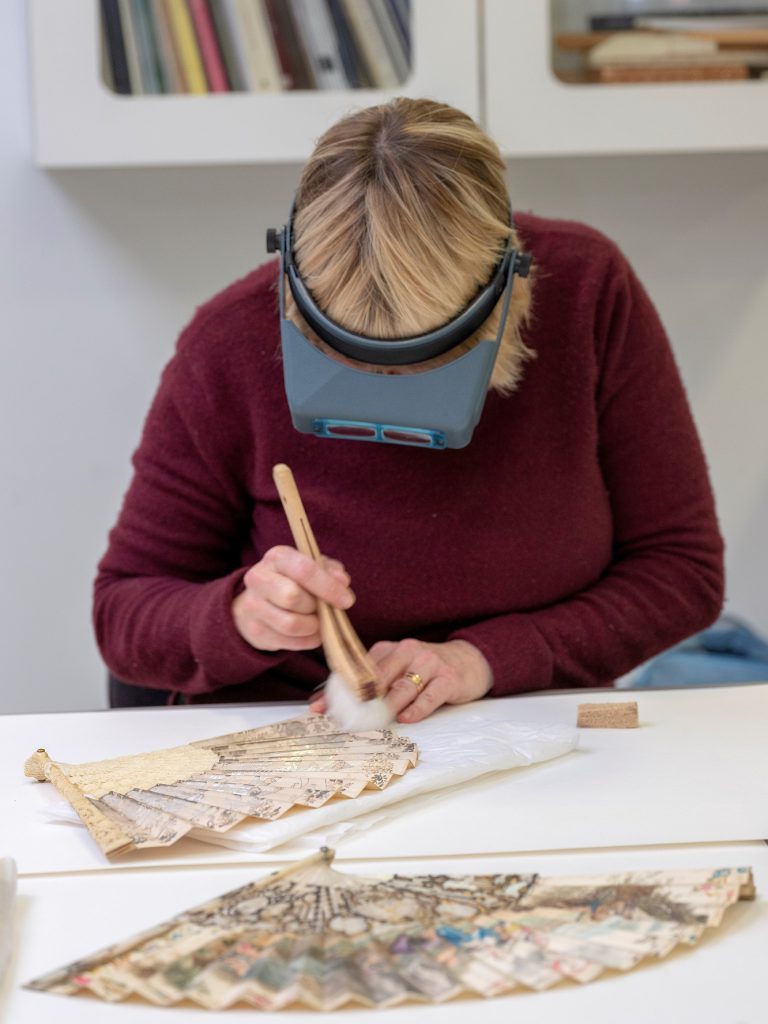
Removing dust and dirt with a soft brush

Paper Fans – Condition

Although fan leaves can be made of materials such as vellum, bone and silk, the predominant material used is paper. The Lennox-Boyd collection contains over 400 paper–based folding fans and flat paper leaves. Of all the components that make up a fan, it is the leaf which suffers the most damage and deterioration. The quality and condition of fans in the Lennox-Boyd collection reflects their wide-ranging variety, age and history. Many fans show signs of ownership and long use: accumulated dirt and assorted tears and splitting along the pleats are the most common types of damage. Additionally, fans can be harmed by exposure to light, fluctuating temperature and humidity, pollution, biological attack from mould and insects, and contact with other, frequently inferior quality, materials. These affect the paper as well as the applied, painted or printed media which decorate the leaves.

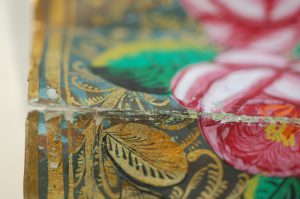
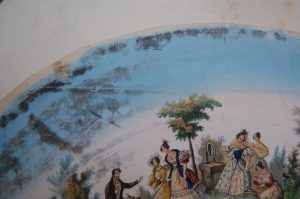
Detail of the flaking paint layer on a fan pleat which needed consolidation (M.343-2015)

Early European papers used for fans were hand-made from plant fibres, which were strong and long-lasting. There are many fine examples of these beautiful papers in the collection. With the advent of machine-made papers from around 1860, paper quality became more variable. Around this time, less durable, mass-produced papers started to appear in fans. Over time, these poorer-quality papers become acidic and weak, tearing easily and losing their ability to endure opening and closing. Other materials used in fan manufacture have also developed and changed, often affecting the stability and permanence of the fan overall: adhesives may discolour and fail as they age; paints and printing inks become less permanent. Other fan components may affect the stability of the paper: the wooden or card ‘ribs’ which hold the fan leaf in place sometimes cause staining and degradation, as do corrosive or degrading paints and inks. The collection also exhibits a wide range of old repairs using materials such as stamp hinges, paper, thread, and pressure-sensitive tapes. Many of these repairs are unsightly and have caused further deterioration.

Localised darkening of lead white paint on a fan leaf

Conservation of Paper Folding Fans and Fan Leaves

Treatments undertaken on the Lennox-Boyd fans in preparation for display ranged from minimal cleaning to more interventive, labour-intensive repairs. Treatment of the folding fans was limited to actions such as gentle surface cleaning and physical repairs which could be carried out safely without taking the fans apart. The fans were supported underneath during treatment with tapering pieces of polyethylene foam and care was taken to apply as little pressure as possible to their delicate surfaces.

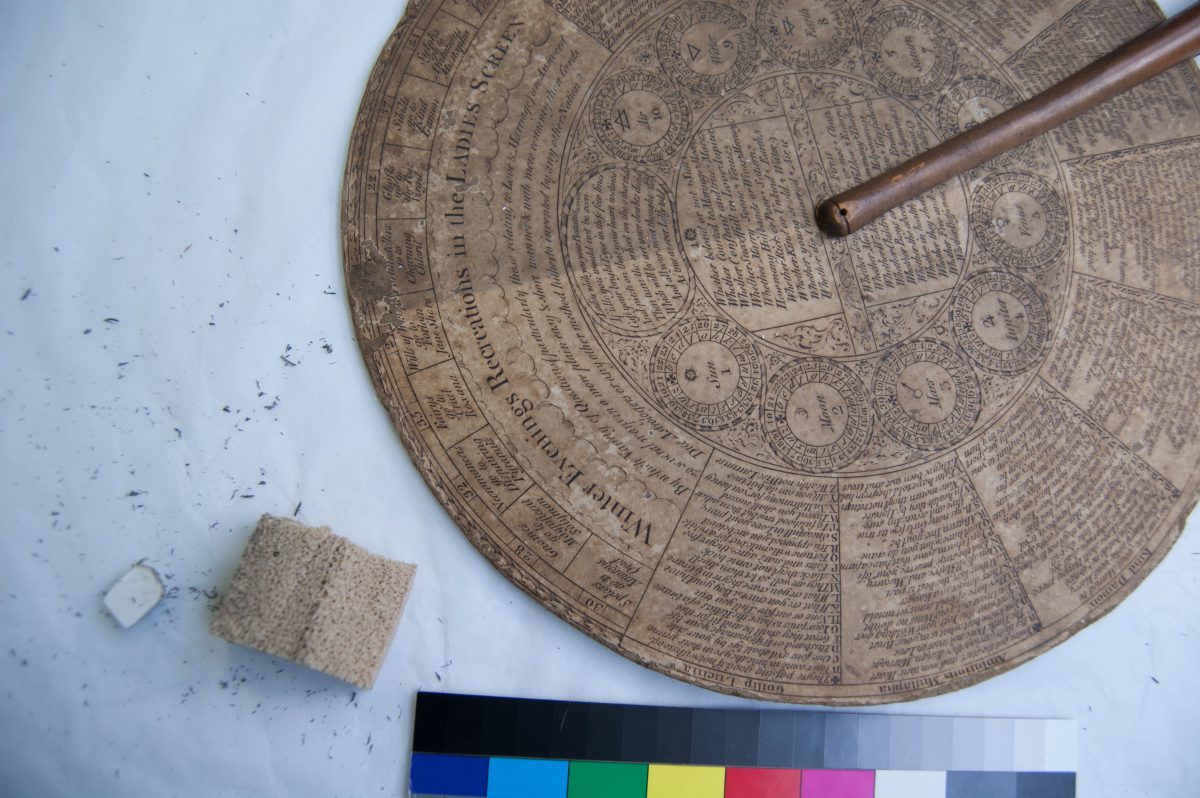
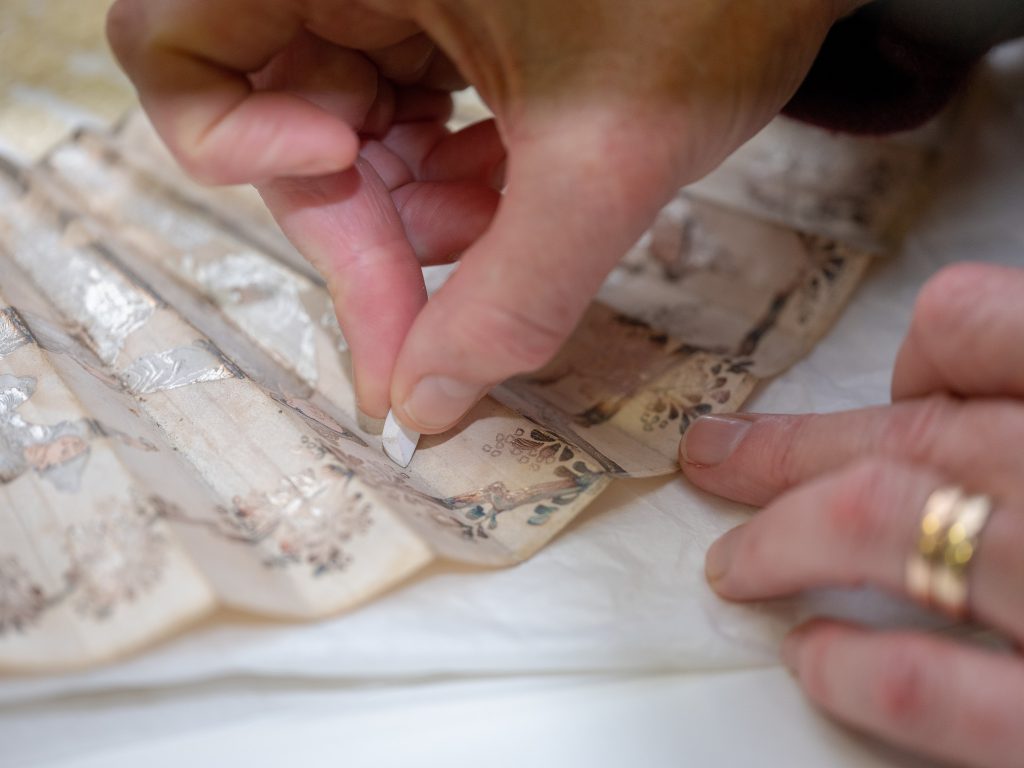
Surface cleaning using a wedge of vinyl eraser

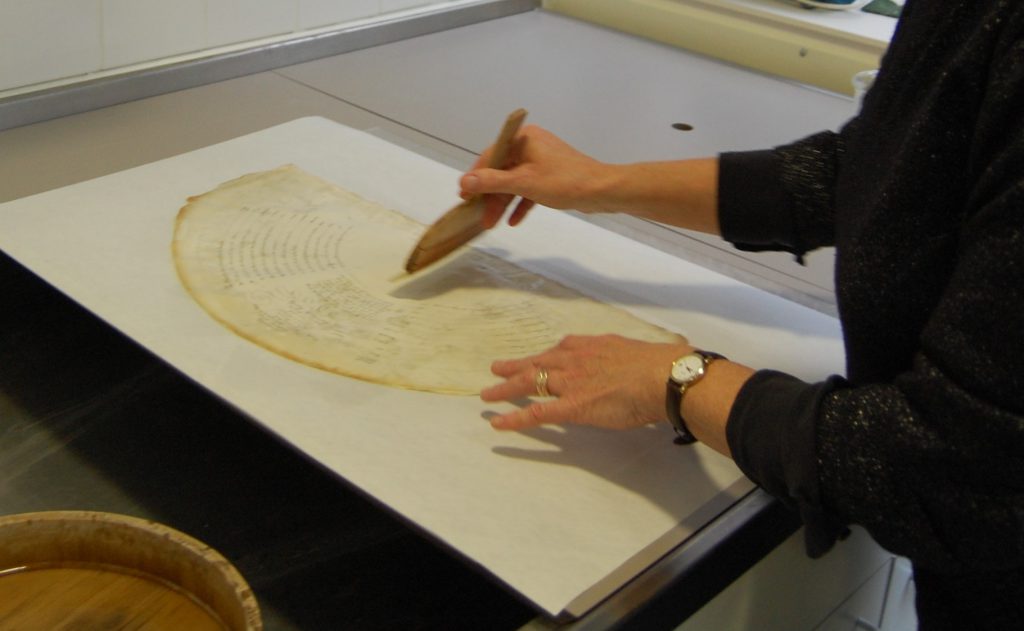
Dirt and dust were removed using soft brushes, accretions were carefully picked off using the tip of a scalpel blade, and the more ingrained dirt was reduced using either dry cleaning sponges or small wedges of vinyl eraser. Cleaning was avoided in areas with fragile media. Where possible, flaking or cracked paints were consolidated with a cellulose-based adhesive. Mould spores were safely removed using a brush and suction. Many flat fan leaves were detached from unsuitable acidic boards. Several discoloured and stained leaves were dry-cleaned, then washed in buffered de-ionised water. Before pressing they were given a coat of dilute gelatine to replace degraded sizing and gently re-adhere the sheets together where they had separated. They were then lightly humidified and pressed between blotters and weighted boards. Some disfiguring stains on the fan leaves were locally treated with a weak bleach solution and then rinsed.

Re-sizing a fan leaf with a dilute gelatine solution after washing

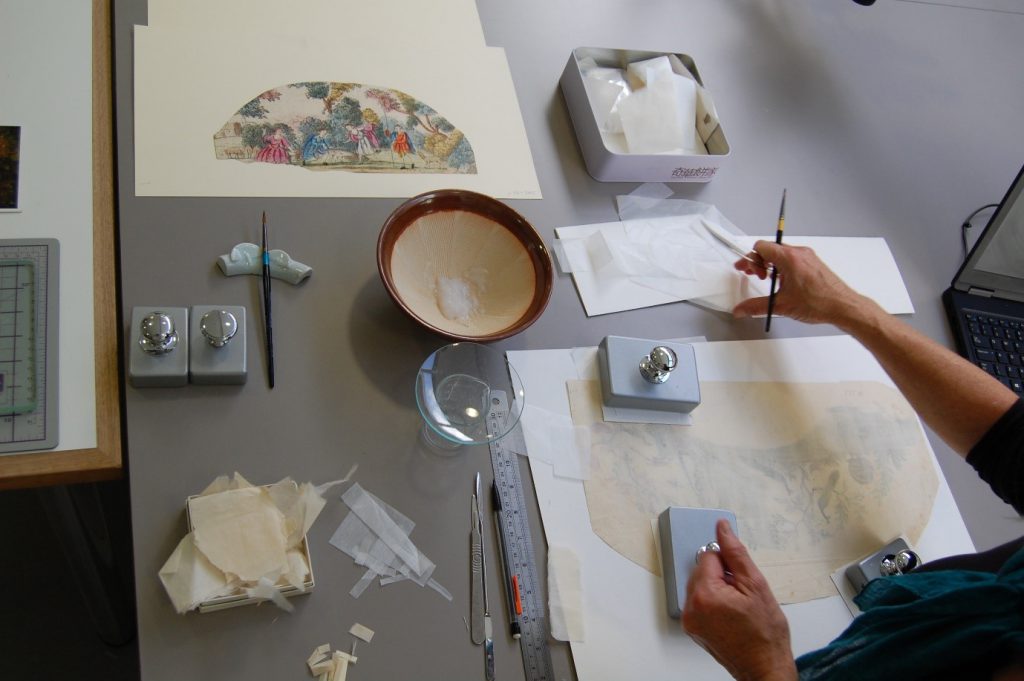
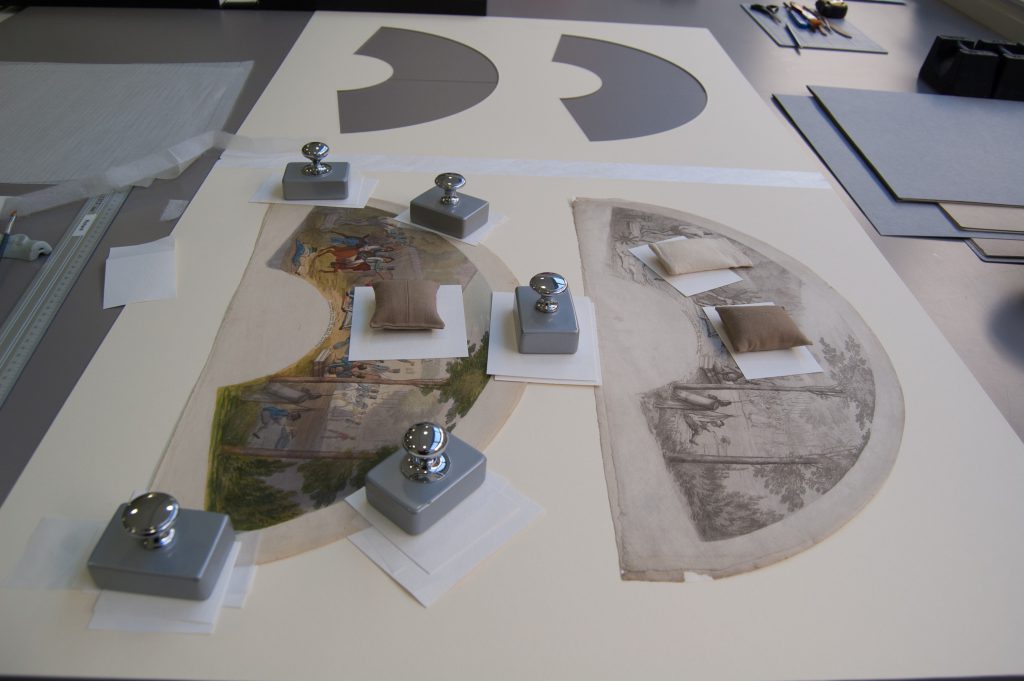
Splits and tears were mended with starch paste and/or a cellulose-based adhesive and narrow strips of cut or torn Japanese tissue tinted with dilute washes of acrylic paint. Where possible, the two paper sheets making up many fan leaves was gently prized apart in order to insert the mend between the layers. The sheets were then pasted closed again to make the repair invisible. If this wasn’t possible, a small strip of tinted tissue paper was pasted along the reverse side of the damaged seam. Repairs were held in place to dry under small weights, using clamps or by hand, depending on the location of the damage and the strength of the paper. Losses were filled with Japanese paper of a matching weight, texture and colour. Disfiguring or damaging old repairs were removed and replaced.

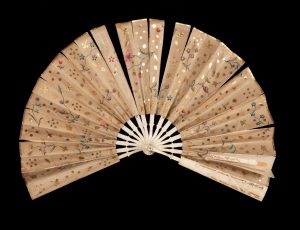
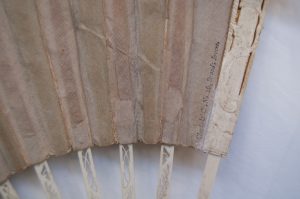
A telescopic (sliding) fan (M.220-2015) before treatment, showing splits, tears and exposed sticks and ribs

Detail of the reverse of the telescopic fan, showing tinted paper repairs to losses (M.220-2015)

Telescopic (sliding) fan after treatment (M.220-2015)

Conservation procedures followed strict professional protocol, using conservation-grade materials, testing prior to treatments, and thorough documentation throughout.

Carrying out paper repairs on a fan leaf

Display and Storage of the Fan Collection

After treatment, a customized acrylic stand was made for each fan by technicians in the Applied Arts department. The stands can be tilted at different angles by means of a ball-joint mounting and are sensitively designed to support the open fan safely whilst on display. Flat fan leaves were hinged onto acid-free museum board with Japanese paper and starch paste, and given fan-shaped window mounts. Other fan leaves will be stored in polyester sleeves with acid-free card support. The majority of folding fans will be stored closed and wrapped in acid-free tissue. All the fans will be stored in museum Solander boxes on racks of dedicated shelving. It is hoped that the conservation of the Lennox-Boyd collection will continue, enabling more of these intriguing objects to be available for study and display in the future.

Fan leaves being hinged onto a bespoke acid-free mount for display

Acknowledgements

Thank you to the curatorial and conservation staff in the Applied Arts department and the Paintings, Drawings and Prints department of the Fitzwilliam Museum. The fan collection of the late Hon. Christopher Lennox-Boyd (1941–2012) was accepted in lieu of Inheritance Tax by H M Government and allocated to the Fitzwilliam Museum in 2015. This conservation project was generously funded by the Marlay Group.

Rosie Macdonald

Paper Conservator, Lennox-Boyd Fan Project


Unfolding the Lennox-Boyd Collection – Part 1

The Applied Arts team has been working with the Paintings, Drawings and Prints (PDP) Department on the recently acquired Lennox-Boyd fan collection. The collection is comprised of 435 folding fans, 10 screen fans, 178 unmounted paper fan leaves, and 4 miscellaneous items. Some folding fans and leaves are mounted within frames, and many are accompanied by their original boxes. The table below shows the variety of fan types and materials. The graph shows their geographical distribution.

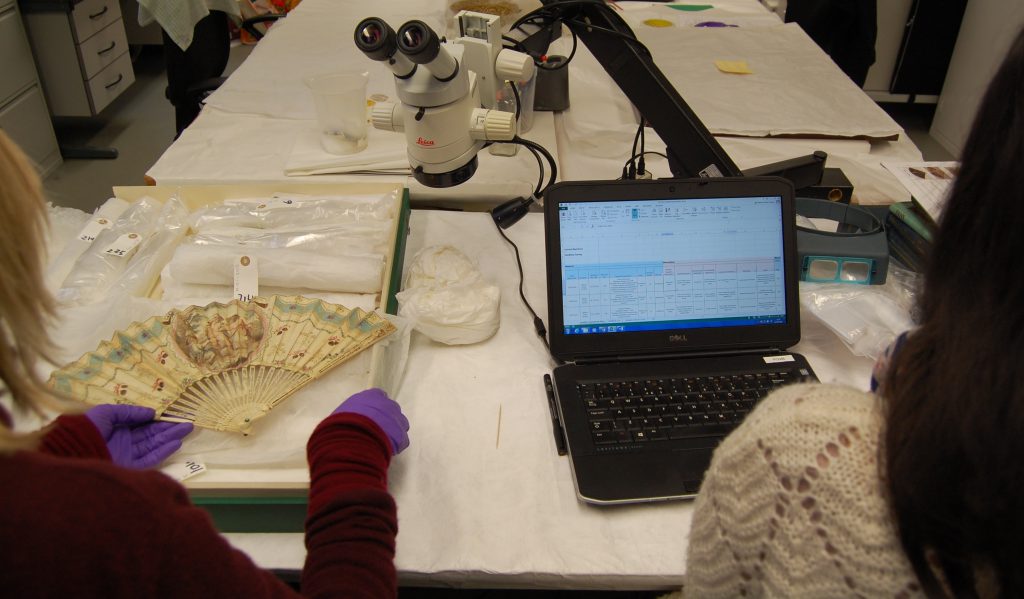
The project began with a condition survey. Paper Conservator Rosie Macdonald and I examined a sample of the collection, identifying materials and deterioration problems, and estimating the time required for conservation.

Condition data was collected in a spreadsheet

We photographed each fan in the sample, entered the condition data into a spreadsheet, and analysed statistics in order to better understand the condition of the entire collection. Conservators from both departments also went on a research trip to visit other fan collections in London.

In the second phase of the project we have been rehousing the collection and conserving some of the fans in preparation for a new display, opening on March 5th 2019.

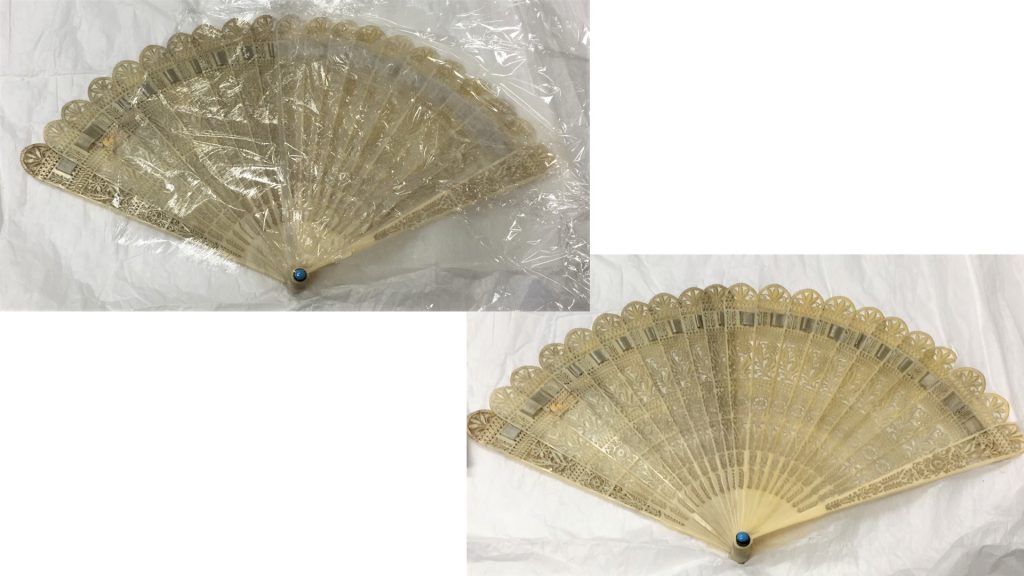
Over the course of this project I conserved three types of fan: folded, brisé and screen fans.

Folded fans

Folded fans have a leaf made of paper, animal skin or textile, which is decorated in a variety of ways and folded into peaks and troughs. I cleaned the textile leaves by dusting with a soft brush and consolidated any loose elements.

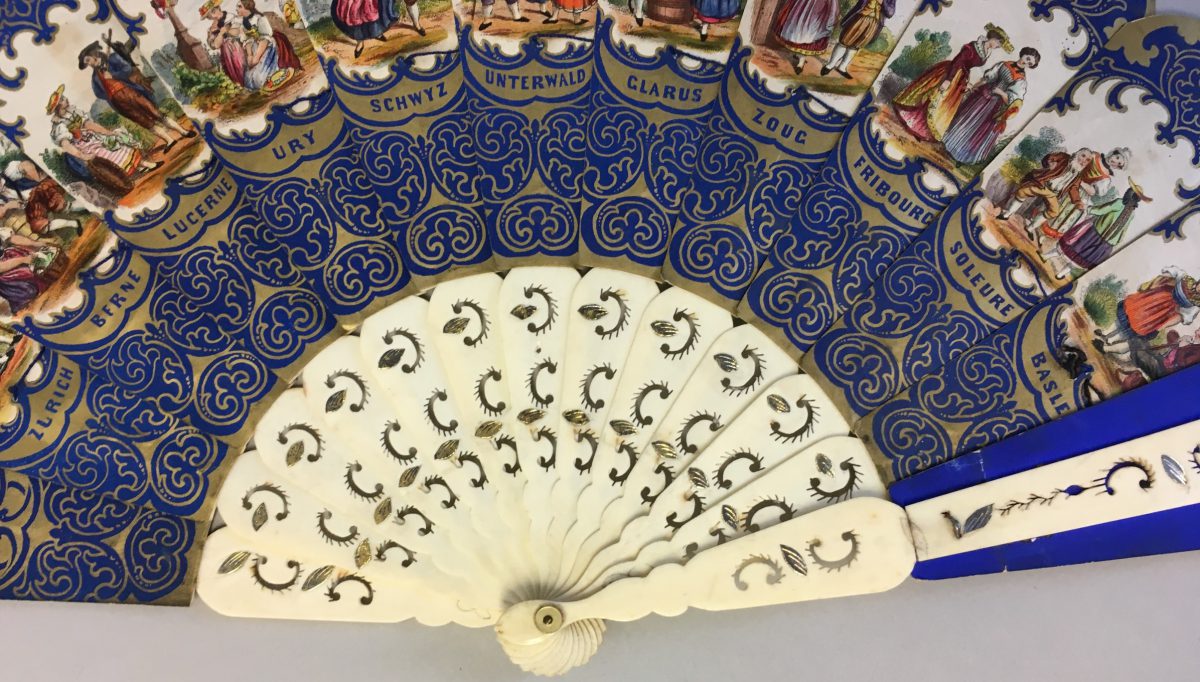
Guards are the exterior, rigid elements that protect the fan when closed. In this collection I encountered guards which are made of bone, ivory, wood, mother-of-pearl and plastic. Cleaning was carried out using a soft brush and a vulcanised rubber sponge. If further cleaning was necessary, I applied a solvent with a cotton swab, removing dirt carefully under the microscope.

Sometimes the guards are heavily worked with carved and pierced decoration. On porous surfaces, such as bone or ivory, dirt was extracted using a gel applied over a barrier layer of tissue paper. The guards were then rinsed with de-ionised water to remove any trace of the gel from the surface.

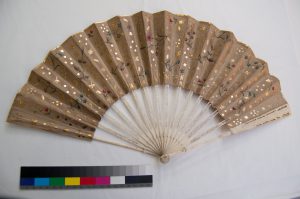
The top image shows half of the bone elements of this brisé fan being cleaned with a gel treatment. The bottom image is how it appears afterwards.

Brisé fans

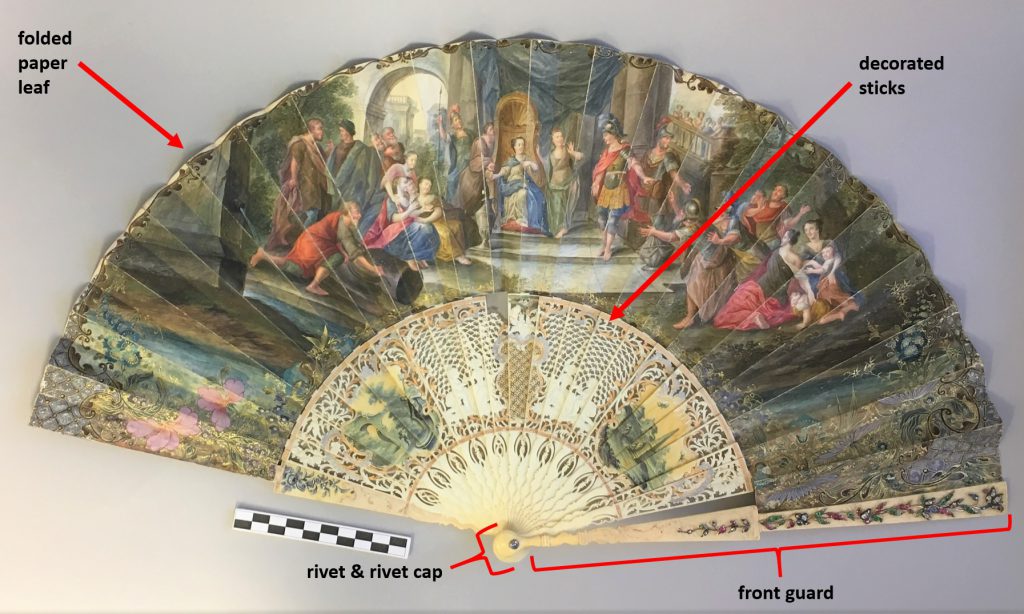
Brisé fans open and close much like a folding fan, but do not have a leaf. They are made of individual blades (sticks) held together by a ribbon or string.

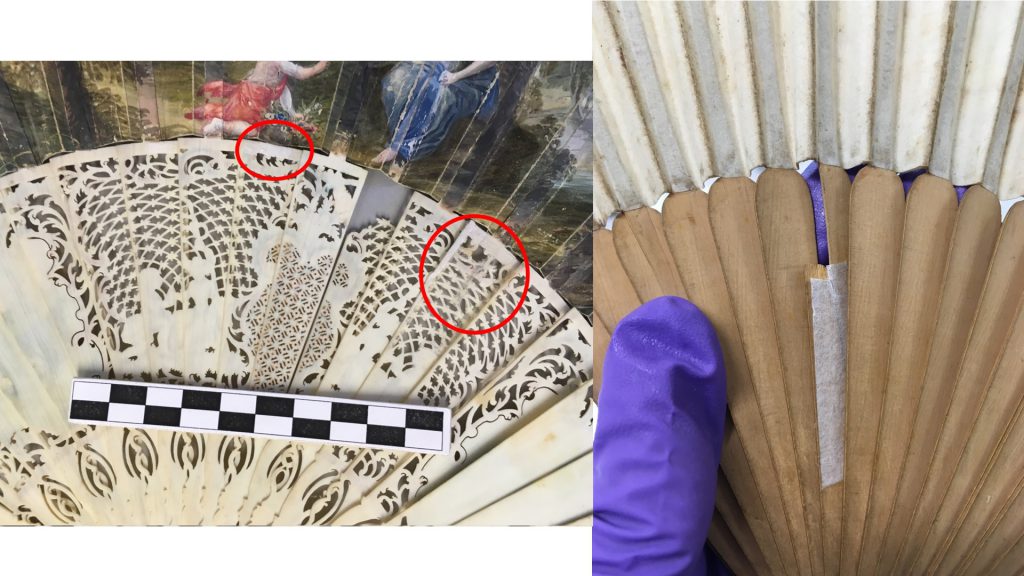
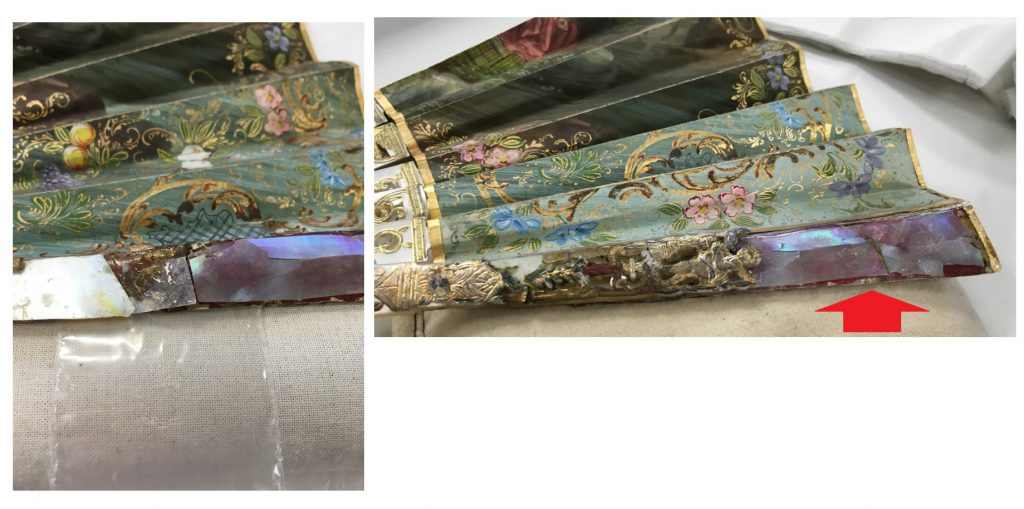
I repaired broken sticks and guards with a conservation adhesive, securing the repairs with a paper backing (as shown above). On one occasion, the breaks on the guards had caused losses. I experimented with different methods and materials to fill in this loss so that the fan could once again have protective guards. I moulded and casted a clear, resinous material that I inserted into these areas.

The left image shows how I applied a protective layer to the painted parchment before adhering the film to the remainder of the guard. The image on the right shows the completed treatment.

The sticks are attached at the bottom point of the fan by a rivet, spacer, and/or a rivet cap. These elements are often made of metal, with the rivet cap containing a resin, glass, or precious stone inlay. Loose inlays were secured to the surface and cleaned where necessary.

Within the left of the highlighted box are gold and silver overlays which have not been cleaned, on the right are ones in the process of being cleaned. This work is done under the microscope with each stick taking up to half an hour to clean.

Metal overlays were stabilised with a conservation adhesive where loose elements were visible. Tarnish and corrosion were cleaned with an enzyme applied under magnification with a cotton swab. A protective layer was applied over some pigments so that the opening and closing of the fan no longer removed the decoration.

Screen fans

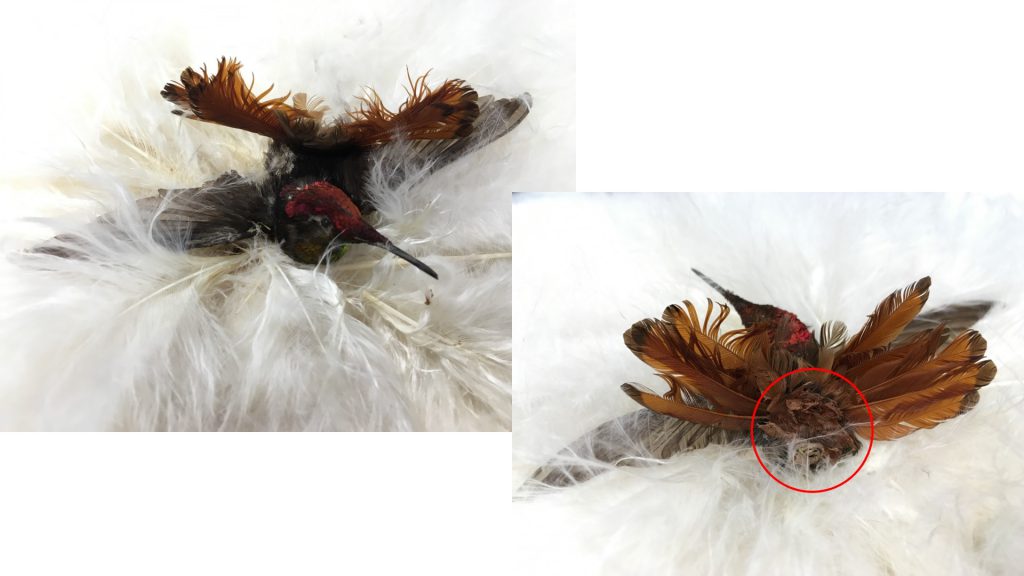
Screen fans have a fixed leaf that can be made of a wide variety of materials. The screen fan I conserved is made of various types of feathers, with a taxidermy hummingbird at its centre, and a wooden handle inlaid with ivory. The feathers were humidified, reshaped and cleaned. Some of the unstable feathers were re-adhered to the surface of the fan. Three areas of loss were filled with a paper patch made to resemble feather down.

On the left is an image of the fan before conservation. Note the mis-shaped feathers and losses to the body of the hummingbird. On the right is how the fan now appears and a detail of a paper down fill is highlighted.

For more on the conservation of these wonderful objects, watch this space for Rosie’s blog-post on the treatment of the paper elements. I hope those who can will visit the new display opening next Tuesday, March 5th 2019!

Rebeca Suarez Ferreira, MA

Objects Conservator

Applied Arts Department

The Fitzwilliam Museum

An Ethnography of Object Conservators at the Fitzwilliam

For the past three years I have been working towards a PhD with the Department of Archaeology at Durham University. My research is all about the everyday working lives of object conservators. I am interested in how conservators approach the objects they work on, what knowledge they use to do so, and how this type of work is established within heritage institutions. I am also interested in all the other work that conservators do, from preventive conservation to training new conservators, and to outreach work for the public, blog-writing included!

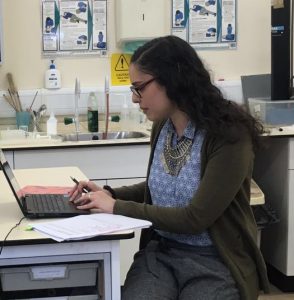
A photograph of me conducting my first interview for my PhD research. At this point I was asking questions relating to the records conservators keep. After that first year, I sought out a field site within which to conduct my ethnography and was grateful to partner with the University of Cambridge Museums.

I decided I would investigate these interests by conducting an ethnography. This is a methodology which anthropologists use to observe human behaviour in various settings. In anthropological terms, my study is multi-sited: I have conducted my ethnography in many different sites, with many different types of practitioners. This has given me a broad, holistic view of what conservators do in practice, how they feel about their work, what  issues  they face, and what experiences they bring to and gain from their work.


I created this diagram to explain how I structured my study. I investigate the way in which conservators come into the profession by including students, volunteers, and practitioners working with a variety of objects in diverse heritage institutions. By observing these participants in their work context, I learn about how different contexts affect conservation practice. When I interview participants, I learn about them as individuals and about their opinions regarding their practice. I also ask conservators about their knowledge production as part of my research.

One of the field sites where I conducted my ethnography was the Fitzwilliam Museum. I spent two months working with the conservators, conservation technicians, conservation interns and students of the Antiquities department. During this time, I did what anthropologists call participant observation. I am also a qualified conservator, so I was able to help with the conservation of an Ancient Egyptian sandal whilst I observed what the other conservators were up to throughout their working day.

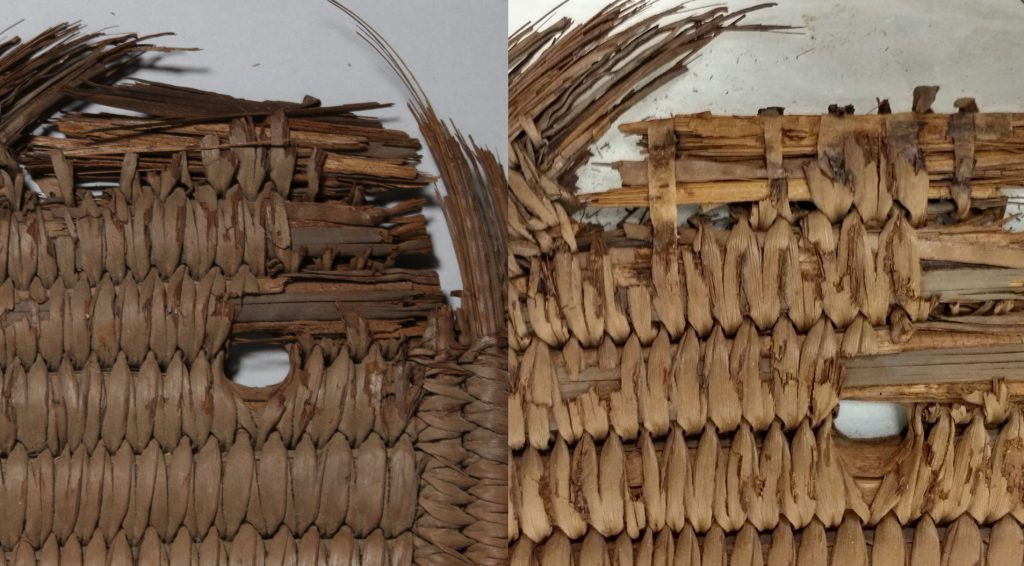
EGA.1461.1947. On the left, a detail of the sandal before conservation. On the right, the same area post-conservation. I cleaned the surface dirt and used Japanese tissue links to hold loose material in place.

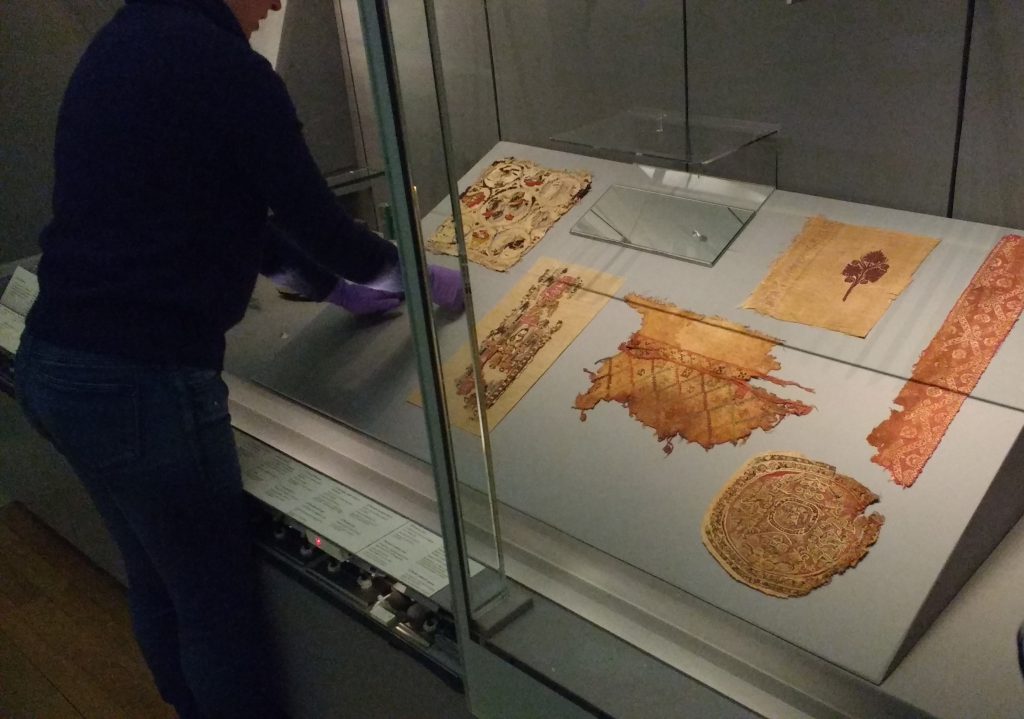
I also helped with the display of a case in the Egyptian gallery that houses textiles and other organic materials. Sometimes I shadowed the conservators as they attended meetings; at other times I asked questions about the objects they were working on. I also conducted an interview with each of the conservation members of that department.

An Antiquities conservator carefully adjusts the textiles selected for the display. I helped with the selection, the design of the display, and its installation.

I then repeated this process with the Applied Arts department. This time, instead of taking part in the treatment of objects, I helped with a project which focused on preventive conservation. Along with a conservator from the Paper, Drawings and Prints (PDP) department I carried out a large-scale condition assessment of the newly acquired Lennox-Boyd fans collection. During my time with Applied Arts I also shadowed the conservation technicians, conducted interviews, and lent a helping hand with temporary exhibitions taking place throughout the museum.

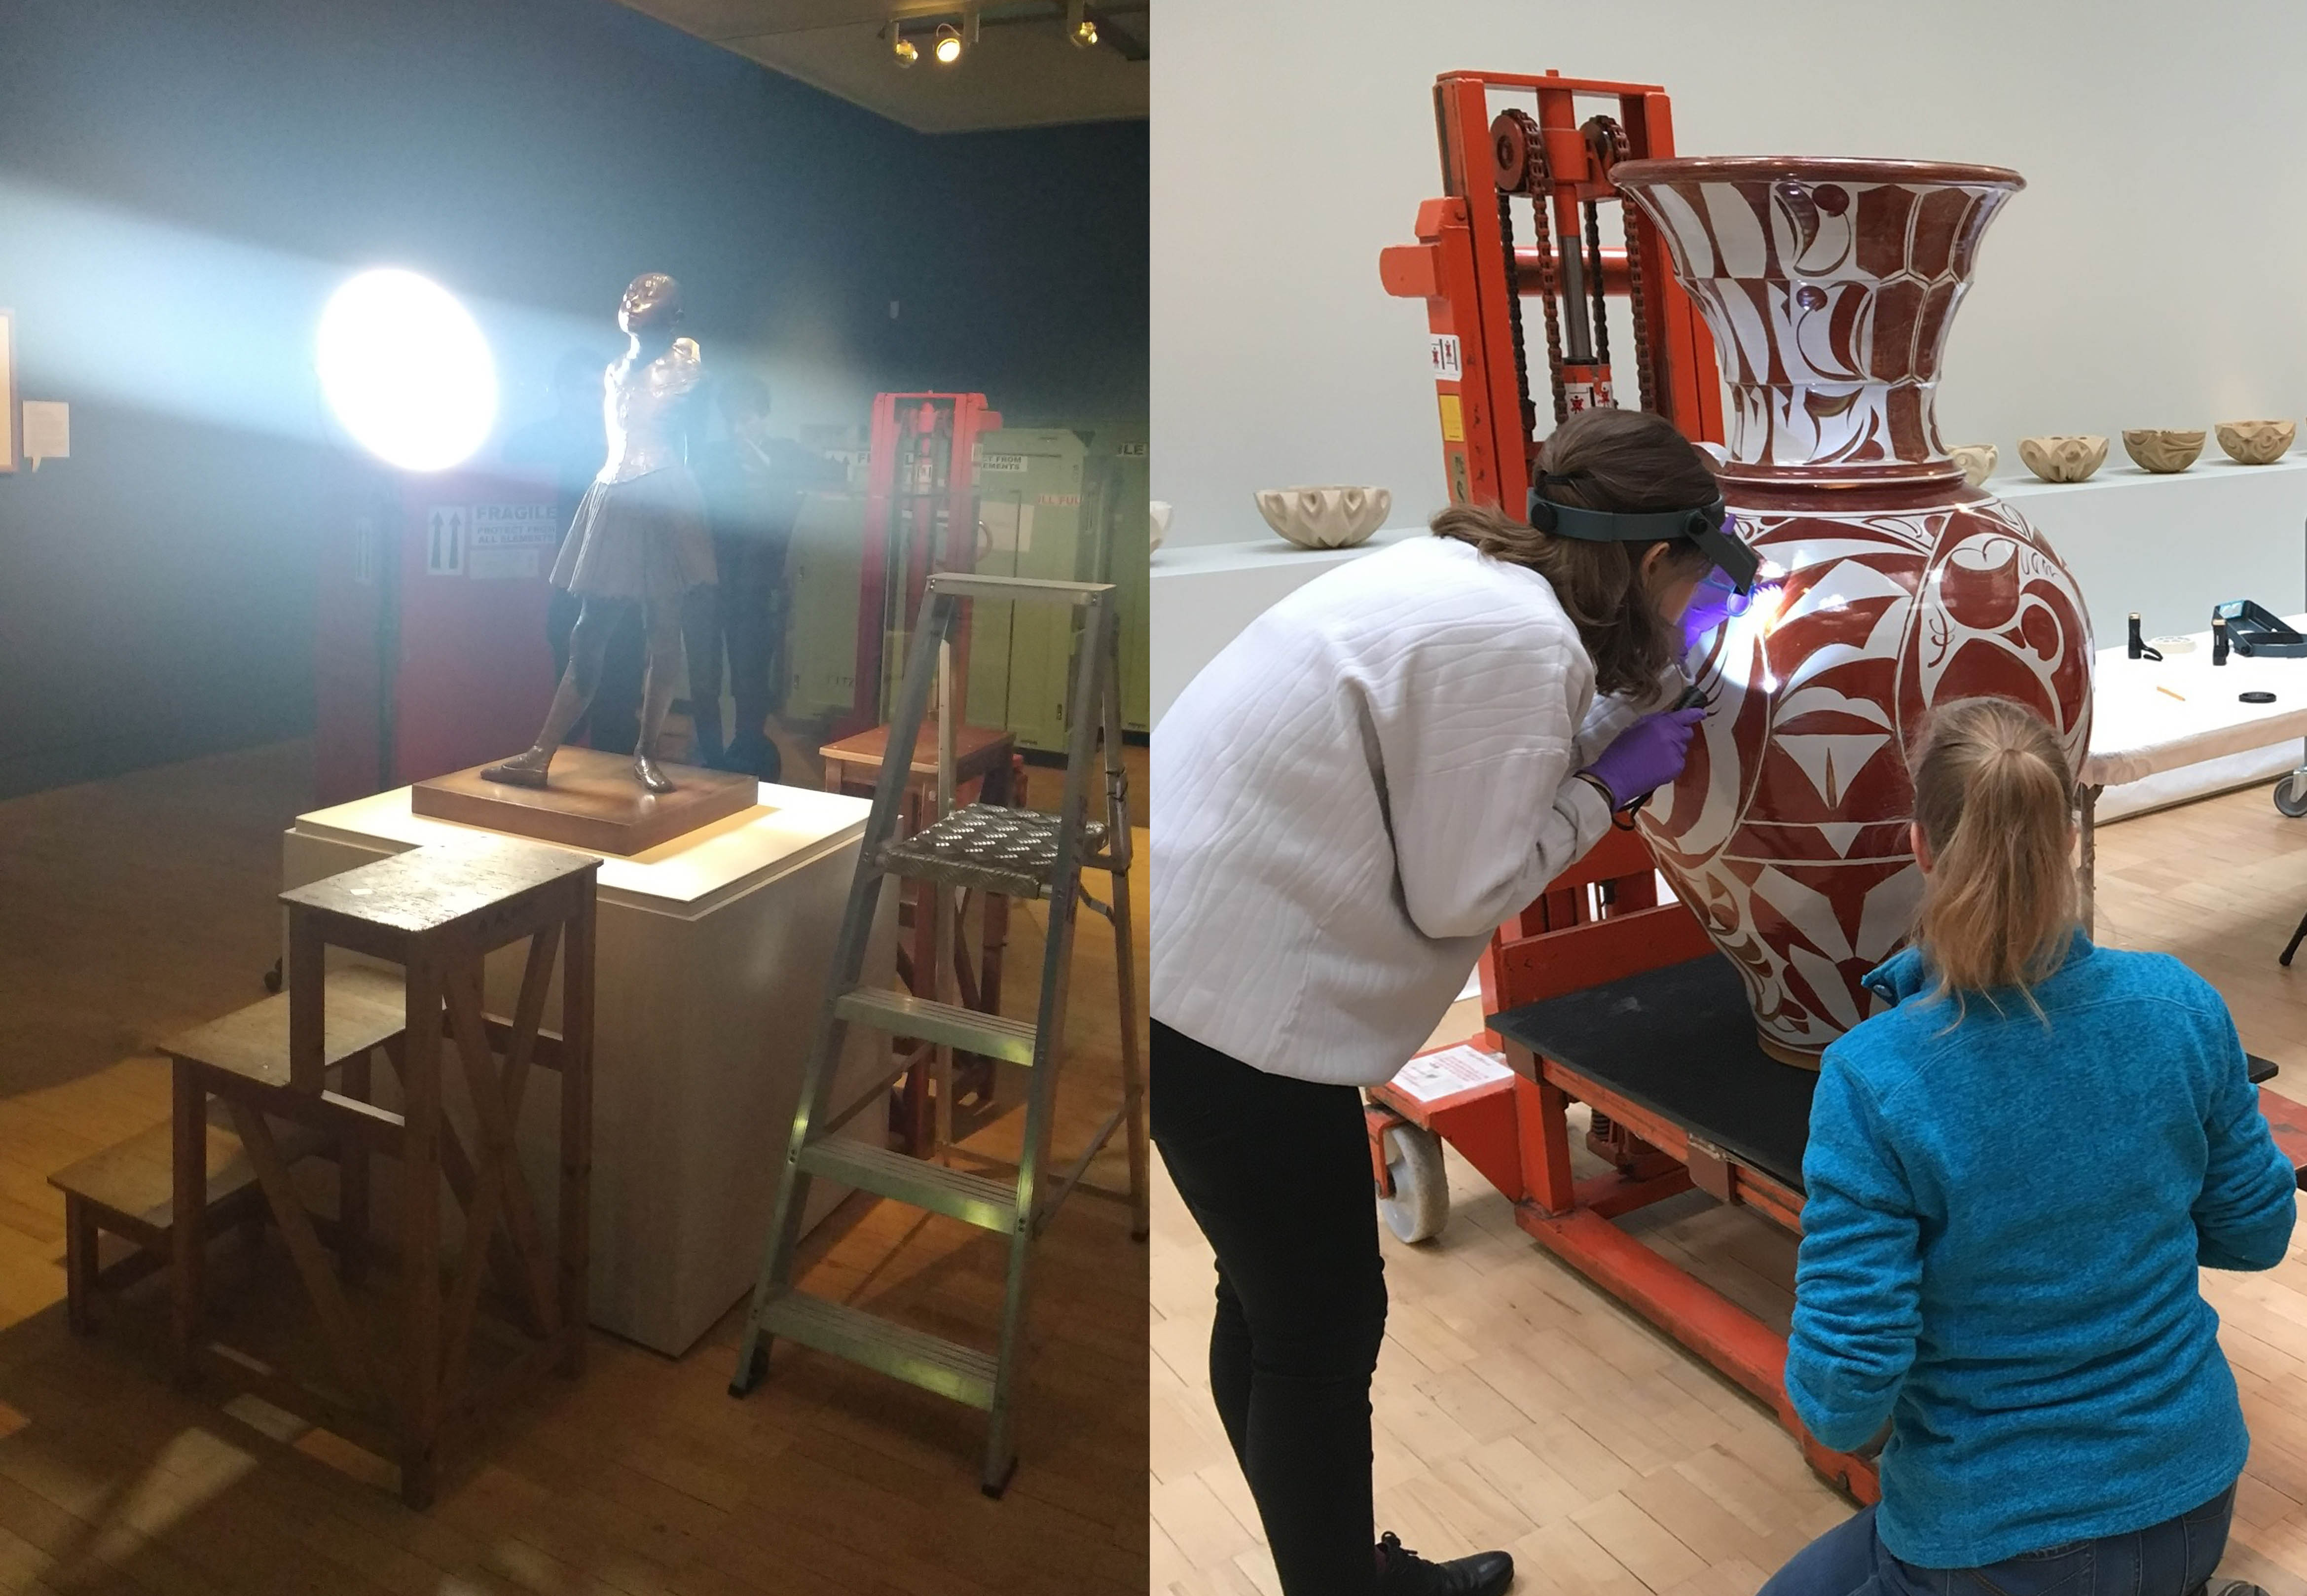
From left to right: de-installation of Degas: A Passion for Perfection; installation of Things of Beauty Growing: In these images I hope to show that I am participating as a conservator in the exhibitions of the museum, as well as observing other conservation professionals at work.

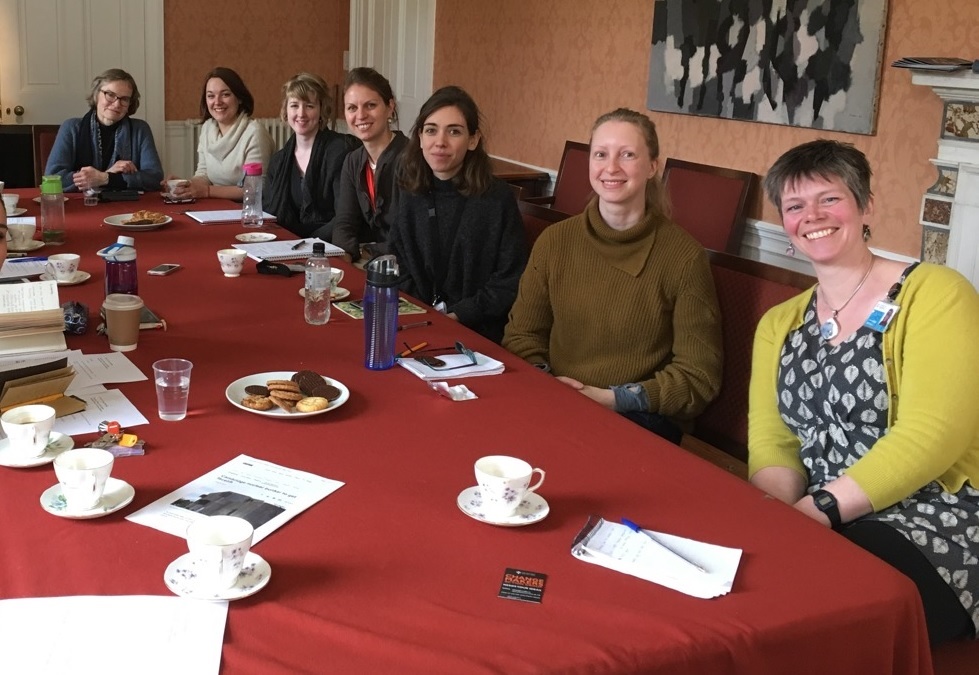
I also spent time in the other University of Cambridge Museums (UCM). I wanted to see how other types of museums work and was attempting to reach as many conservators as possible. To do this, I led forums through the UCM 4C group, which brings together conservators and care of collections professionals throughout the museum consortium.

I led three forums throughout the past year and treated them like group interviews for the purpose of my research. This allowed me listen to different conservation practitioners discuss all kinds of topics. These included the practical side of conservation, the risk of loss of practical skills, working with unfamiliar objects or sensitive materials, gender and class in conservation, responsibility in conservation, experiences with objects, and difficulties in becoming a conservator. Again, this list is not exhaustive but I hope it gives an idea of the range of these conversations and how useful they were to me as a researcher.

I am still working on the Lennox-Boyd fans collection and a related display focused on the conservation work carried out on the fans. I am also in the midst of writing my PhD which I hope to finish within the next year. I would like to take this opportunity to thank the Fitzwilliam Museum, University of Cambridge Museums, and all those who kindly participated in my doctoral research. It was, and continues to be, a great pleasure to work with you.

Just a sneak peek of what is to come on my blog post about the conservation of some of the fans from the Lennox-Boyd collection! Can you guess what I was trying to achieve with this element of a fan?

I will return to write about my conservation work on the Lennox-Boyd fans collection in due course!

Until then…

Rebeca Suarez Ferreira, MA

PhD Candidate

Department of Archaeology, Durham University

Objects Conservator

Applied Arts Department, The Fitzwilliam Museum

Conservation at the Fitz: an intern’s perspective

I have recently started a 9-month internship at the Fitzwilliam Museum as part of my MSc in Conservation for Archaeology and Museums at University College London. Working with both the Applied Arts and Antiquities teams I will contribute to the preservation needs of the departments’ collections. Having spent just under 2 months in this placement, I have already learned a great deal, not only about objects and materials but also about general museum practice. My placement supervisor, Antiquities conservator Jennifer Marchant, identified a number of projects for me to work on. They are varied and I get to participate in a range of activities within the Museum, including preventive and remedial conservation, collections care and management, and material analysis using specialized techniques. This work plan is not set in stone and can be modified if necessary, giving me the opportunity to sign up for new projects that may arise down the line.
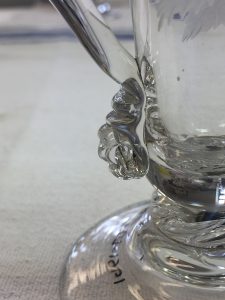
My first few weeks were mostly spent in becoming acquainted with the collections and members of staff, as well as helping out wherever an extra pair of hands was needed. Conservation work during this time centred on cleaning glass objects for an exhibition in 2019 and assessing the condition of wooden furniture. This was my first direct experience with glass and I was pleased to discover a new interest in it. The objects served as a fitting introduction to the material as they were in excellent condition. To my surprise some of the items were over 200 years old but I never would have suspected this as they had been cared for so well. The experience of working with furniture was enlightening in terms of the signs of damage that appeared and the relationship between their location and the function of the items during their lifetimes. Photographs were required for the reports and this proved a challenging but edifying exercise since the space lacked proper lighting and I had to rely on natural light.
Jelly glass from the Applied Arts collection.

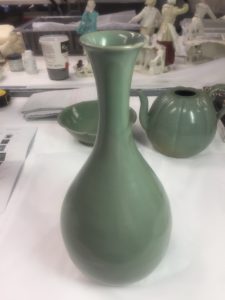
Korean wine bottle from the 12th Century.


Aside from cleaning a small group of twelfth- and thirteenth-century Korean ceramics that is going on loan to the National Museum of Korea, I have had the chance to treat an ancient ceramic from Cyprus. This earthenware, categorized as a red-polished ware which is specific to the Cypriot Bronze Age, is a ritual vessel with incised decoration that has been inlaid with a white material. The anthropo-zoomorphic symbols of the decoration offer a fascinating glimpse into the beliefs and values of this early community. One of the finials shaped like a bull’s head had broken off and required reattachment. Though this was a straightforward treatment, I found it tremendously gratifying to contribute to the preservation of this ancient ceramic. While investigating the earlier work carried out on this object, I read the conservation file written by the last conservator who had performed an intervention. I could not help feeling a sense of kinship with this colleague, unknown to me, who contributed to the safeguarding of the same artefact over 20 years ago.

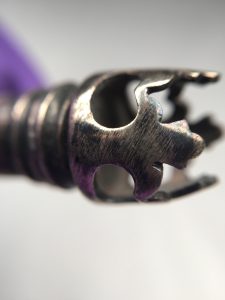
Detail of a spoon.

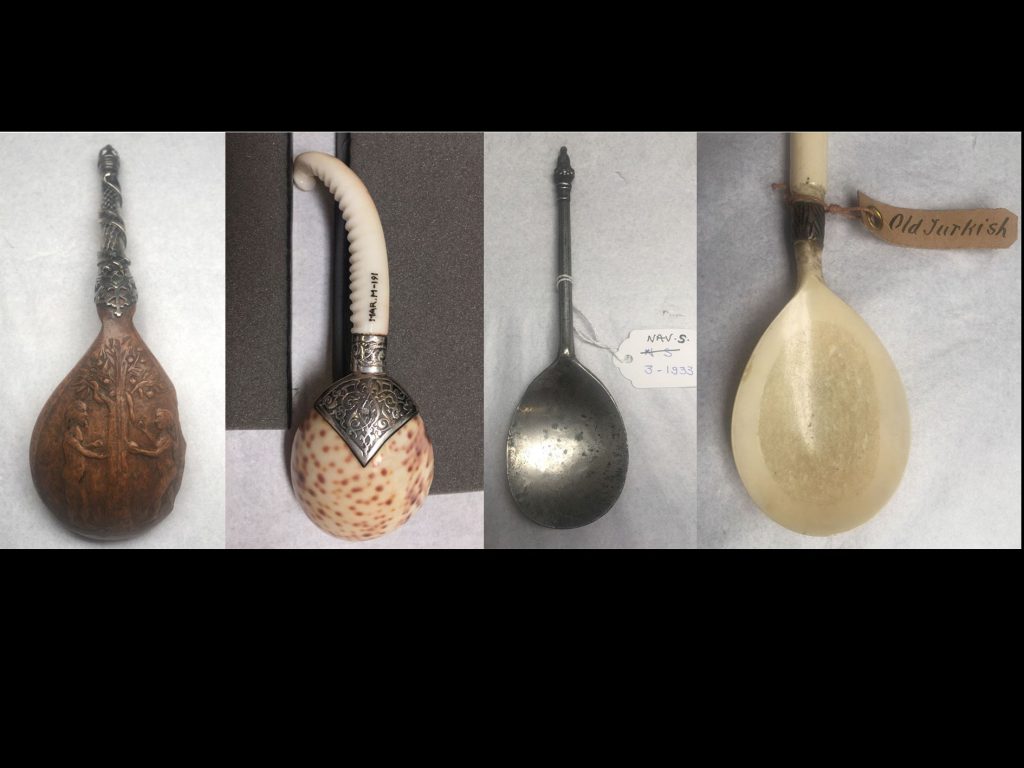
Another memorable project I am working on is also for an upcoming exhibition. This is one of my favourite assignments so far. I was given a collection of spoons that are to be displayed together and tasked with identifying the materials they are made of, as well as choosing appropriate treatments to meet their conservation needs. Some only require light cleaning while others have to be stabilised structurally. In addition to this, I will share recommendations about the display mounts and suitable materials for them. This project is most appealing because it is like a crash course in conservation, requiring me to use a wide range of skills relevant to conservation practice on a variety of materials (ivory/bone, metal, wood, glass, ceramic, and shell).

Spoons for the 2019 exhibit.

Two months have not yet passed since I started my internship at the Fitzwilliam and the experience has already proved to be beyond price in terms of educational value. I have been extremely fortunate to be allowed to experience so many different areas of museum practice. My interests within the heritage sector are broad and varied: with this placement, I certainly feel that I am able to explore different roles and diversify my skills.

I must express my gratitude first to my UCL supervisors, who recommended this internship to me, and to my internship supervisor, for taking my requests and interests into consideration when arranging my work plan. I appreciate its flexibility as well, especially considering that as a student I am eager to experience as many areas as possible to further develop my skills and identify new interests. I am also grateful to all the staff who have been so welcoming and have graciously allowed me to join in tours, conferences, and meetings where I have caught a glimpse of the behind-the-scenes work in the Museum. I am fortunate to have been offered this placement and look forward to the work that is to come.

Maria Melendez, UCL conservation intern


Glass Iridescence – Deliberate or deterioration?

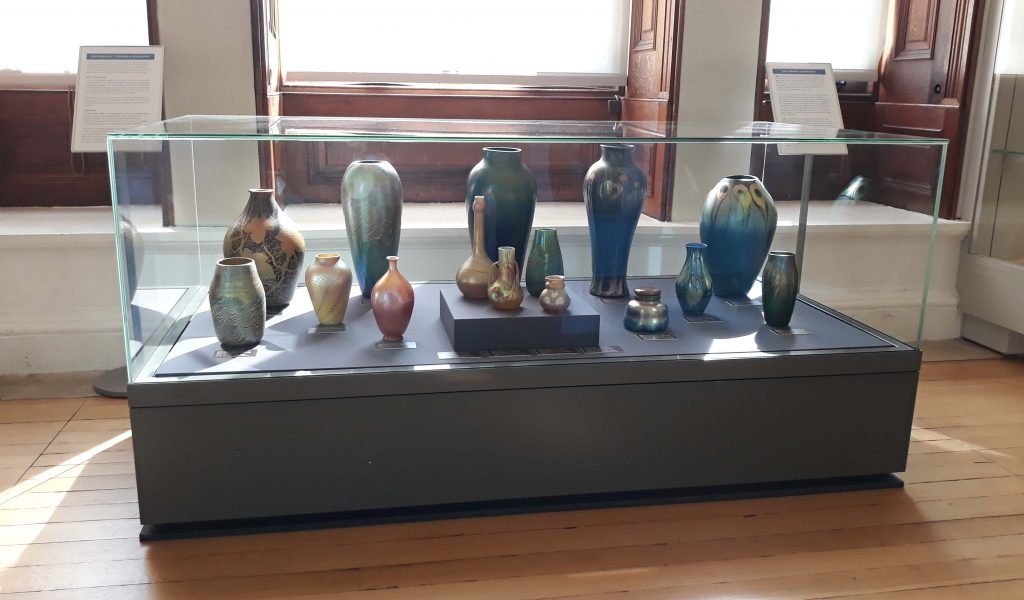
I’ve recently enjoyed making an interesting connection between our Roman glass collection and a beautiful display of Tiffany and Loetz glass that is part of the Frua-Valsecchi collection. You can see this for yourself in our Cypriot gallery.

Valsecchi glass display in the Cypriot gallery

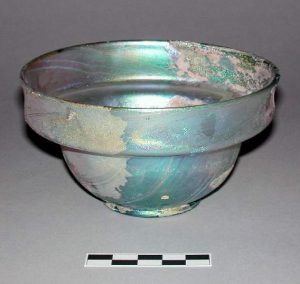
Much of the Roman glass in our collection displays a pearlescent sheen known as iridescence. Although beautiful, and copied by 19th and 20th century glassmakers such as Tiffany and Loetz, this wasn’t deliberately produced by ancient glassmakers, it is the result of the deterioration of the ancient glass.

Iridescent glass vessel
Early Roman bowl found in Leukolla Cyprus, GR.101.1876

What is Roman glass?

The major component of glass is silica, found in sand. The melting point of silica is 1600-1713oC, which is too high for production in simple glass furnaces (about 800oC) so an alkali is added to reduce the melting point. In Roman glass this was soda, which is found in many naturally occurring salts. Lime is also needed to stabilise the material. This is found in many sands. Soda-lime-silica make a very stable form of glass.

Much Roman glass is slightly blue or green; this is caused by small quantities of iron in the natural materials used in glass making. Other colours could be produced by choosing particular sources of sands that contain different minerals.

Deterioration

Although largely stable, our Roman glass has had to contend with many challenges to survive to the present day. Vessels may have been physically damaged during use, at the point of burial or during excavation. Prolonged contact with water is also a significant challenge to the chemical stability and surface appearance of the material (take a look at a previous blog post where one of our conservation students worked on part of the glass collection).

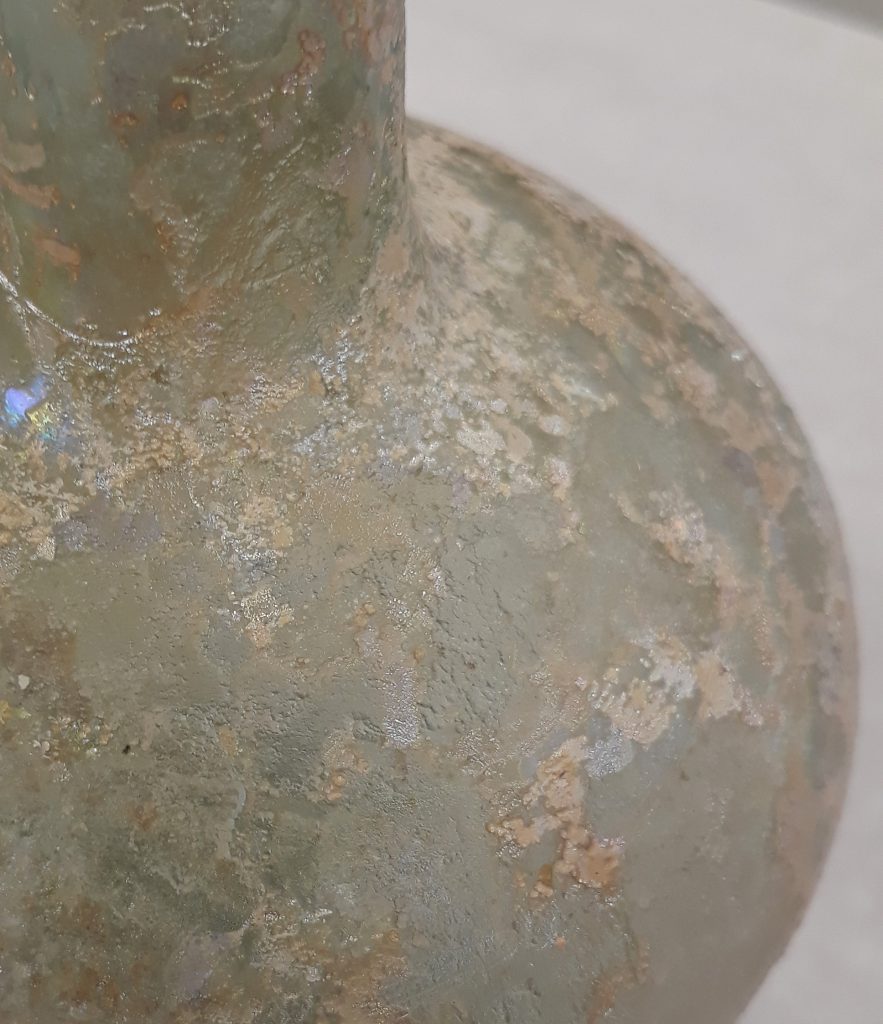
Water leaches the alkali (soda) from the surface of the glass, especially in slightly acidic burial environments. This leaves behind fine layers of silica that can flake off the surface. The iridescence is purely a visual effect; in the same way that water droplets in the air cause rainbows, light is bent and split into its separate colours as it passes through the thin layers of deteriorated glass and air.

Surface of deteriorated glass showing pitting and flaking

Copying history

Tiffany Louis Comfort Tiffany was an American artist and designer well known for his work in stained glass. In 1865 Tiffany travelled to Europe and visited the Victoria and Albert Museum (then the South Kensington Museum). Here he was struck by the colours of the Roman and Syrian glass collections, reflecting on the “rich tones” achieved without the use of paint. It is likely that Tiffany did not recognise the impact of deterioration on the appearance of this material.

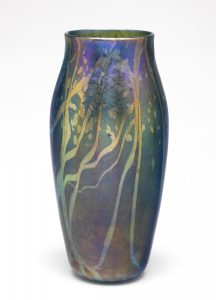
Vase, Favrile glass. Louis Comfort Tiffany. Lent to the Fitzwilliam Museum by Massimo and Francesca Valsecchi.

The Tiffany Glass Company was established in 1887 in New York, but he was working with glassmakers at more than one Brooklyn based glassworks prior to this. In the early 1890s, Tiffany patented the Favrile glass making technique, which was heavily influenced by the appearance of ancient material. Multi coloured iridescent glass was produced by mixing different colours of glass together and spraying metal solutions onto the hot surface of the glass before the vessels were blown. The glassmaker Arthur J. Nash developed this method, passing it on to his son Leslie Nash. They kept the recipe a closely guarded secret that even Tiffany did not know.

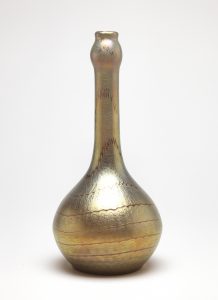
Iridescent vase. Loetz, Austria. Lent to the Fitzwilliam Museum by Massimo and Francesca Valsecchi.

Loetz A glassworks was established in Klostermühle (today called Klášterský Mlýn) in 1836. This changed hands several times until it was bought by Frank Gerstner and his wife Susanne Loetz in 1851. Loetz was the widow of a glassmaker and ran the business for 20 years after the death of her second husband in 1855. The business was then transferred to Loetz’s son-in-law Maximilian von Spaun in 1879. Working with the glassmaker Eduard Prochaska, he modernised the factory and developed new glassmaking techniques.

In 1897, von Spaun, saw Tiffany Favrile glass exhibited in Bohemia and Vienna. This inspired him to focus production on Art Nouveau style glass, which led to the most artistically significant and profitable period of the company’s history.


Being able to make this type of comparison of objects from widely separated time periods is one of the joys of working somewhere like the Fitzwilliam Museum. Come and take a look for yourself in our Cypriot Gallery.

Preparing for ‘Flux’: Object Processing on a Large Scale

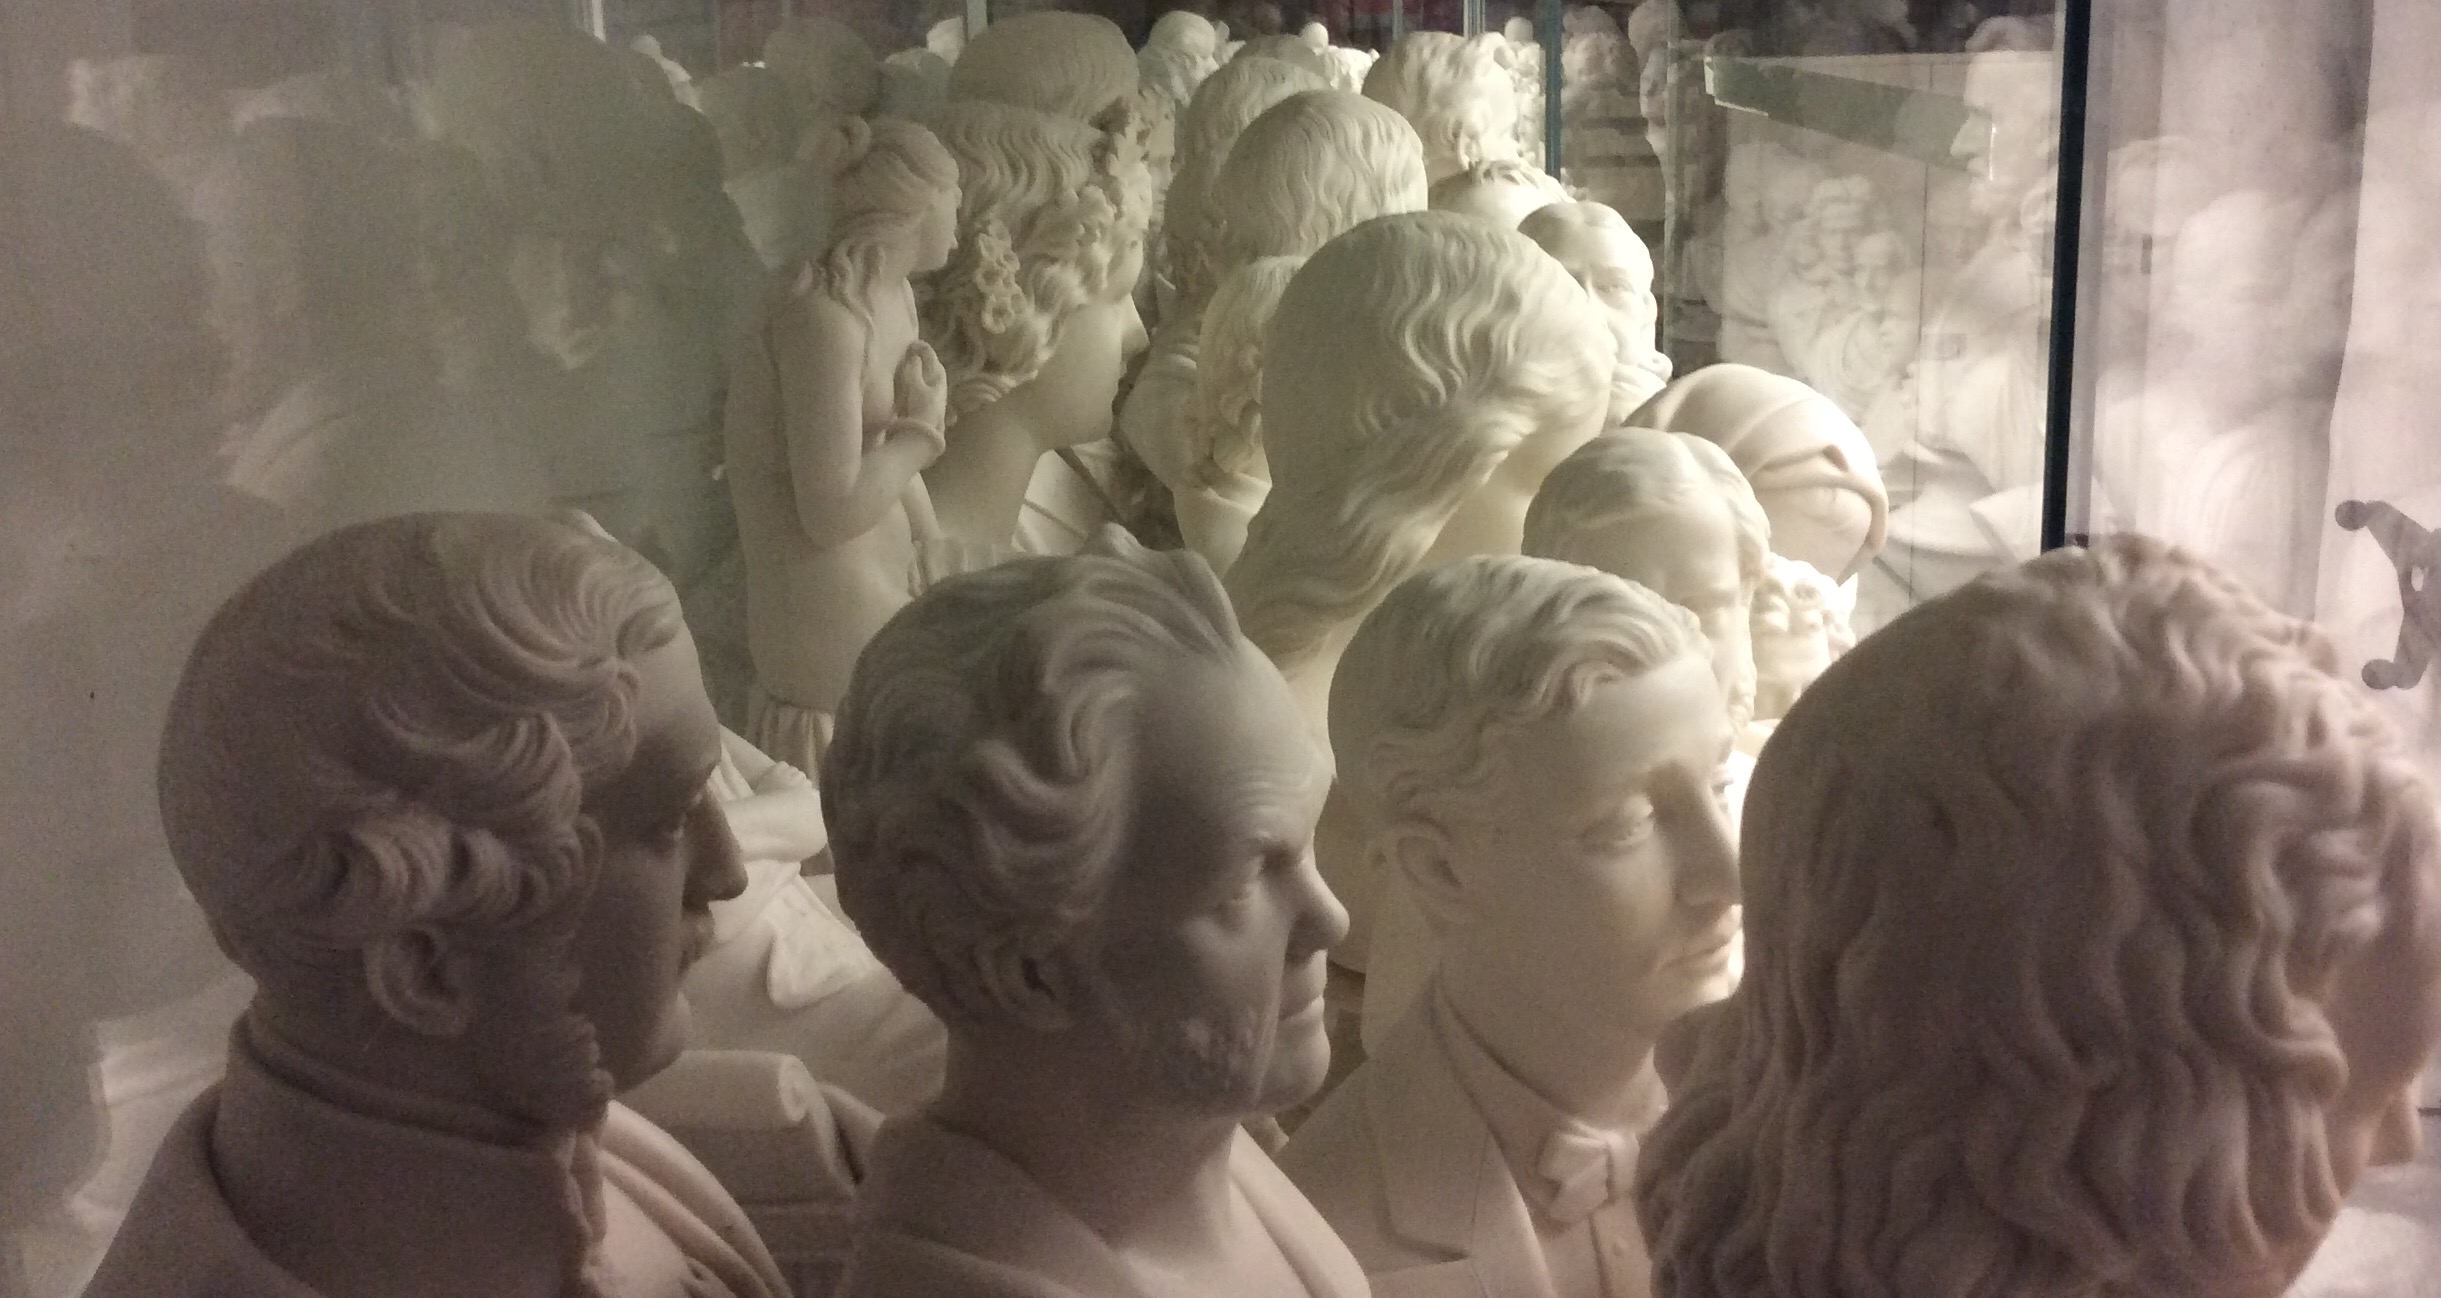
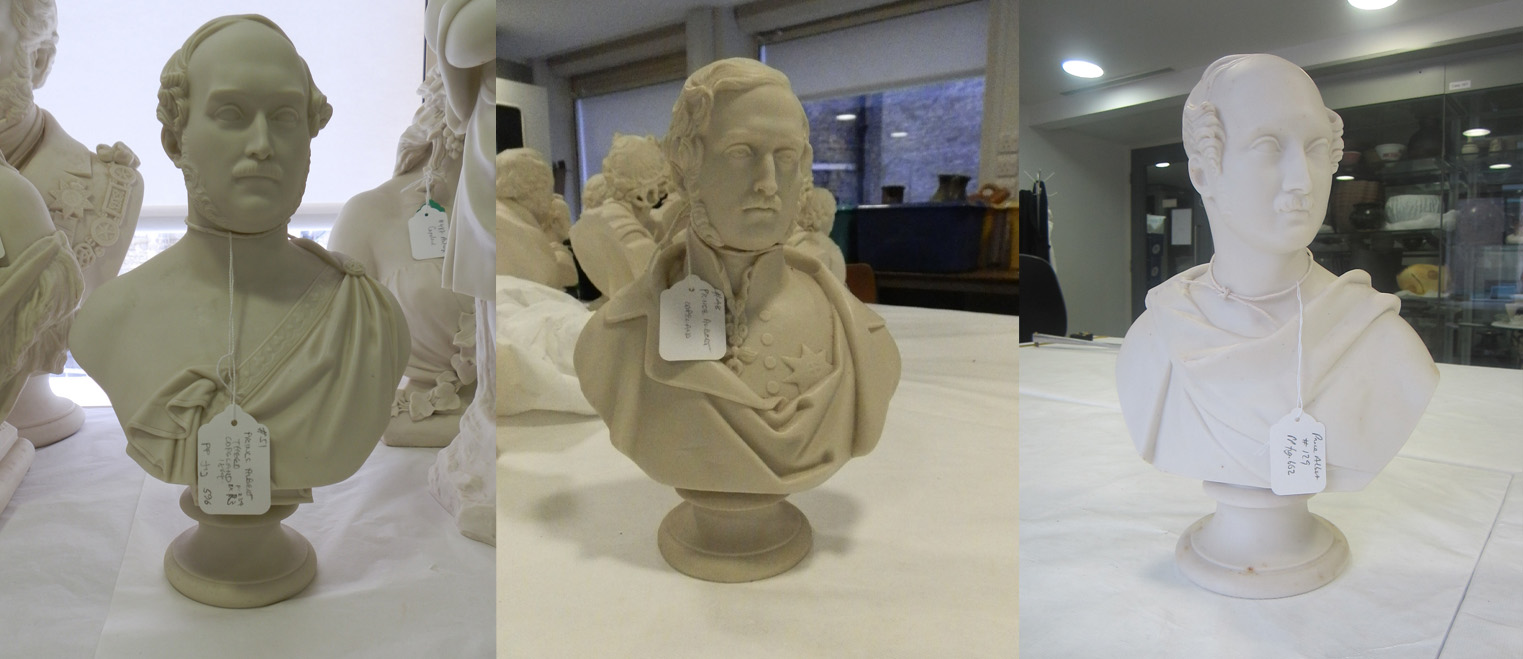
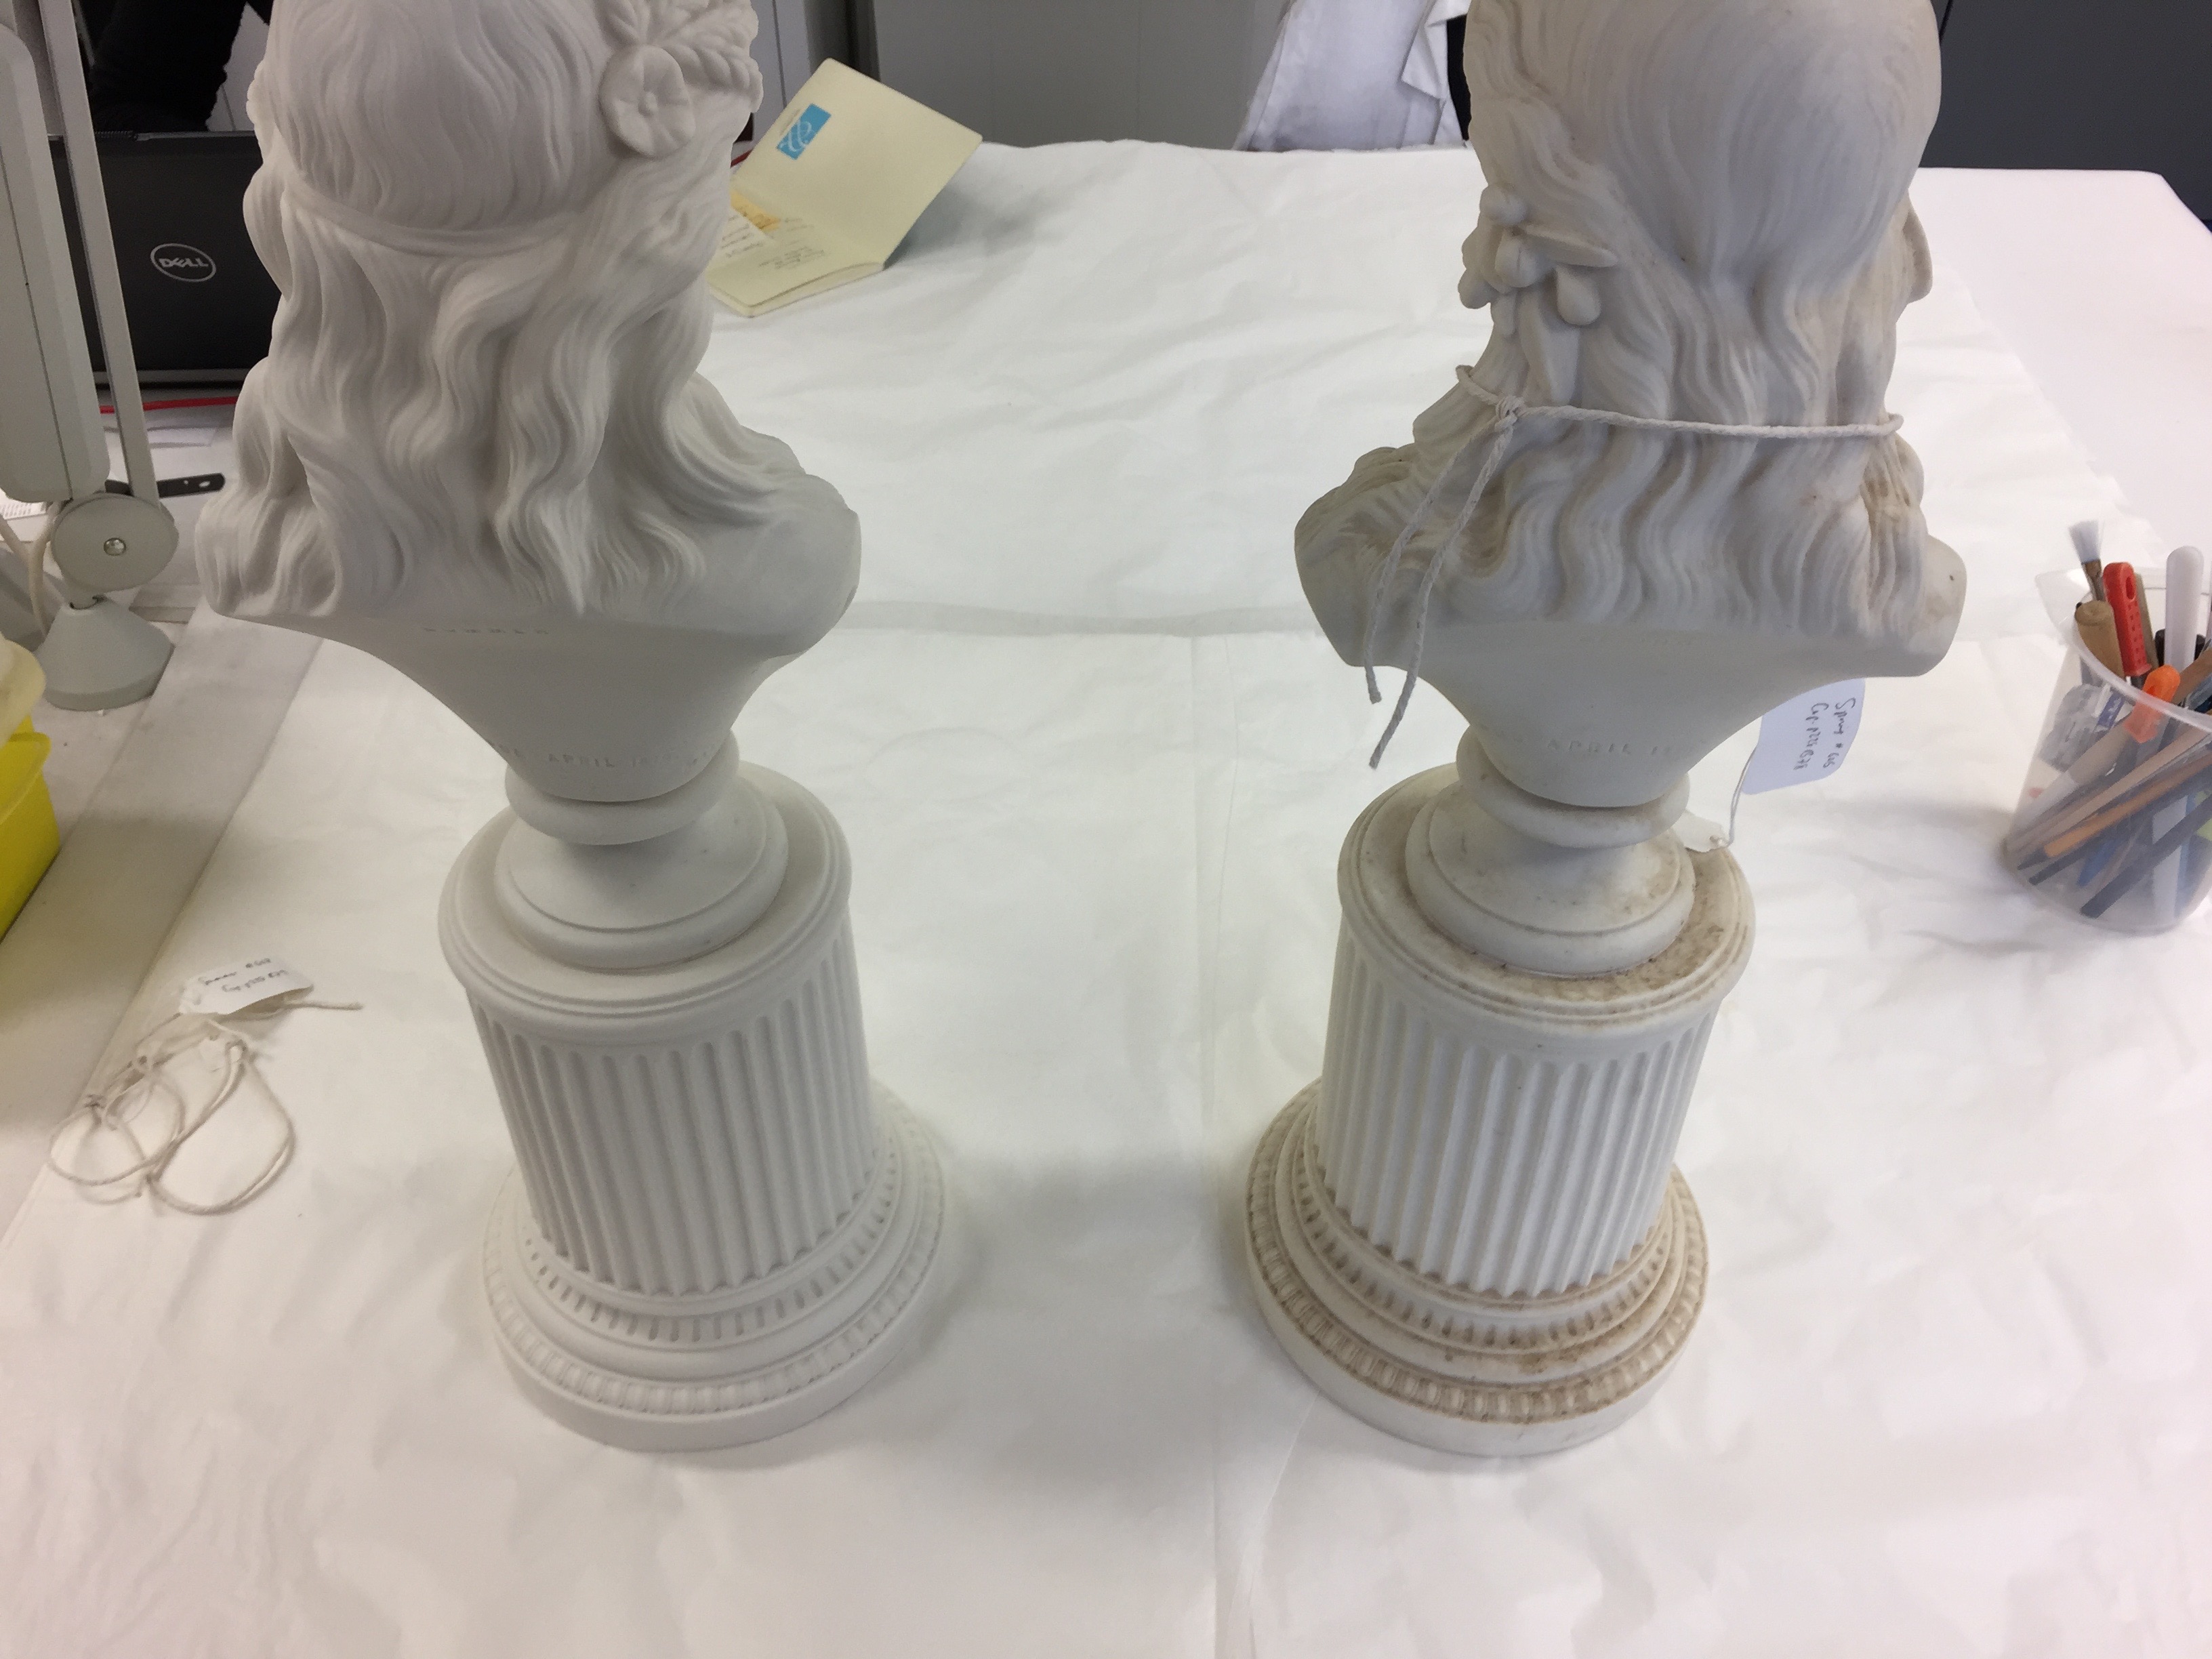
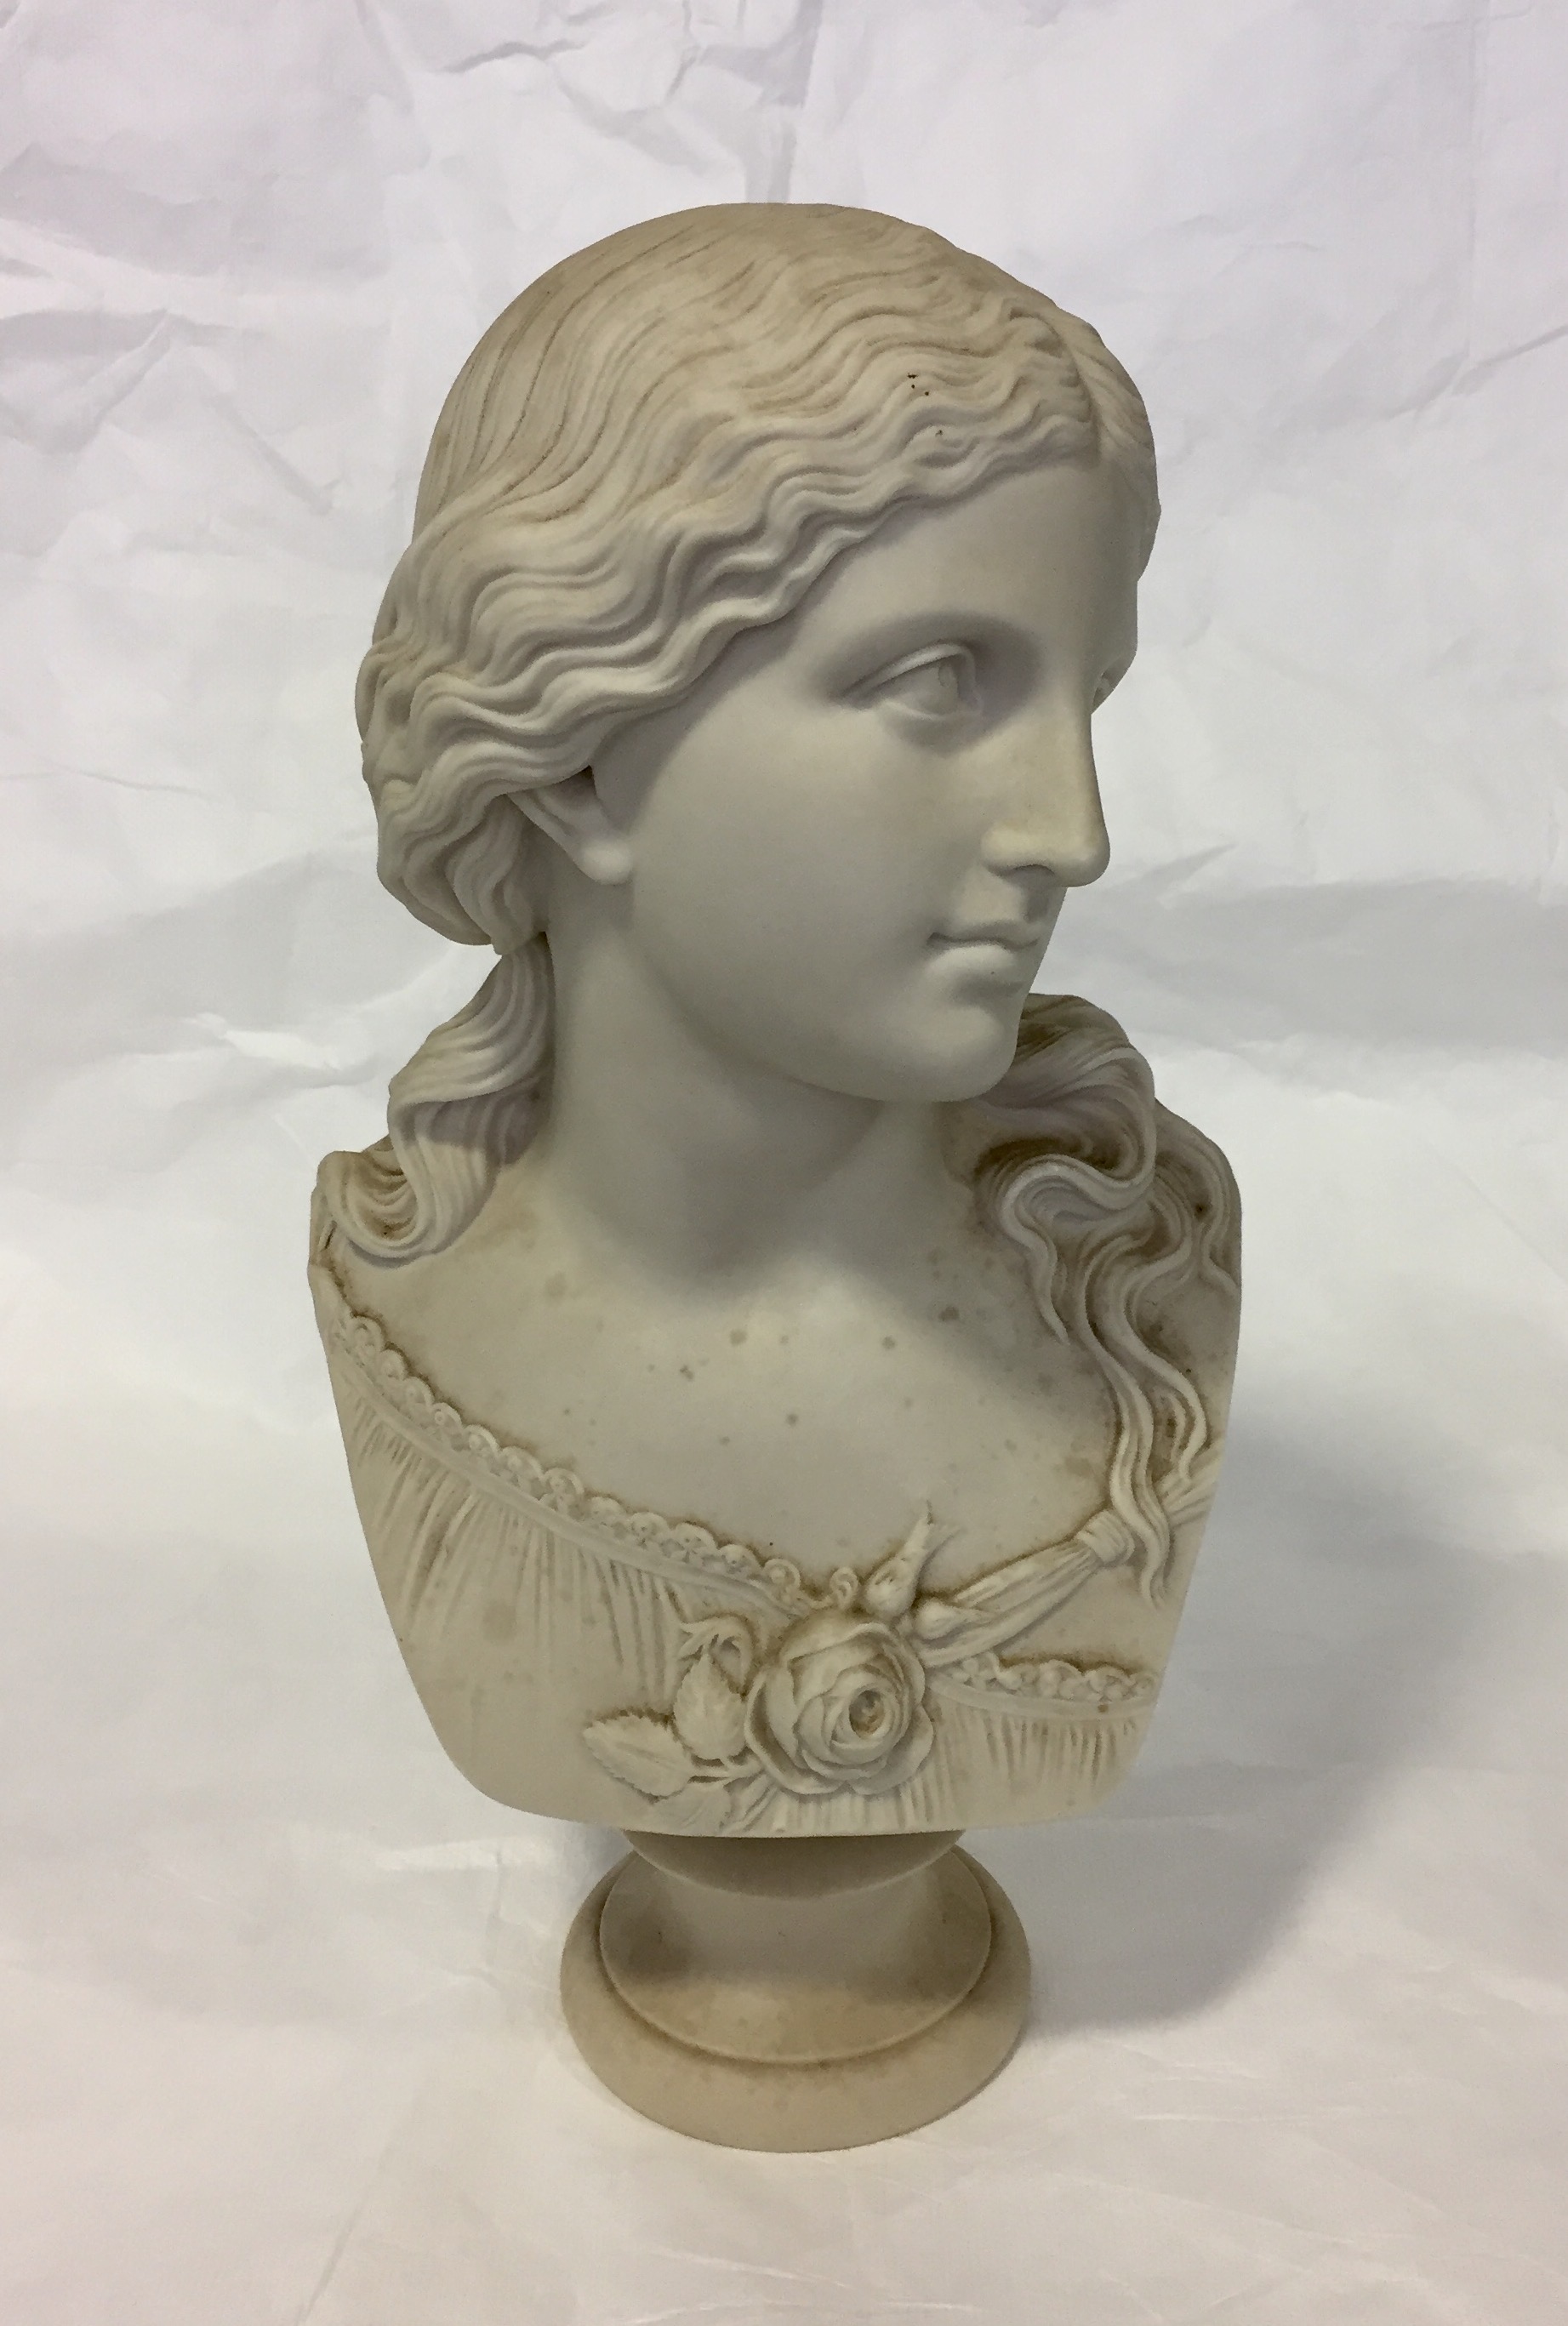
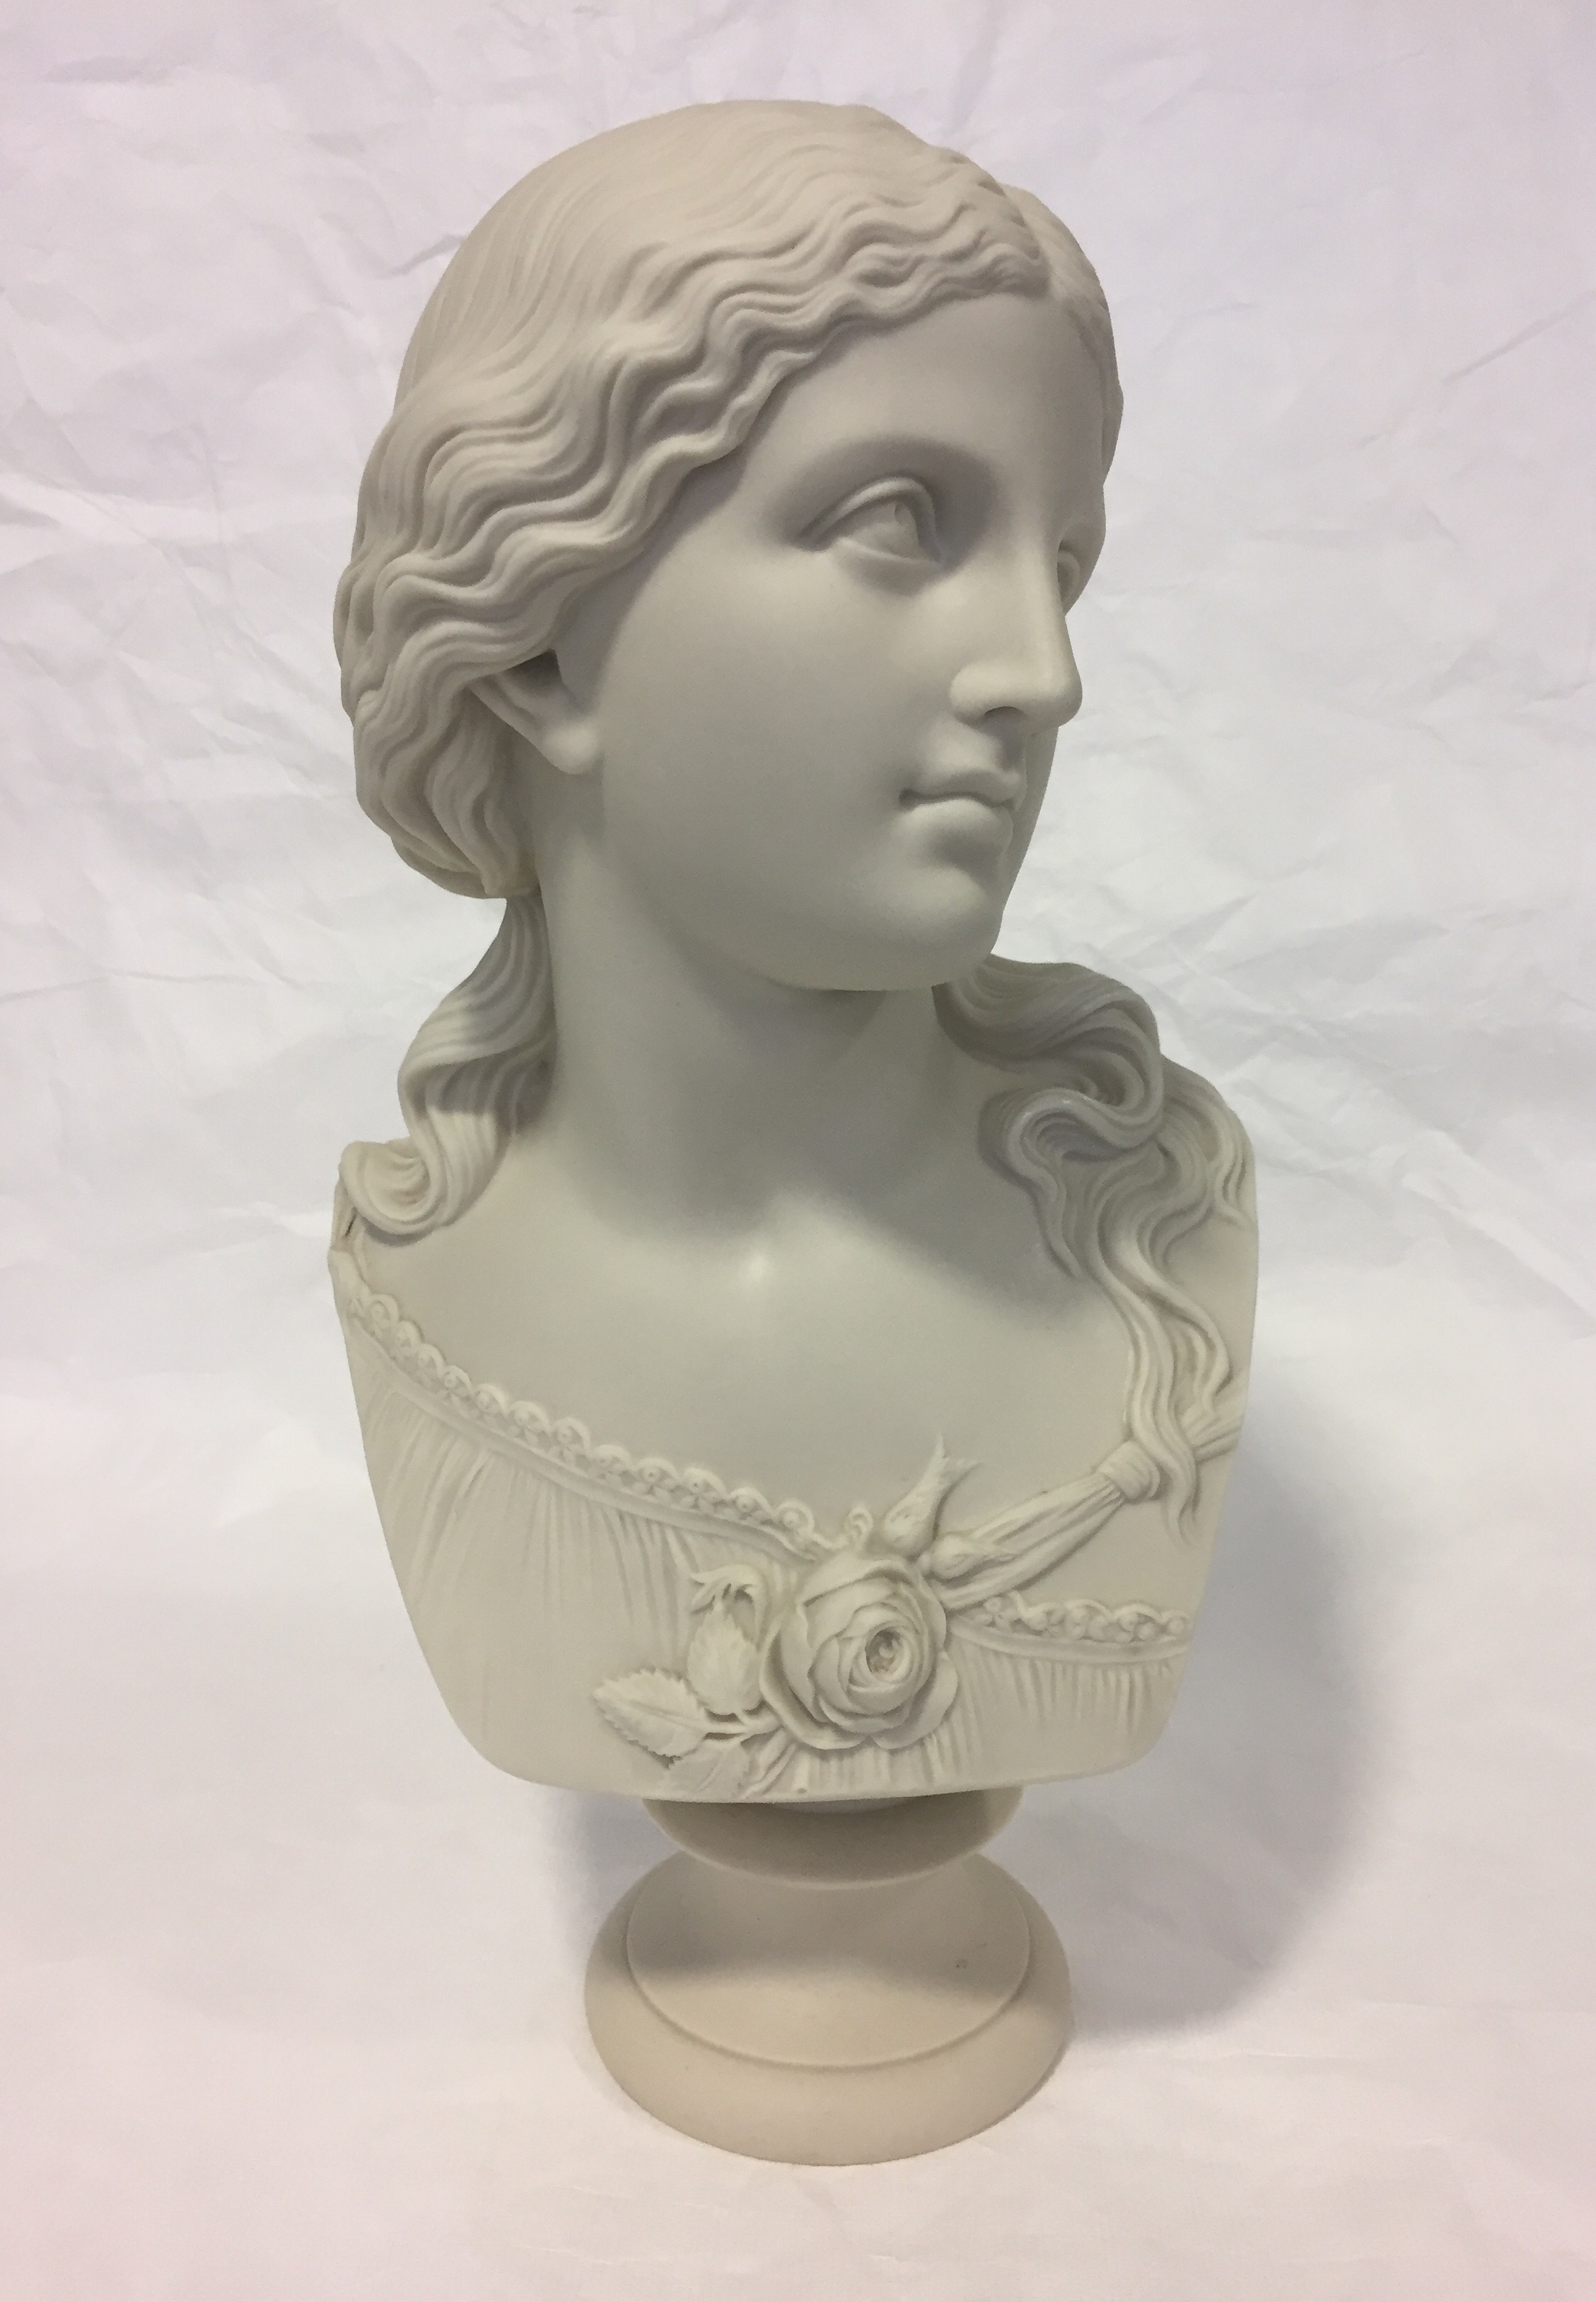
In the past year, the Applied Arts team has faced a monumental task: processing a group of 360 newly acquired pieces of Parian-ware (or Parian) porcelain, predominantly busts, in preparation for an upcoming exhibition. Most were dirty and many were separated from their original bases, which had become jumbled up. The scale of the project required that we think differently about how to care for the objects, finding an efficient way of processing them while respecting individual conservation needs.

The Glynn Collection of Parian-ware was acquired by the Fitzwilliam Museum in 2016 as part of the Acceptance in Lieu of Inheritance Tax scheme. Largely featuring busts of Classical characters and Victorian public figures, it provides an important insight into lives deemed worthy of commemoration in 19th-century England.

Acquiring such a significant collection opened up exciting possibilities for interpretation and display. The exhibition Flux (opens March 2018 in the Octagon gallery) is guest-curated by the artist and historian Matt Smith. As well as producing his own art, predominantly in clay, Matt has extensive experience of curating museum collections, often re-interpreting them from the view of an outsider. Flux will make use of his own unconventional Parian-ware (most fascinatingly produced in black Parian!) highlighting the Fitzwilliam’s historic collection and making it more relevant to a contemporary audience. The Flux display will accompany a major exhibition of studio pottery, Things of Beauty Growing, which will showcase ceramics sourced by the Yale Center for British Art, in New Haven, USA.


Parian-ware is named after the Greek Island Paros, known for its white statuary marble that was popular in the Classical world, which the porcelain imitates in appearance. Parian was a development of the biscuit (or bisque) porcelain used primarily by factories in France, such as Sèvres, to produce small-scale statue-like figures. This was developed further by porcelain manufacturers in Staffordshire, Britain, in the mid-19th century in order to give the surface a more reflective, marble-like finish. The slip-casting method, where liquid porcelain is poured into a detailed mould, allowed mass-production; making affordable, marble-like statues and busts available to middle-class Victorian homes. Parian was popularised by many British factories, right through to its decline in the early twentieth century. It was produced by many famous names such as Coalport, Wedgwood and Copeland. Factories competed with one another to obtain the finest Parian ‘recipe’. This has resulted in the many pieces within our collection having very different finishes, textures and weights. They vary greatly in density, porosity and colour: there are many shades of white and a few are tinted with coloured slips. Several busts are mounted on separate Parian bases, attached with threaded metal dowels. All these aspects need to be taken into account when treating each object.

The considerable size of the Glynn Parian-ware Collection made it necessary to develop a methodology that would allow streamlining the process of accessioning and conserving the porcelain in preparation for the Flux exhibition. The collection has occupied most of the available work surfaces in the department for much of the year, and clearing space was a priority. The first step required the combined effort of Departmental Technician Timothy Matthews and Research Assistant Helen Ritchie, who examined, photographed, measured and described the objects one by one, recording all information on a spreadsheet and eventually assigning each a museum accession number.


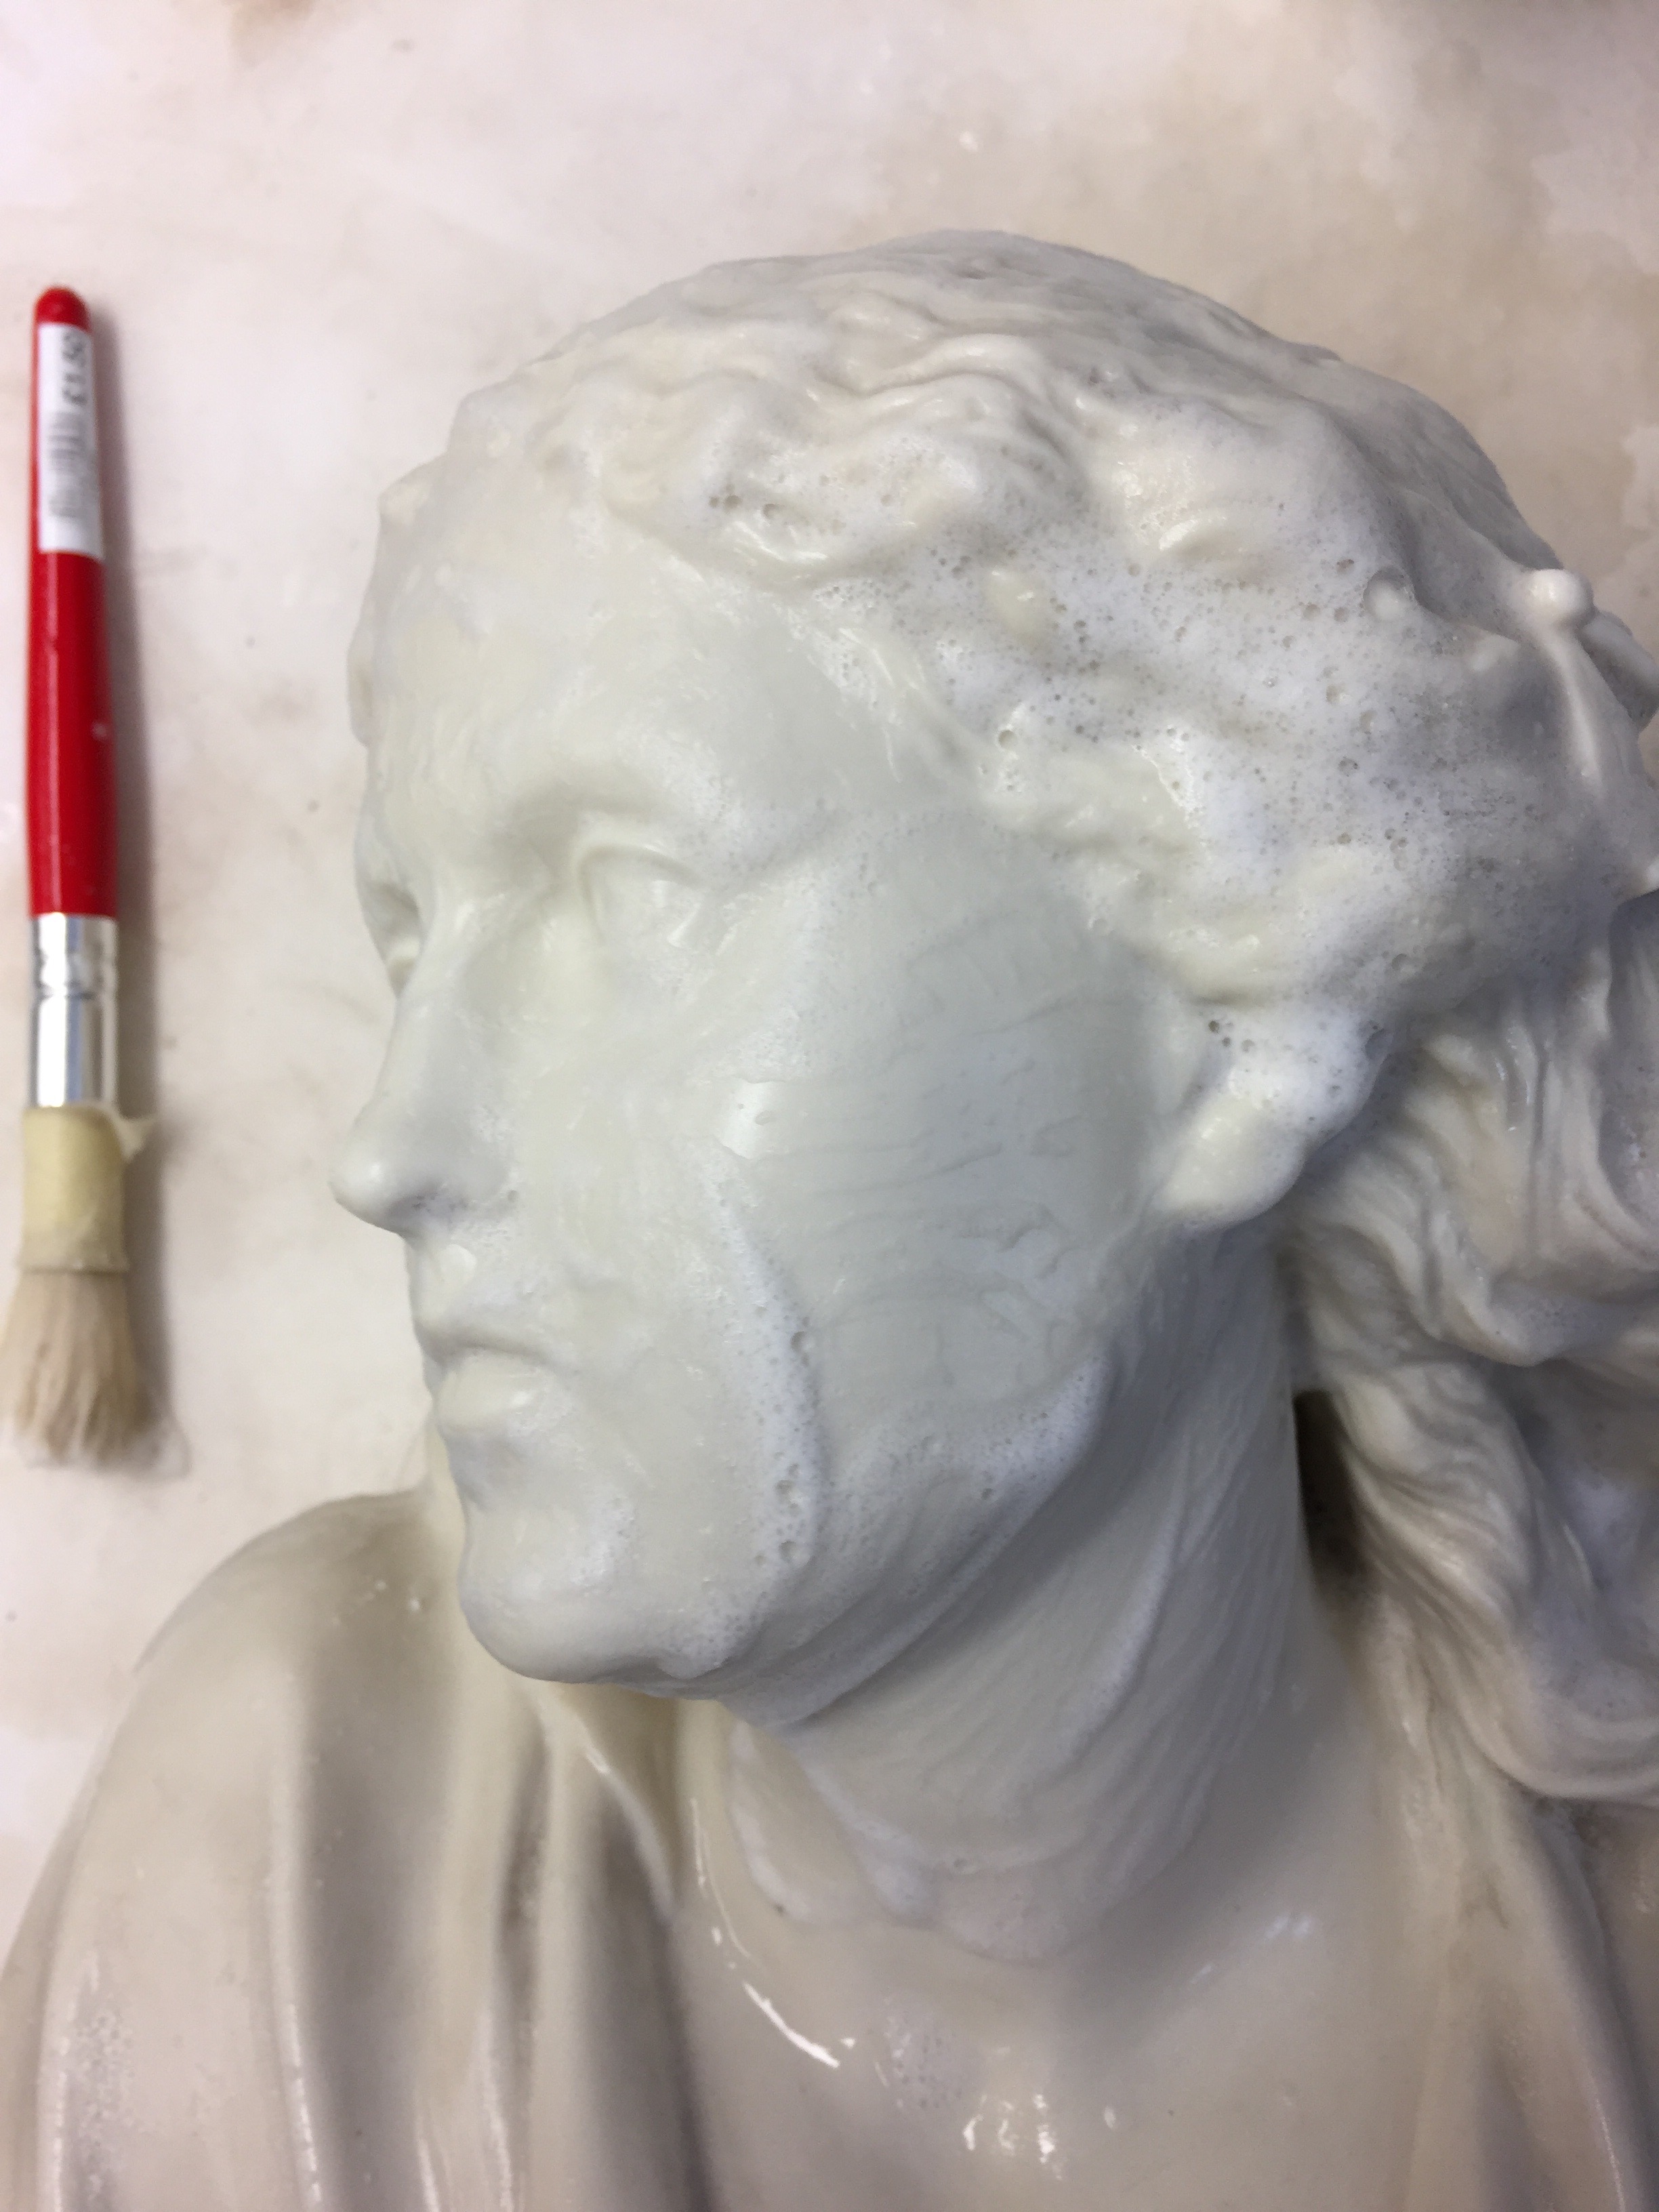
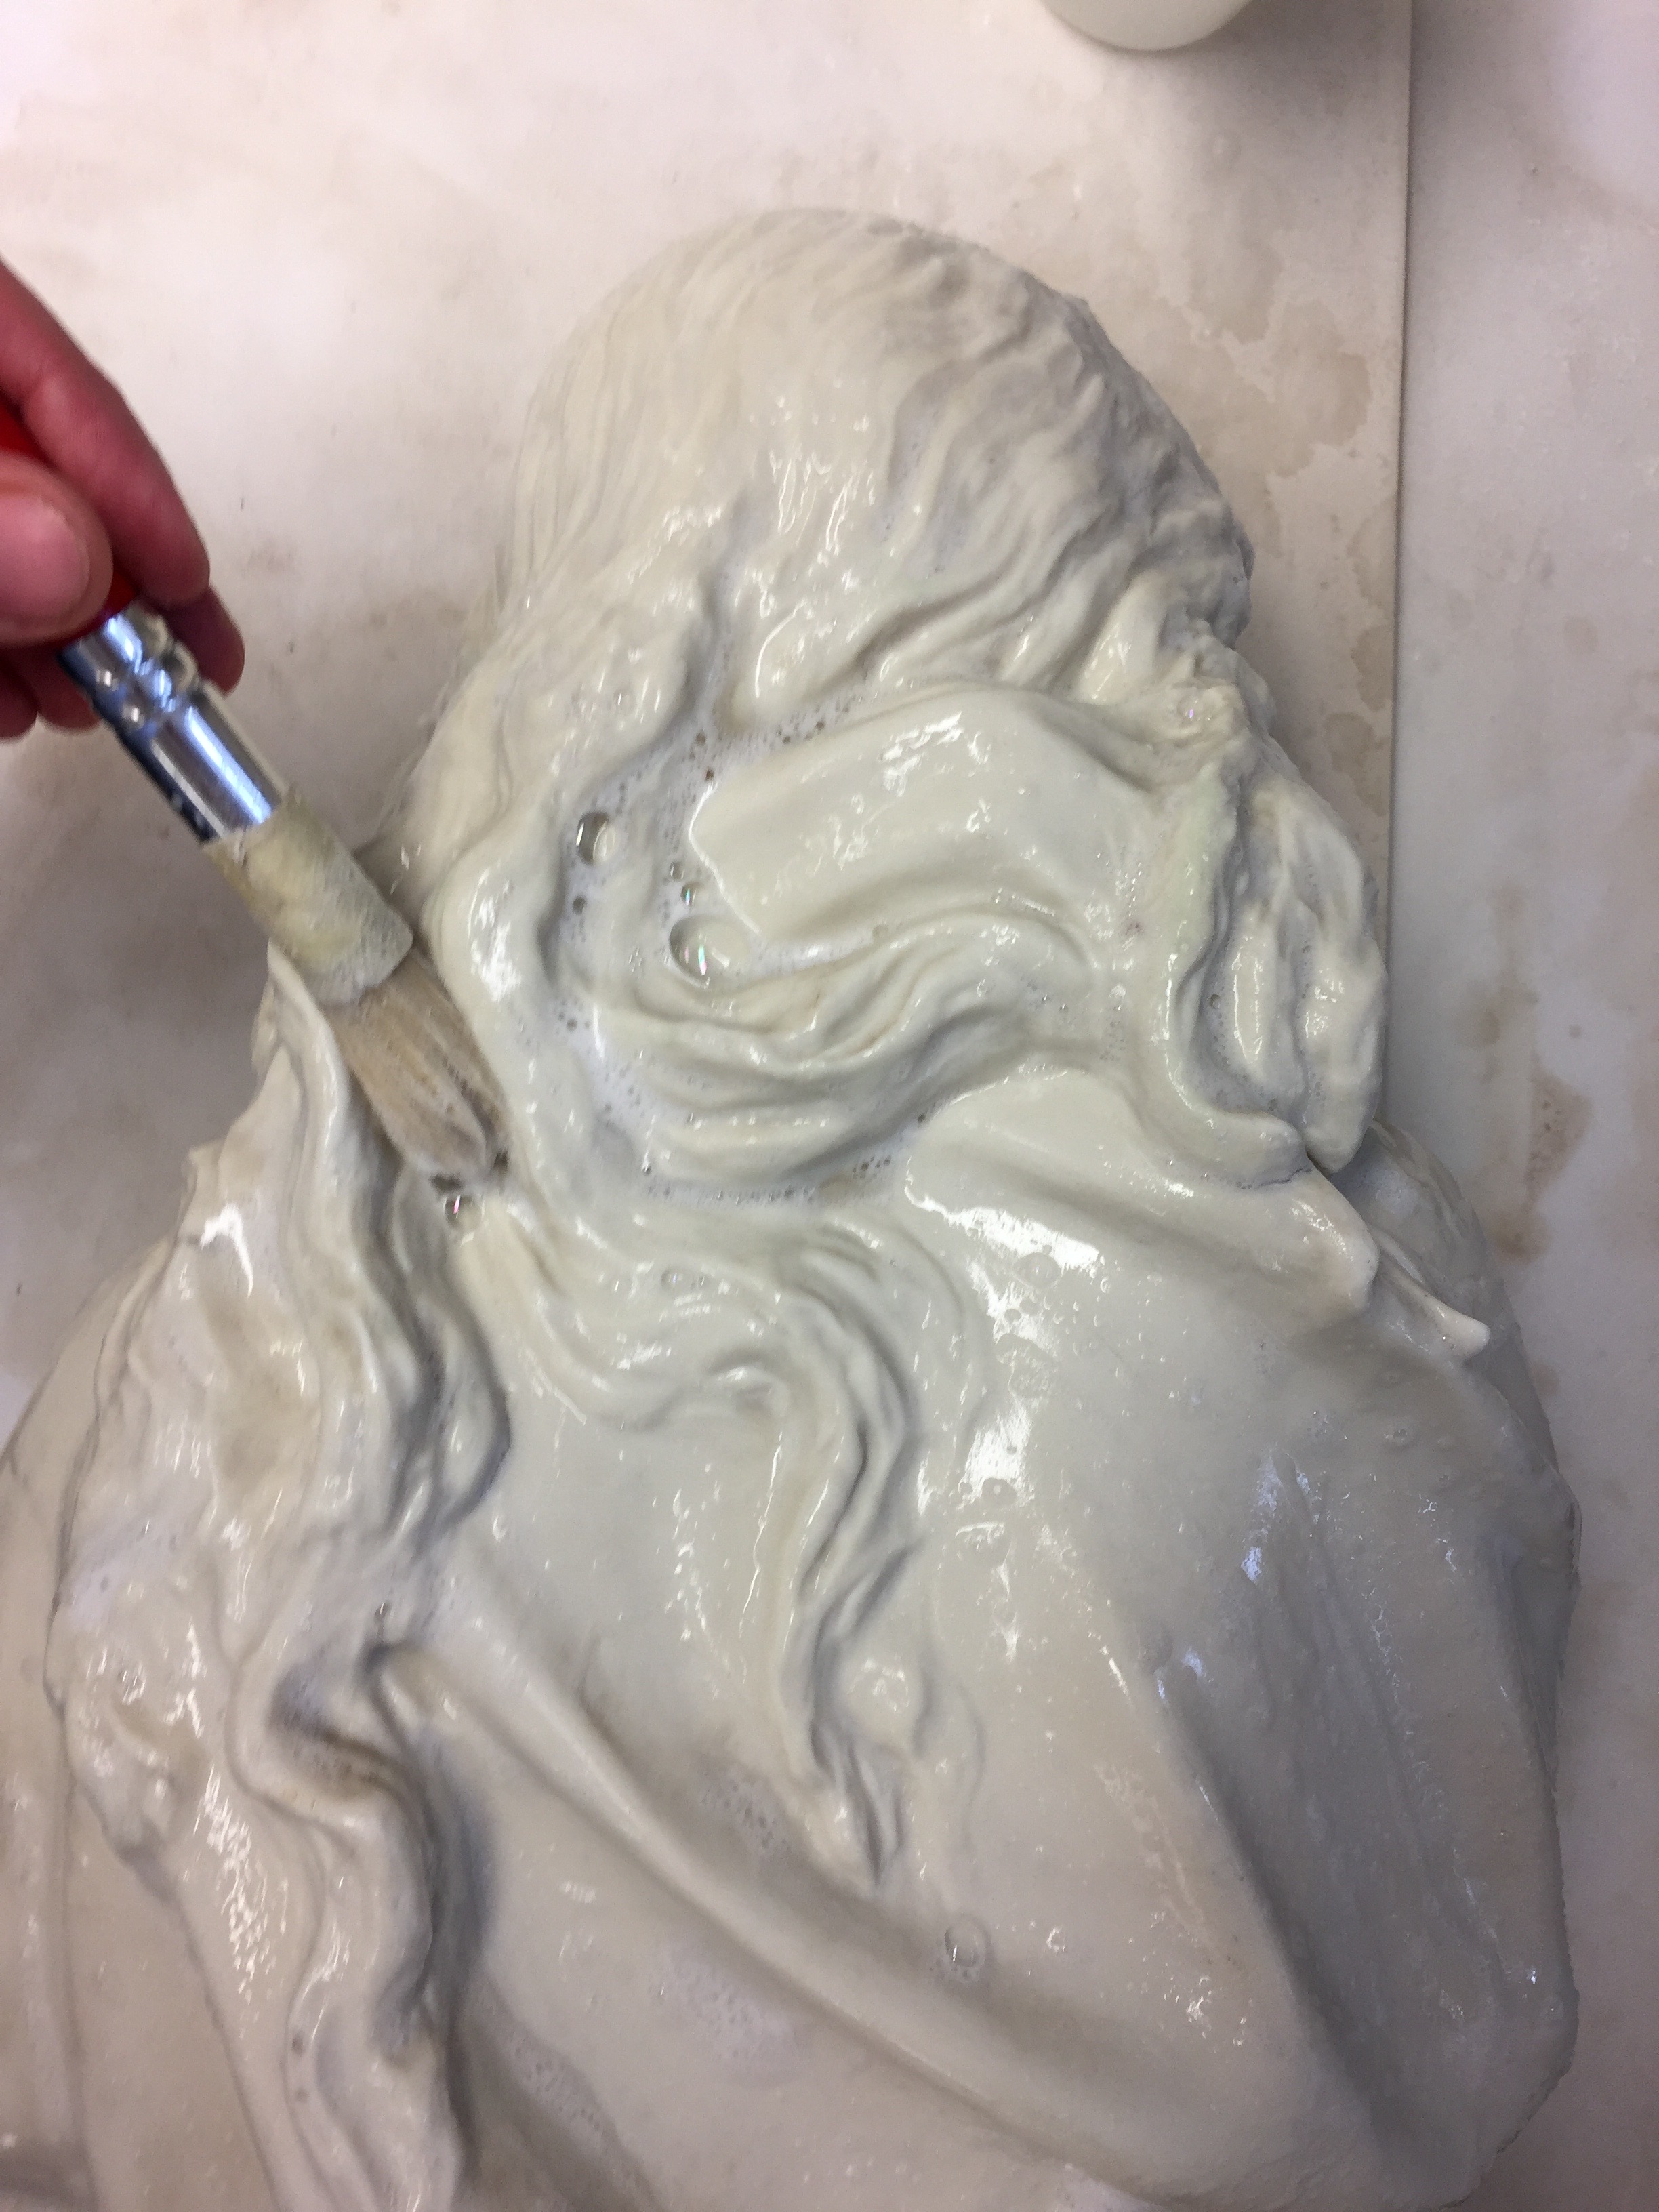
The condition was assessed by Penny Bendall, an independent ceramics conservator, who identified which objects required more complex conservation treatments, such as the reattachment of broken parts, removal of old repairs and re-mounting on bases. The vast majority just needed cleaning in order for them to be appreciated properly and to be made suitable for public display. The porcelain had more than likely been stored in different conditions and cared for in different ways by different owners. While many of the larger busts appeared to have been kept outside, their surface weathered and discoloured by accumulated dirt, smaller statues were far cleaner. Timothy Matthews and Assistant Conservator Flavia Ravaioli removed surface deposits using an enzyme-based detergent that activates in warm water. You will see from the photographs that a small amount of detergent was initially applied by brush and left on the objects’ surface for a few minutes to allow the enzymes to work. The detergent was then worked over the surface with the brush, taking care not to scratch the surface, until all the dirt had lifted. This was followed by thorough rinsing with specially-filtered water to remove all residues of the detergent. Finally, the porcelain was dried with soft cloths, then left in a warm place until completely dry.

When cleaning Parian-ware, we are very mindful of areas of restoration, the porosity of the surface, the presence of metal elements and old labels. When encountering a restored piece of Parian, we do nothing more than dust it with a dry brush, as using detergent and water could weaken or remove previous joins or restorations. A small handful of restored pieces were cleaned with acetone on small cotton wool swabs to allow more localised application.

Once clean, the objects were labelled with their accession number, photographed, and stored away to await display in the spring. So far 260 pieces have been completed. Only 100 more to go!


Timothy Matthews, Departmental Technician

Flavia Ravaioli, Assistant Conservator